Automatic configuration
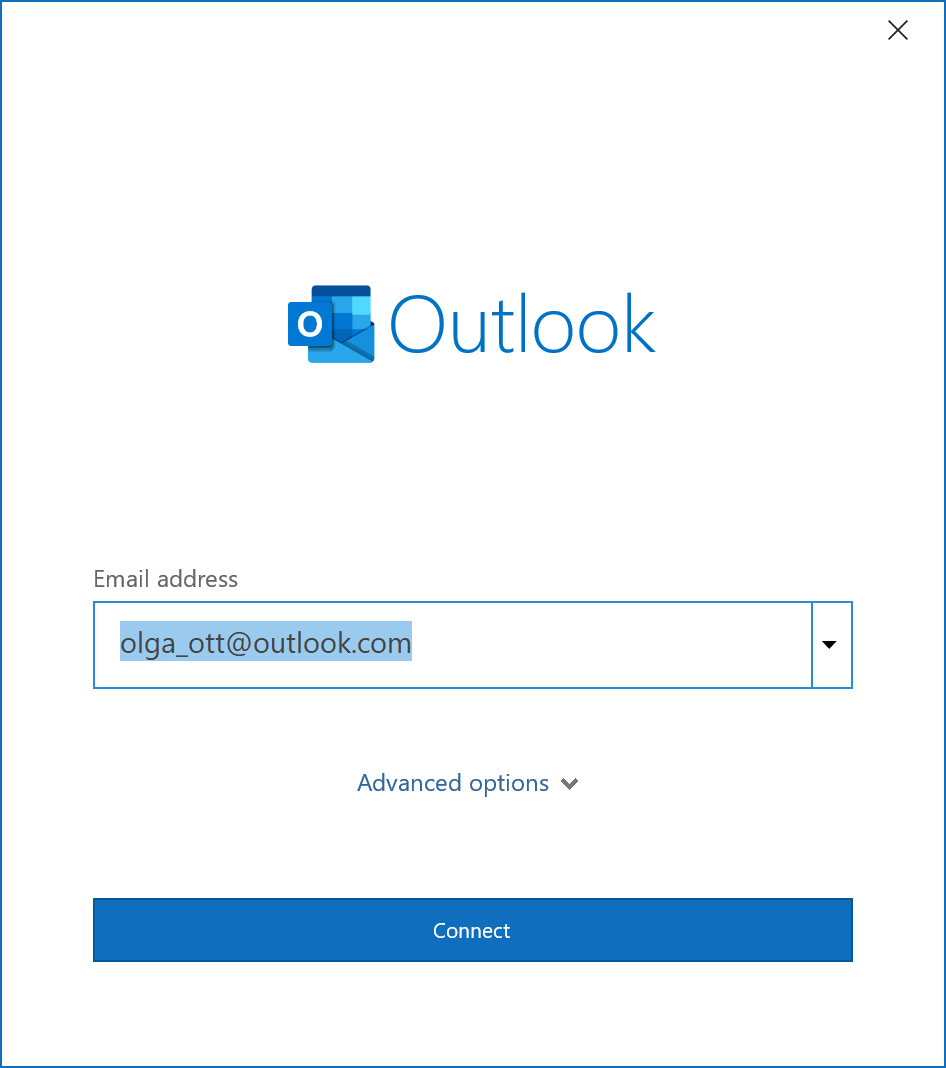
When you start an Outlook for Microsoft 365 first time, you need to connect your email account:
-
In the new connection screen, type or change your email account, and click the Connect button:
-
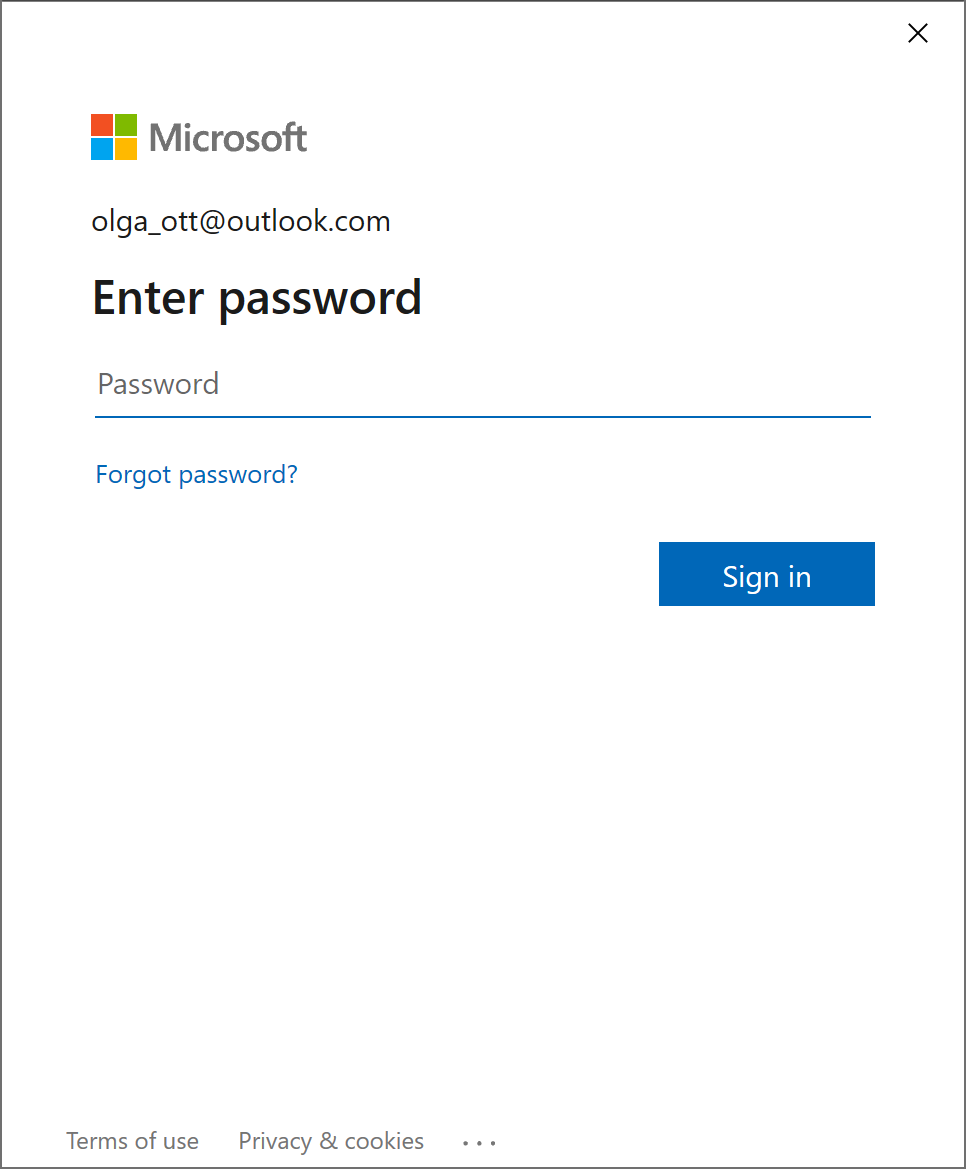
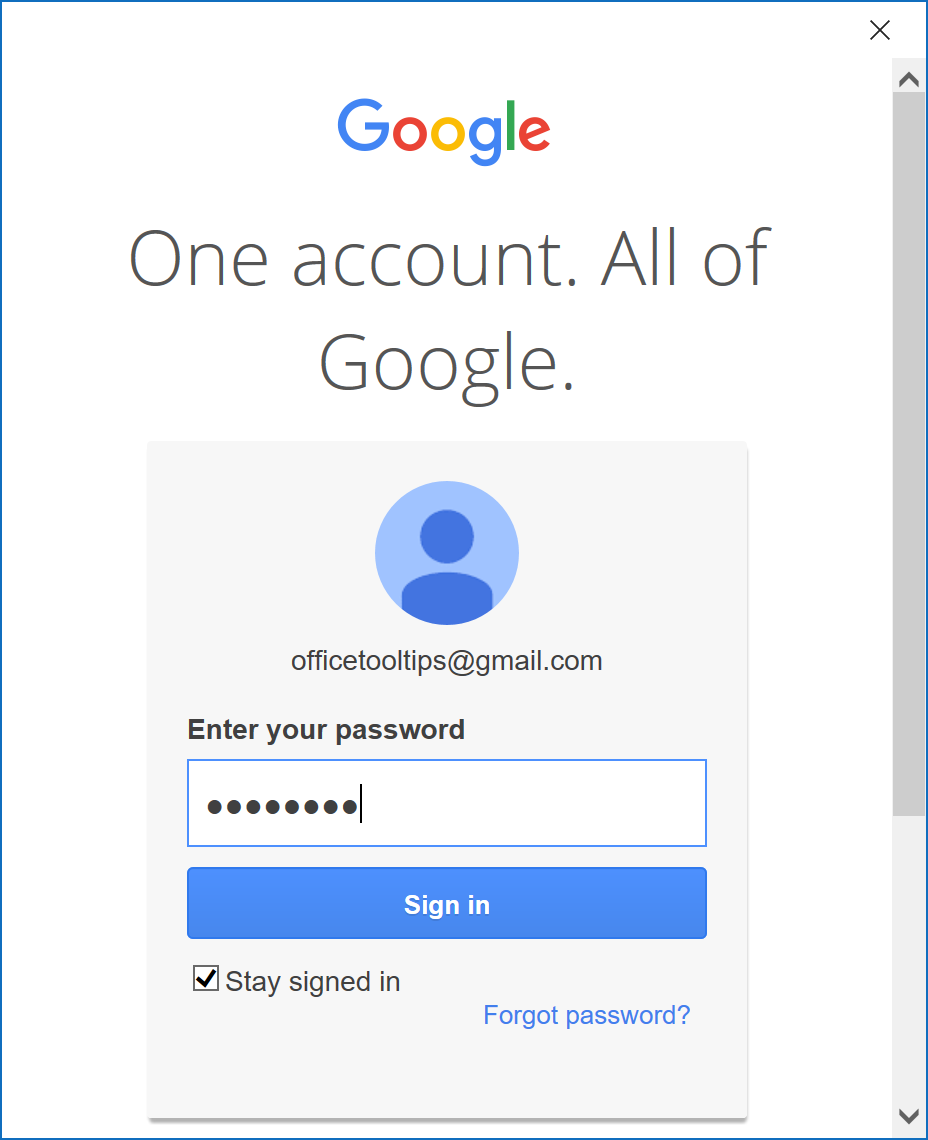
The following connection screens depend on the email providers. For this example, to connect the
Outlook
account, in the next screen, enter your password, and click the Sign in button:
If something went wrong, you can close this window and start the connection from the first step.
-
This step is available, if:
- You are adding your first account to the Outlook
- You entered the correct email address and password
- This account is available

Outlook may request additional authentication for the email account that requires extra security. The steps to obtain a password are different for each email provider, such as Gmail or Yahoo. If you are sure that you entered the correct email address and password, but Outlook did not connect to your account, find additional information on how to connect your email provider's account to Outlook for Microsoft 365.
-
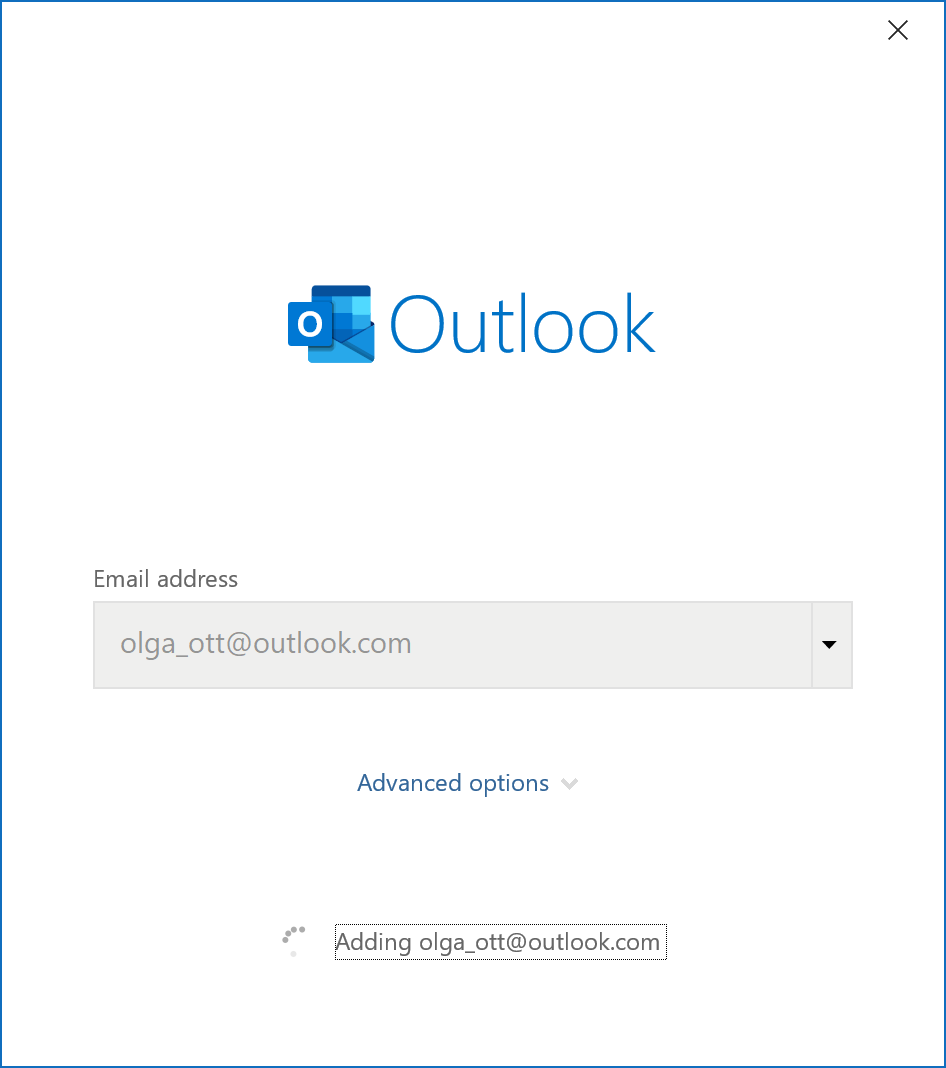
Click OK to see that Outlook configures your local mailbox:
-
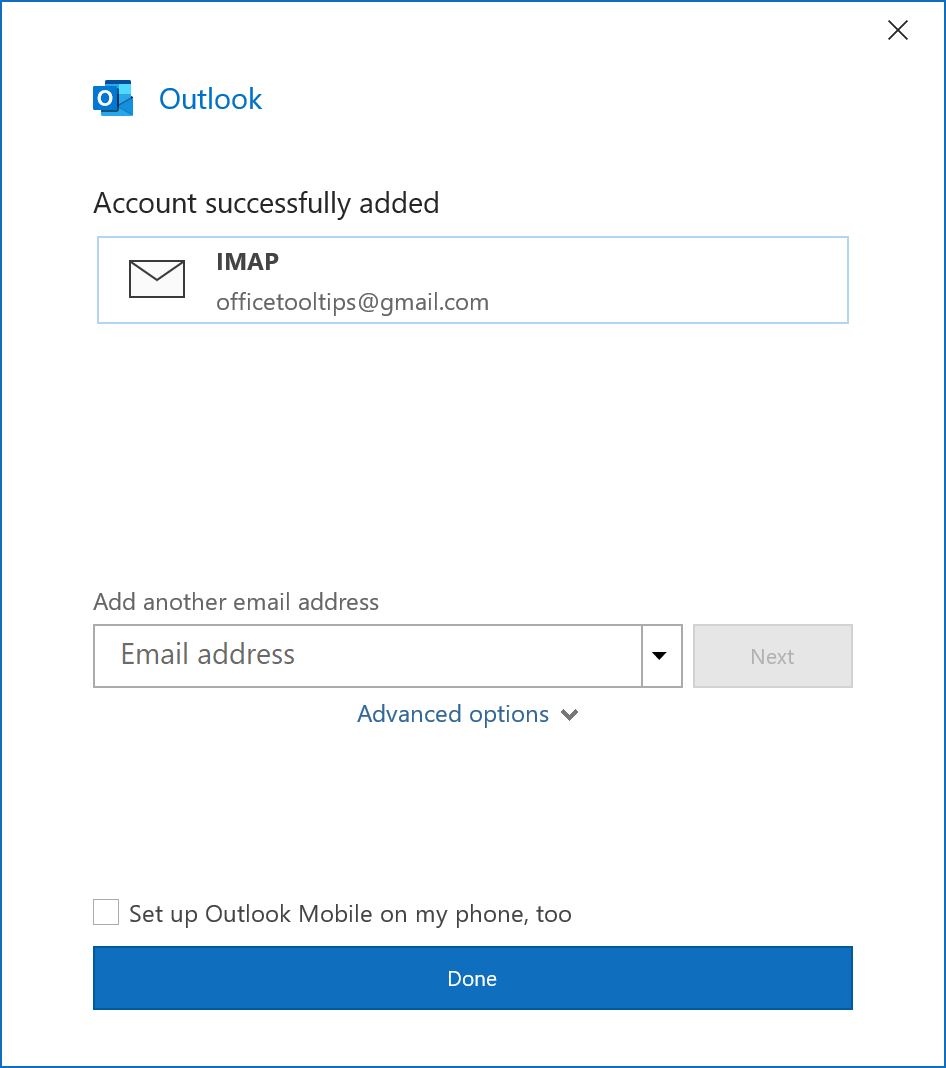
After a few minutes (or a little later), you will see the screen with the Account successfully added
message:
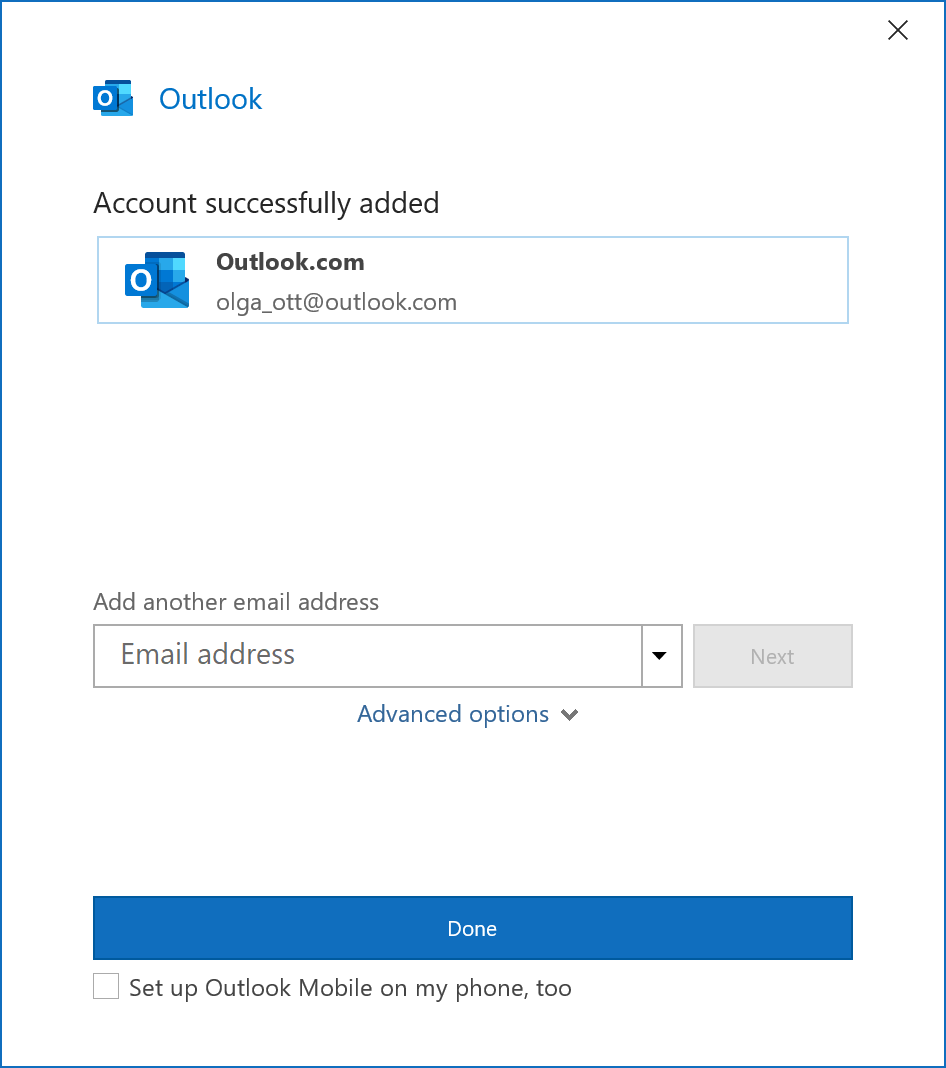
- Click the Done button to finish the customization of your account.
- Outlook might prompt to reenter the email address and password even if you entered them correctly the first time.
- Outlook may need to restart to apply all necessary customizations to the added account.
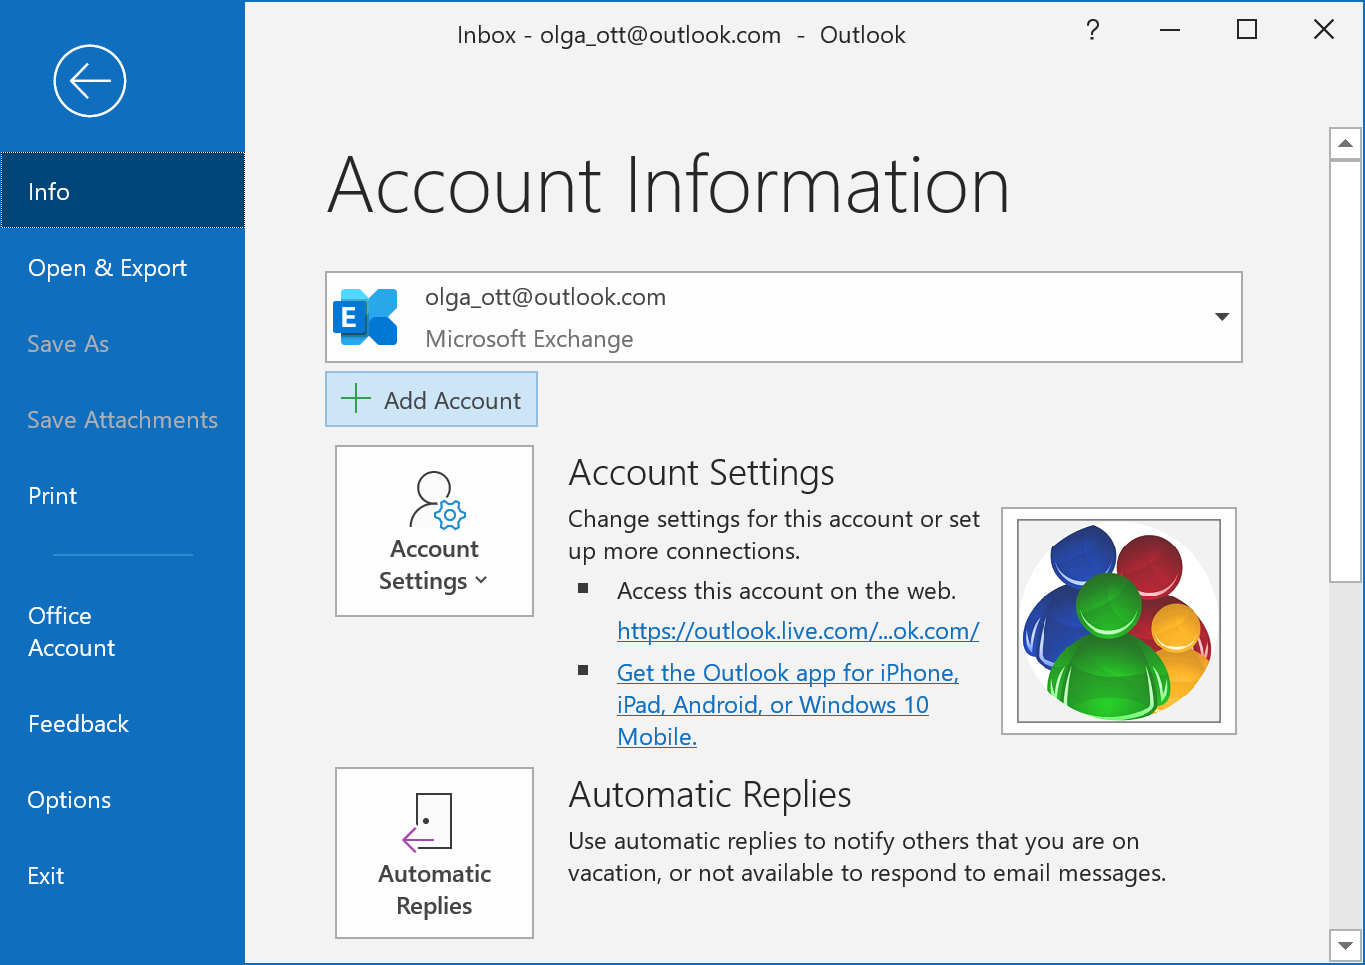
- If you need to add another email account to Outlook, on the File tab, in the Info pane, click
the Add Account button:
IMAP configuration
To add an email account to your local Outlook as IMAP, do the following:
-
On the File tab, in the Info pane, click the Add Account button:
IMAP is short for Internet Message Access Protocol. For IMAP accounts, Outlook does not store messages on the local device, such as your computer. It keeps emails on the server and downloads them on demand. This protocol is better for email accounts that you need to access on multiple devices, such as a work computer and a smartphone. IMAP is most suitable and accessible for the majority of Outlook users. Make sure you configured the email account on the provider's server, such as Gmail or Yahoo, to work with IMAP protocol (see more details on the Internet).
-
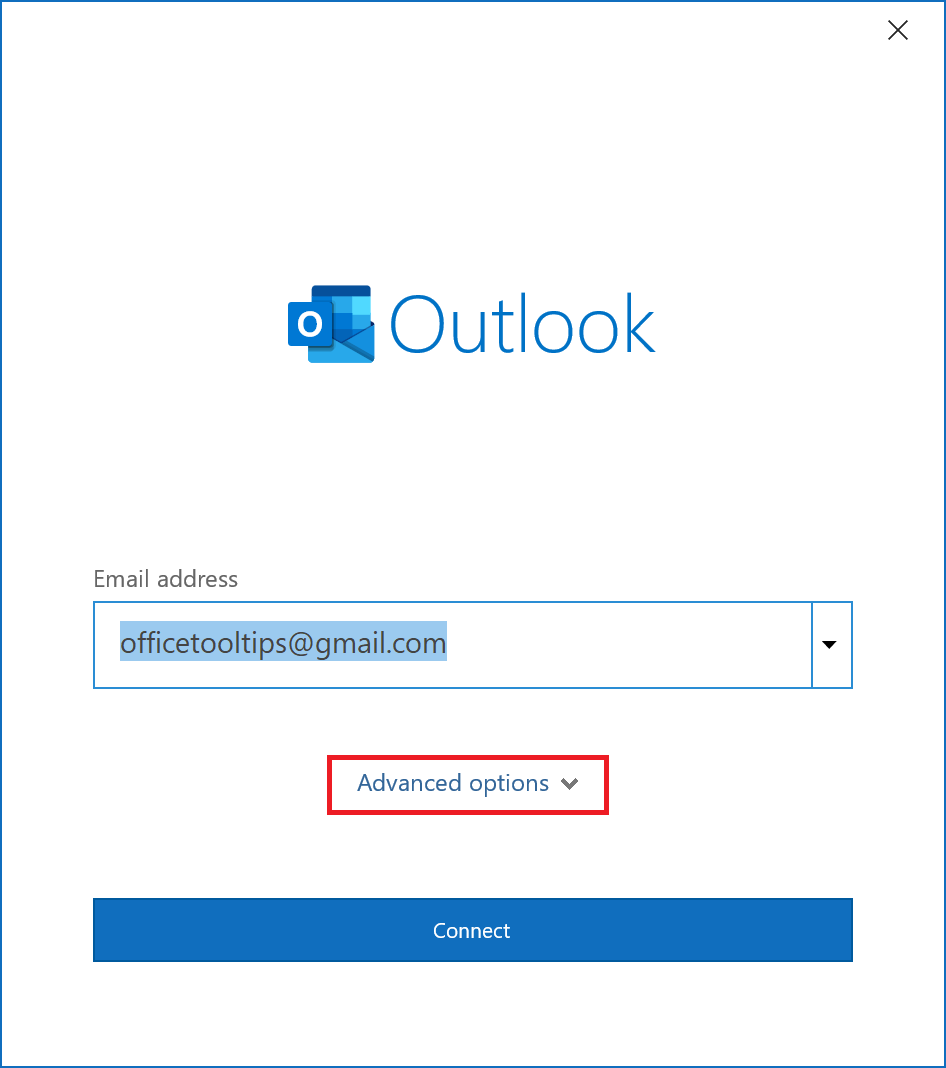
In the first connection screen:
- Type or change an email account that you want to add
-
Click the Advanced options link
-
Select the Let me set up my account manually option:

- Click the Connect button.
-
In the next screen, click the IMAP button:
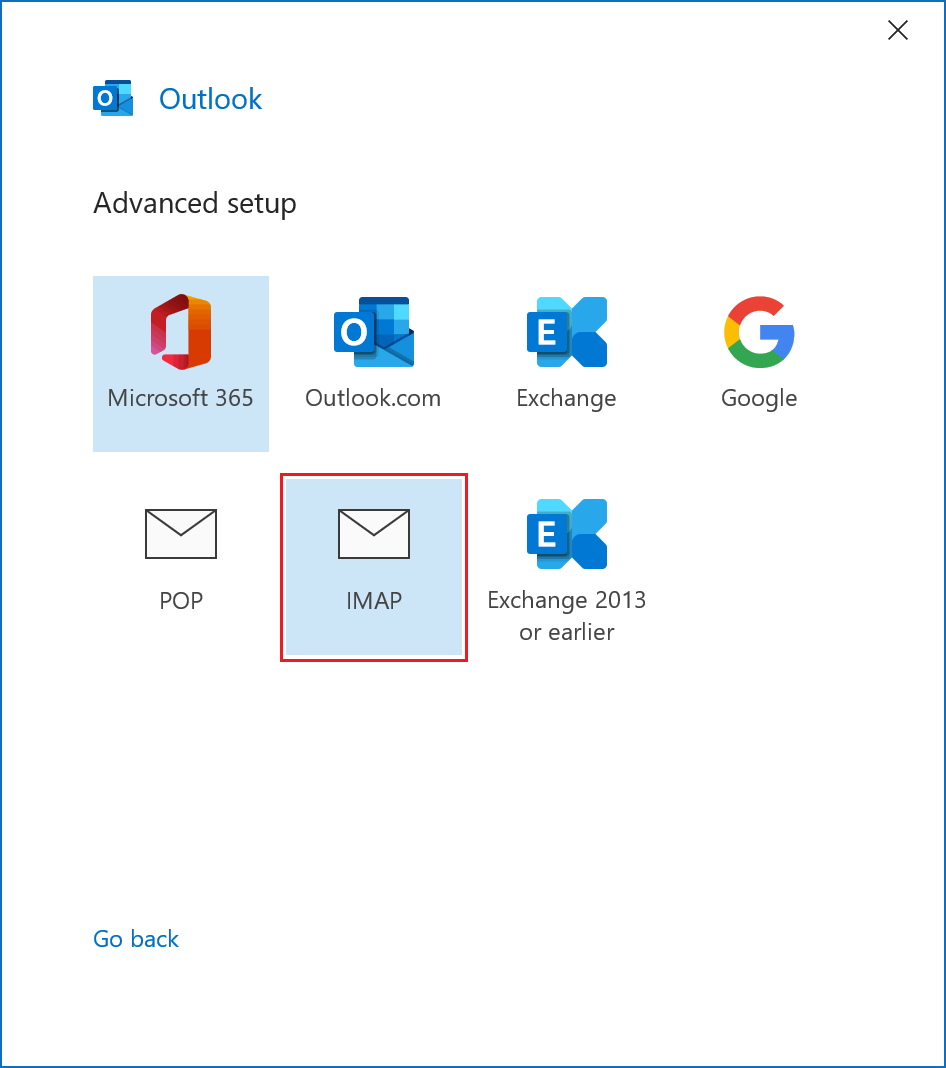
- After clicking the IMAP button, Outlook opens a screen with connection details for your email provider. The screen may differ depending on the email service provider if Outlook could detect it.
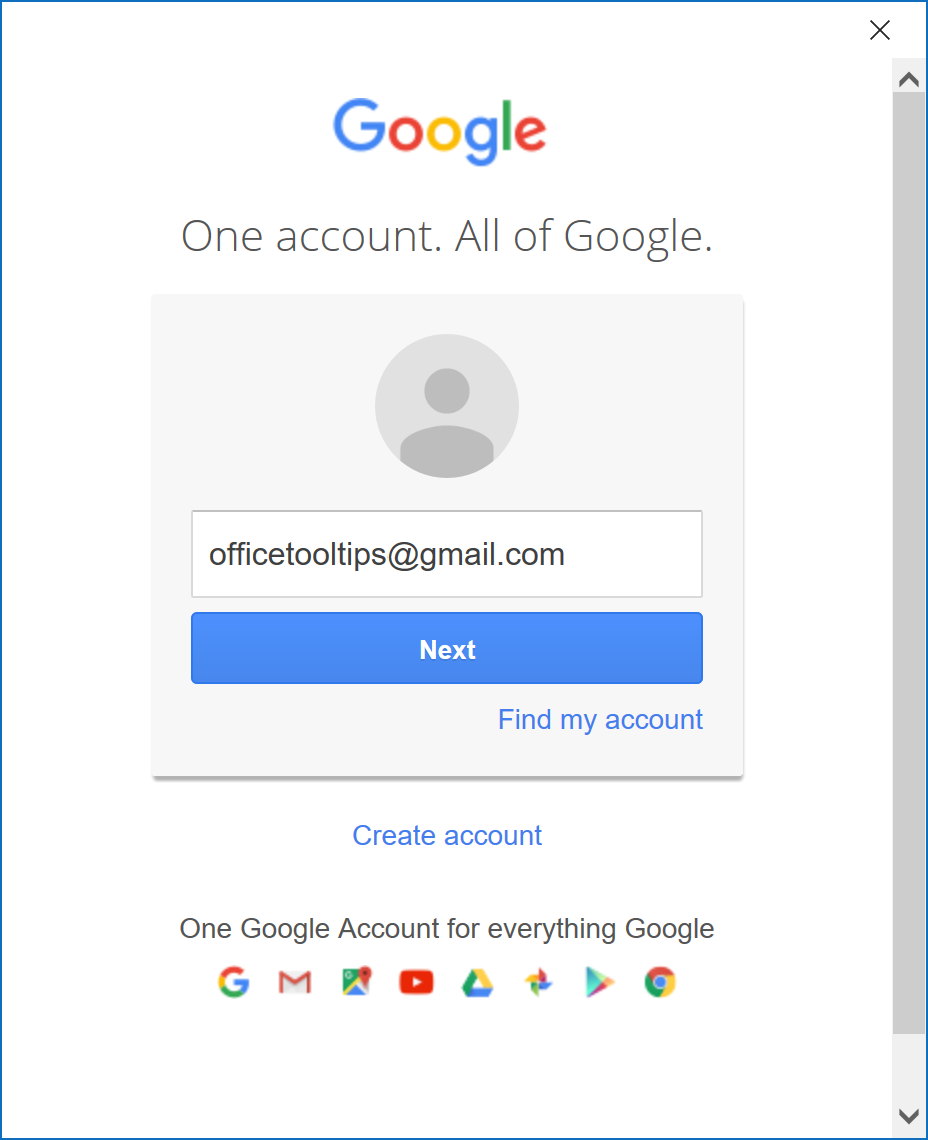
For example, if you add a Gmail account:
-
Confirm your account address and click the Next button:
-
Type the password and click the Sign in button:
For the account with 2-step verification settings, an additional screen can open to enter a verification code. Confirm your account if needed.
- After entering the connection data, Outlook opens a screen to confirm access to your account’s information. Scroll down and click the Allow button:
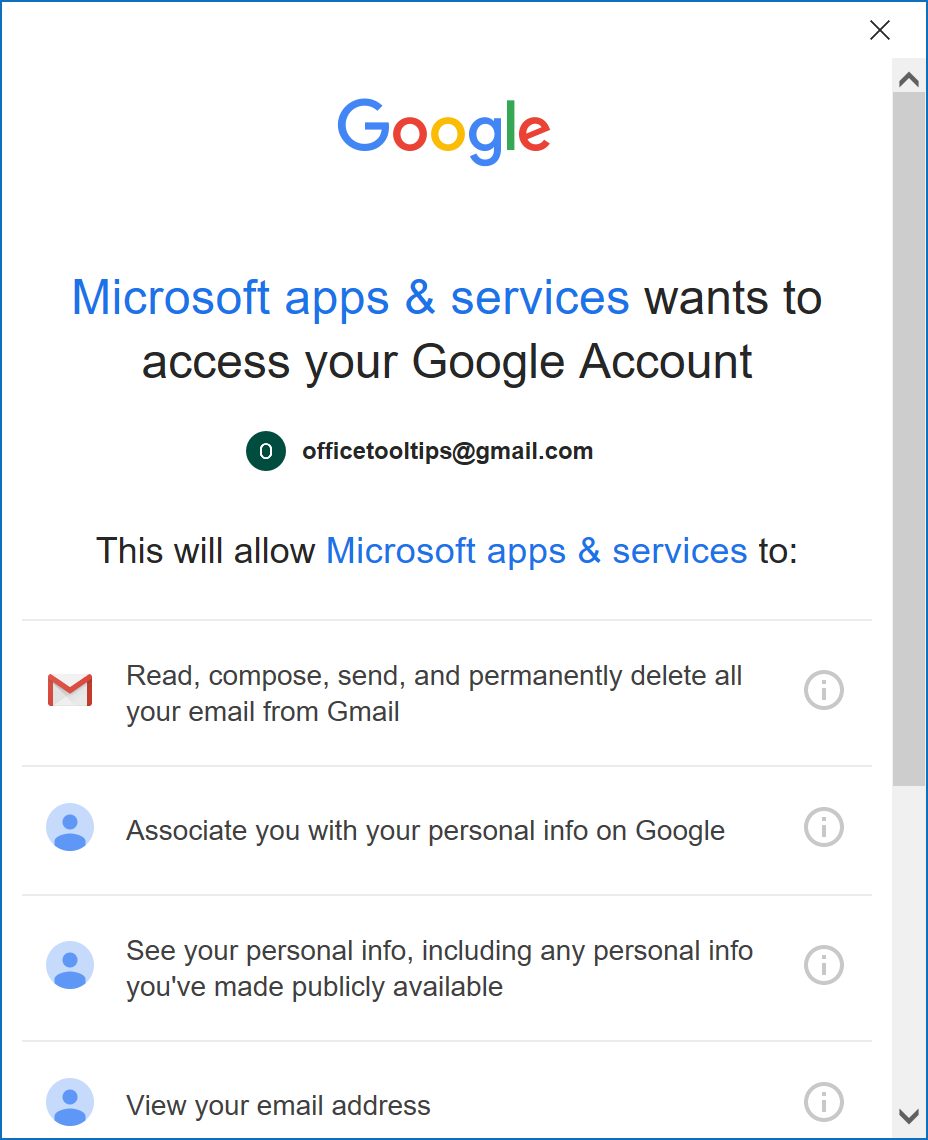
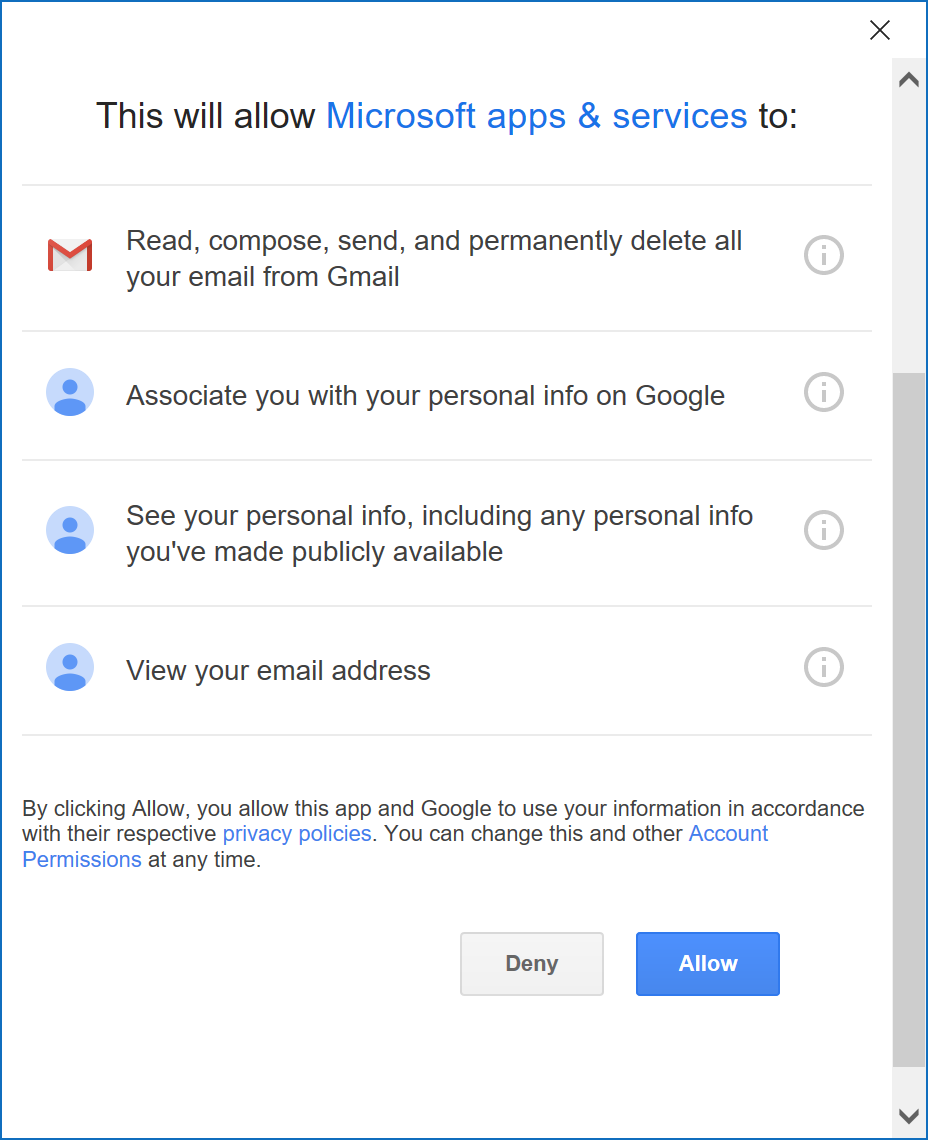
You can click the Deny button to prevent adding the account to the Outlook.
-
After a few minutes, you will see the screen with the Account successfully added message:
- Click the Done button to finish the customization of your account.
There are many reasons why you cannot add a new account, the most popular are:
- Your connection details are wrong - check the email address and password.
- Your email provider disabled IMAP by default - enable IMAP for your email account.
POP3 configuration
To add an email account to your local Outlook as POP3, do the following:
-
On the File tab, in the Info pane, click the Add Account button:
POP3 is short for Post Office Protocol. With POP3 mail, Outlook downloads and stores messages on the local device (computer or mobile). This protocol works best for email accounts that are used on one device but have a huge number of messages. It is also better for poor internet connections and for occasionally working offline.
-
In the first connection screen:
- Type or change an email account that you want to add
-
Click the Advanced options link
-
Select the Let me set up my account manually option:
- Click the Connect button.
-
In the next screen, click the POP3 button:
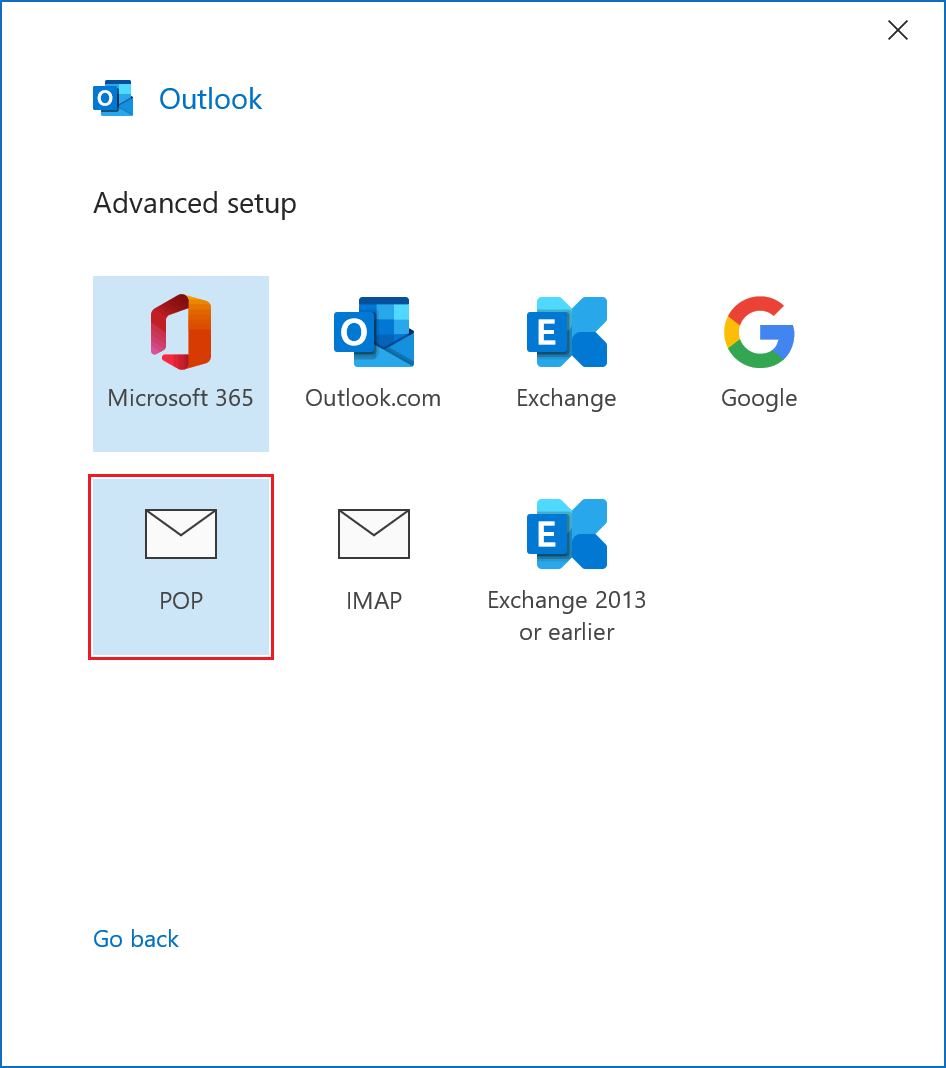
- After clicking the POP3 button, Outlook opens a screen with connection details for your email provider. The screen may differ depending on the email service provider if Outlook could detect it.
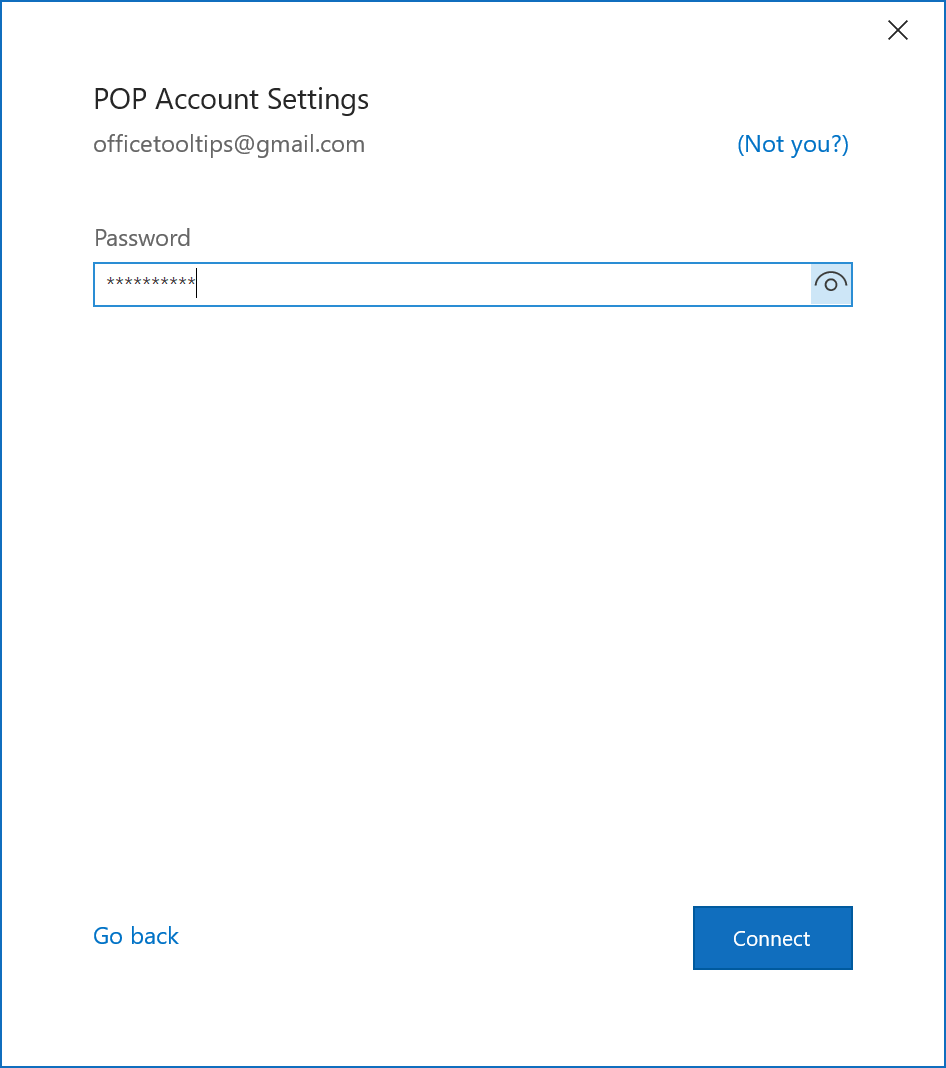
For example, if you add the Gmail account, type the password, and click the Connect button:
-
After a few minutes, you will see the screen with the Account successfully added message:
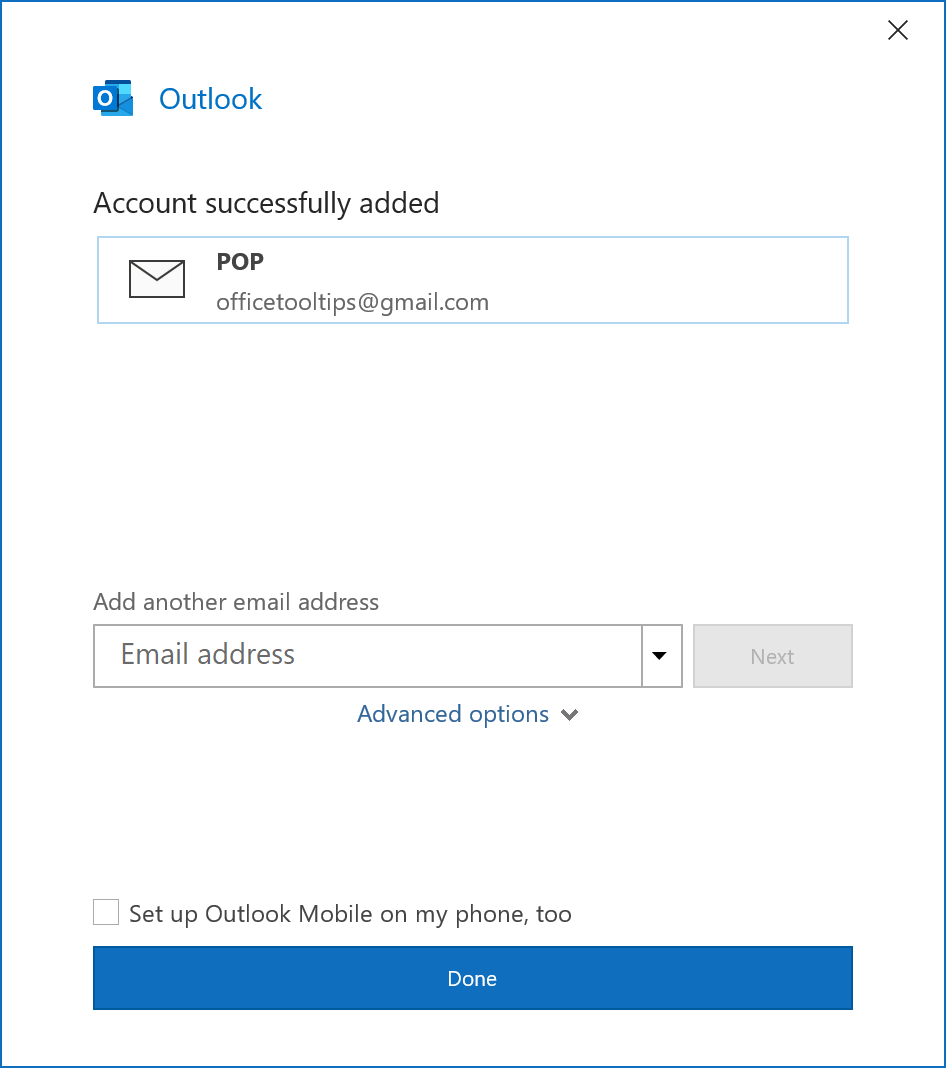
- Click the Done button to finish the customization of your account.
Mail view in Outlook
Outlook, like all Office programs, has the title bar, ribbon, and status bar.
See more how to customize your
ribbon in Outlook. By default, on start, Outlook opens the Mail view. You can switch to the
Mail view anytime by clicking the Mail button on the Navigation bar or pressing Ctrl+1 (see how to
customize the Navigation bar):
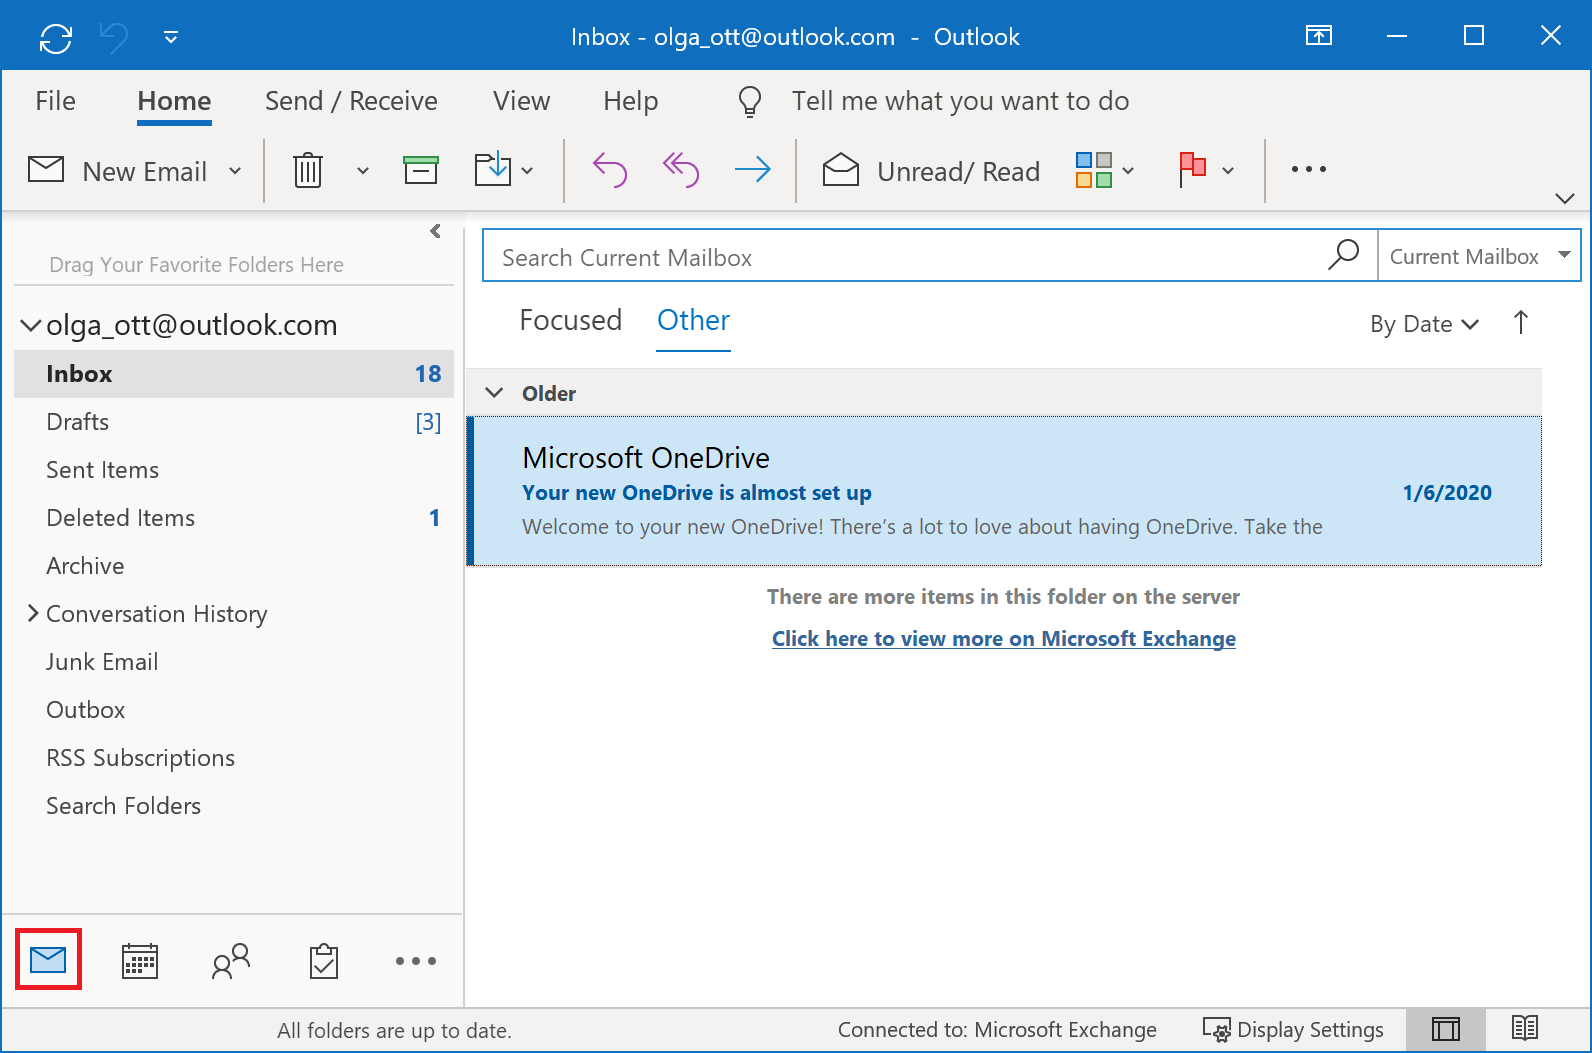
In the Mail view, you can see two, three, or four panes depending on the customization for each account:
-
At the left side, Outlook displays the Folders pane with email accounts and their folders:
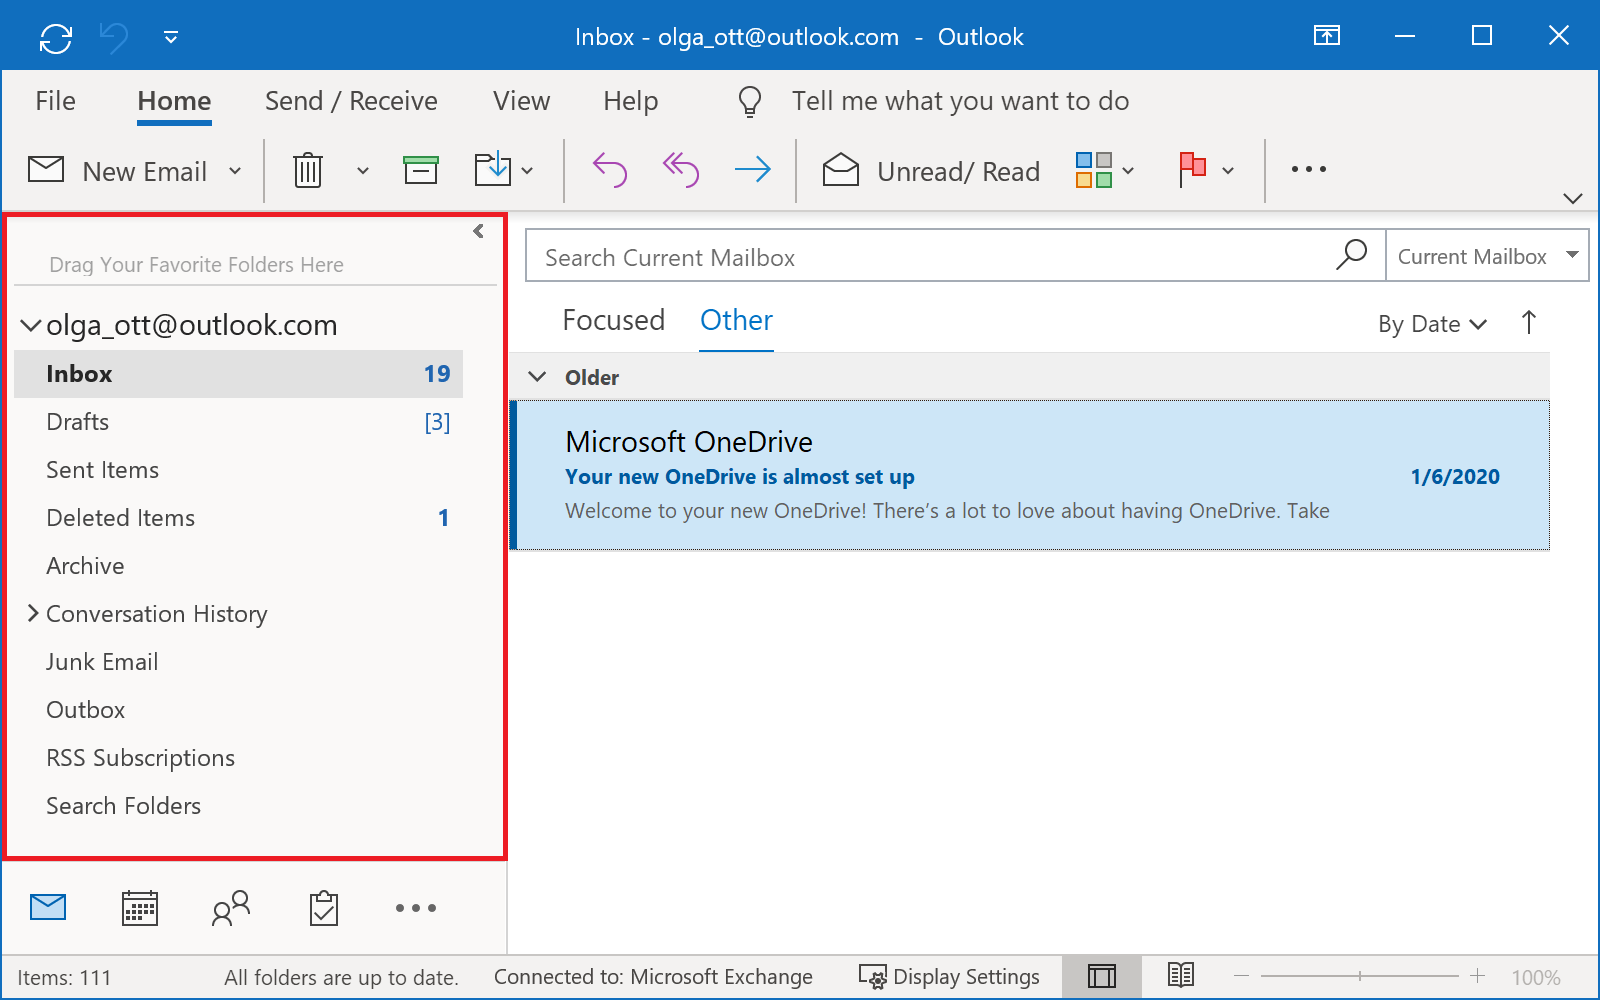
-
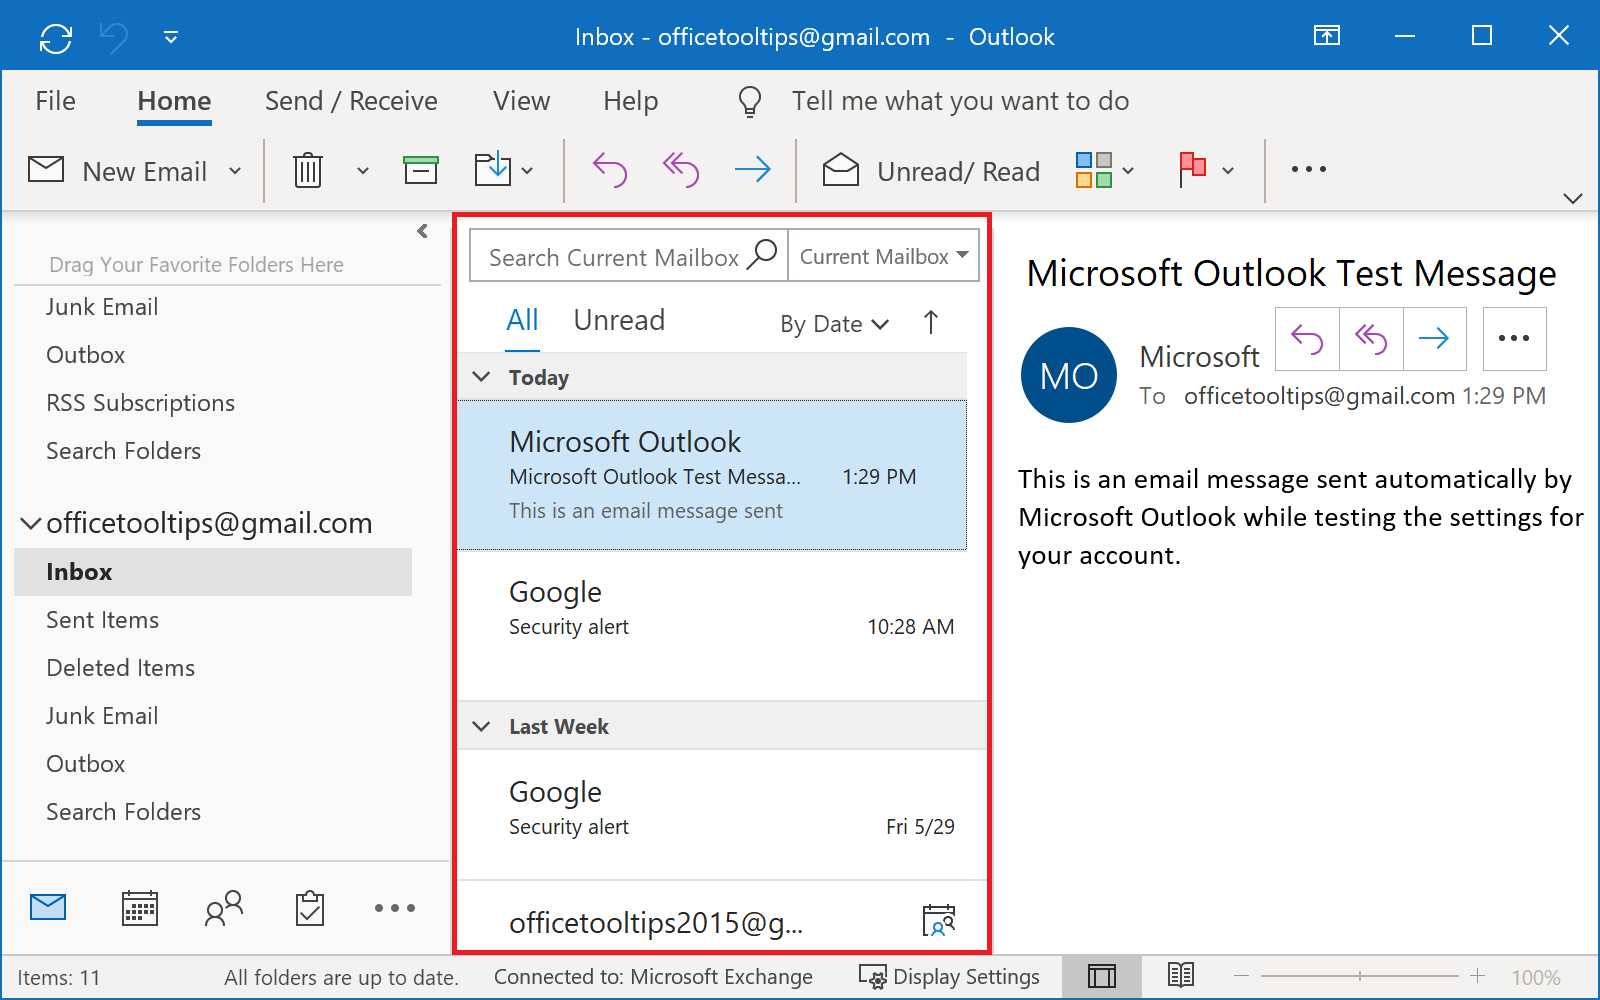
At the right side, Outlook displays the Content pane that shows the list of messages of the
selected folder:

If you enable the Reading pane, Outlook displays the list of messages at the center:
-
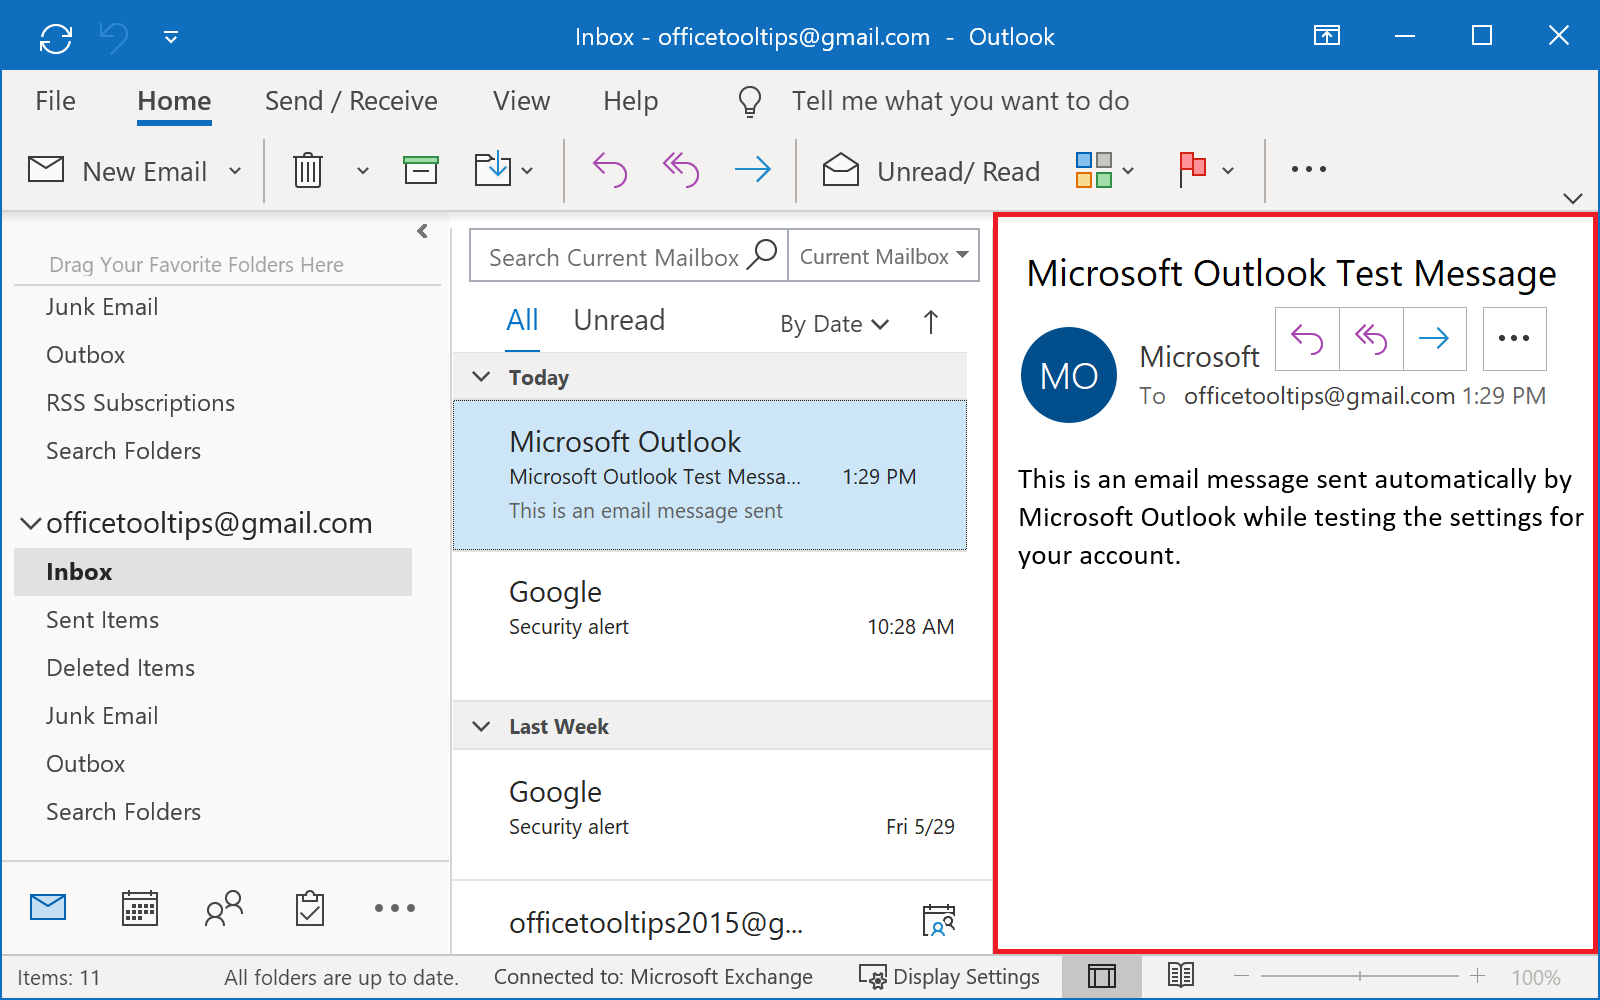
The Reading pane can be shown at right, at the bottom, or can be turned off (see how to
customize the Reading pane). It displays the preview and allows to work with the content of the selected
message or the attachment:
-
The To-Do pane appears at right, at the bottom, or is hidden. It shows a monthly calendar, upcoming
events from your timeline, favorite contacts, and your task list, or any combination of these that you choose:

Create a new message
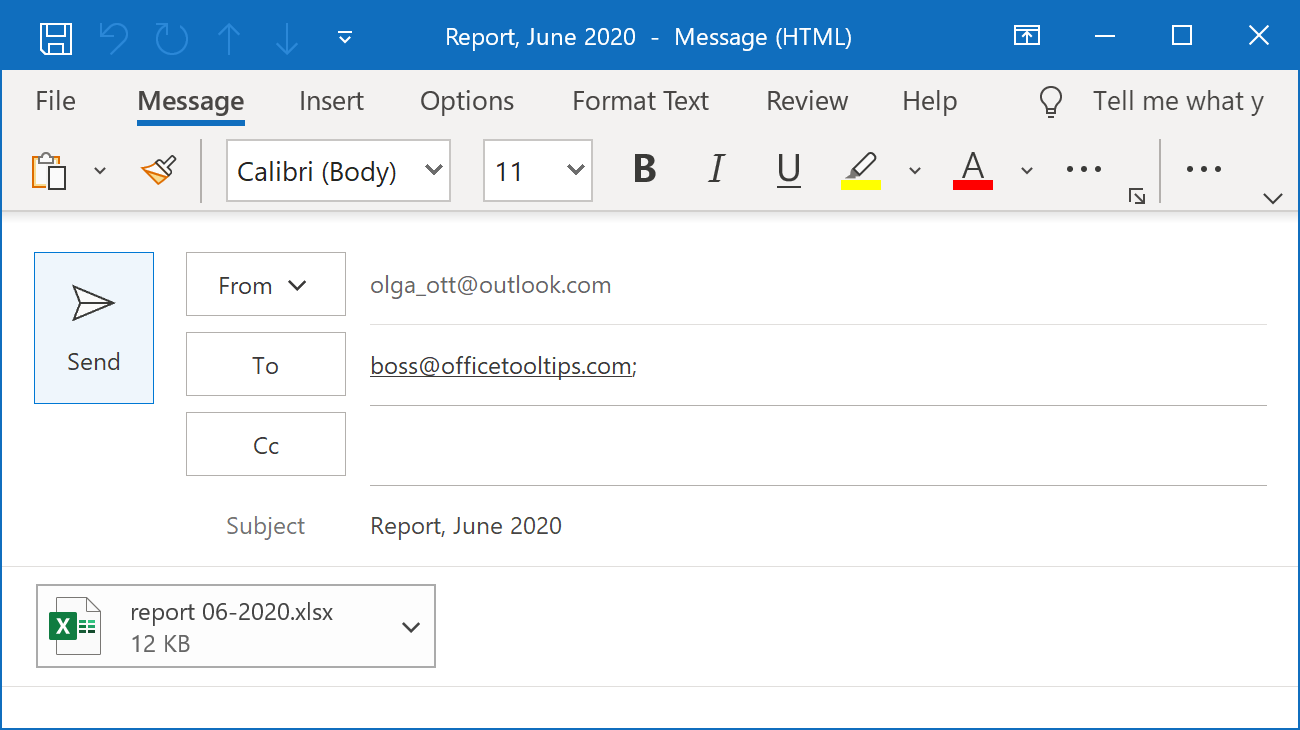
To create (compose) a new email message in Outlook, click the New Email button, or press Ctrl + N (or Ctrl + Shift + M):

This button can also look like:

After Outlook opens the new message window:
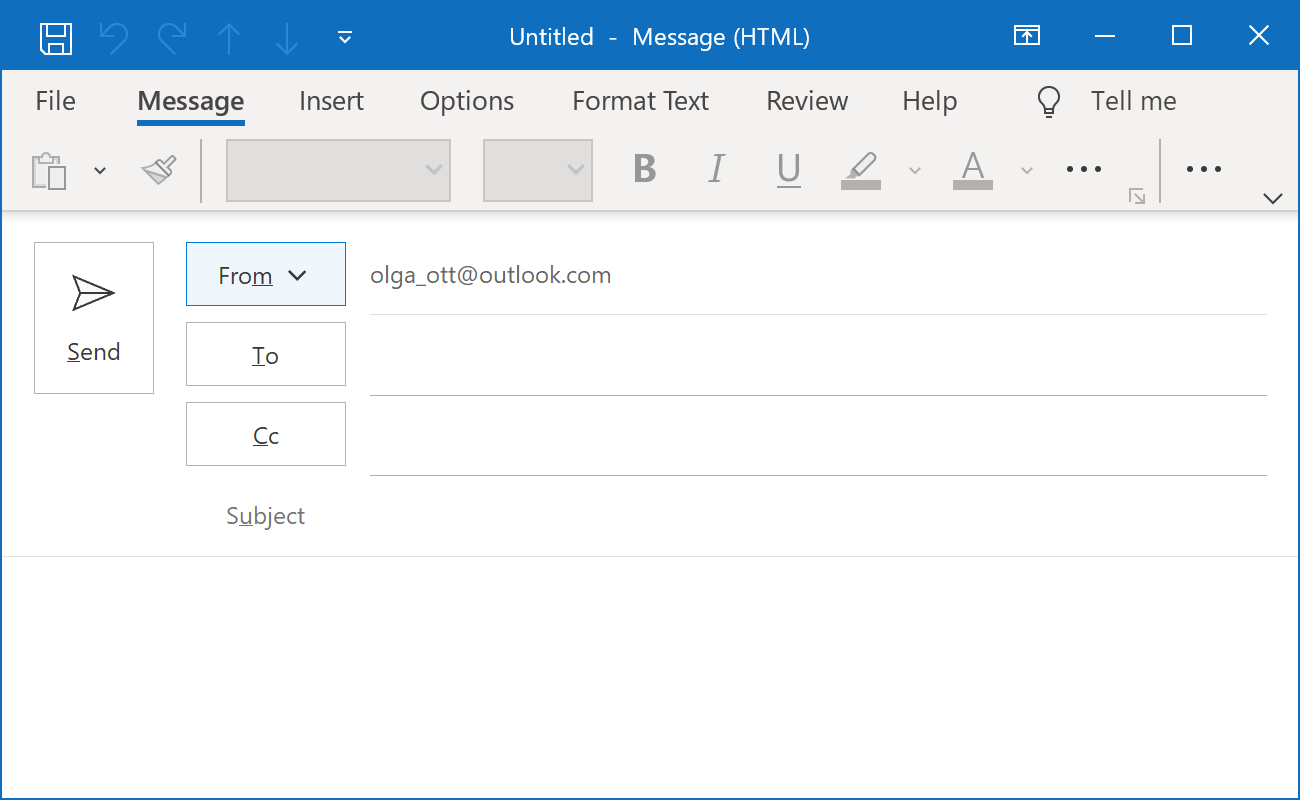
- In the Subject text box, type the subject of the message. Usually, the subject is a short description of what the message to be sent is about or what it contains. In some cases, there are rules on how to create a topic and which words and symbols should it should include.
- The Attachments text box appears when you add attachments to the message (see how to add an attachment on the follwing slides).
- In the bottom, in the body of the message, add the information you want to send.
-
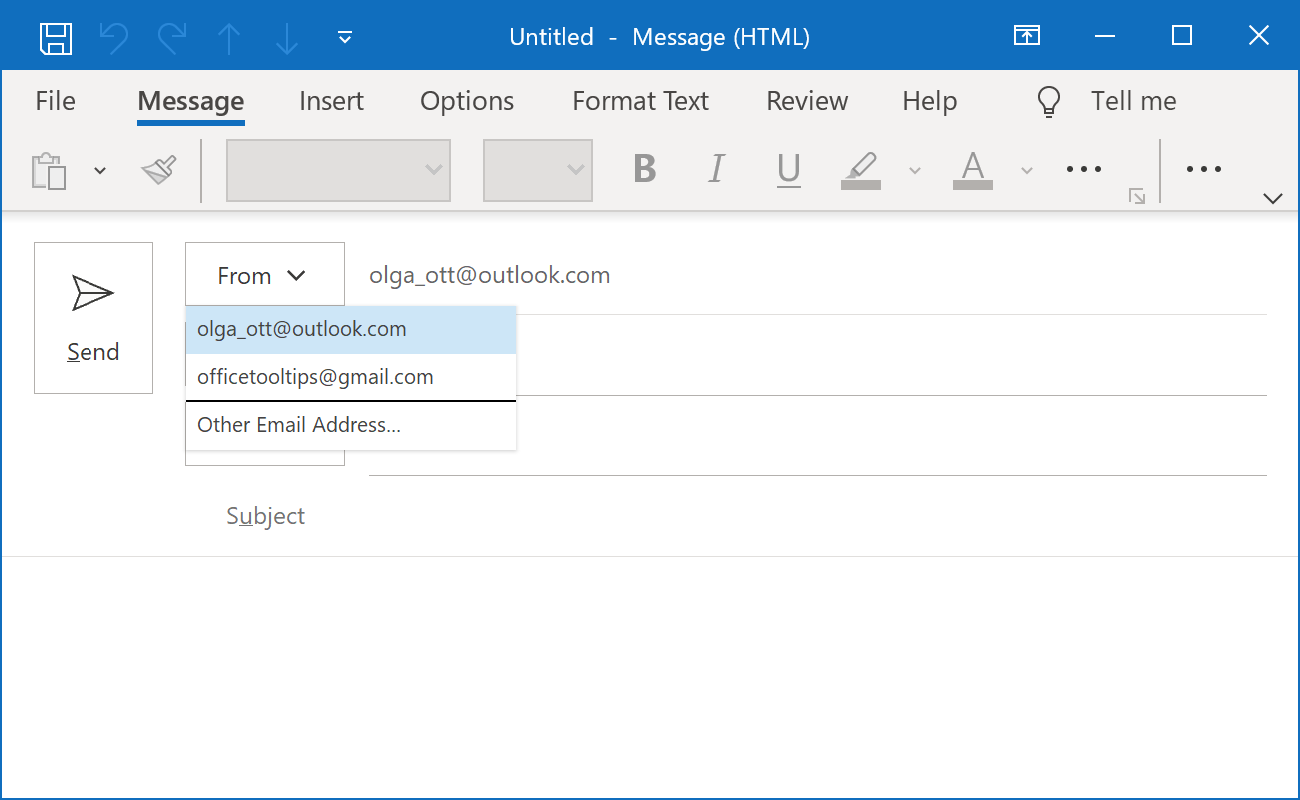
Select the account from which you want to send the message from the From button shows a drop-down list
if you have several email accounts in Outlook:
-
Click the To, Cc (and Bcc, see how to add it to the
message) buttons or start typing in the To, Cc, and Bcc text boxes to add the
recipients' email addresses or names. To add several addresses or names, use a semicolon as a separator (see
how
to use comma as a separator). For example:
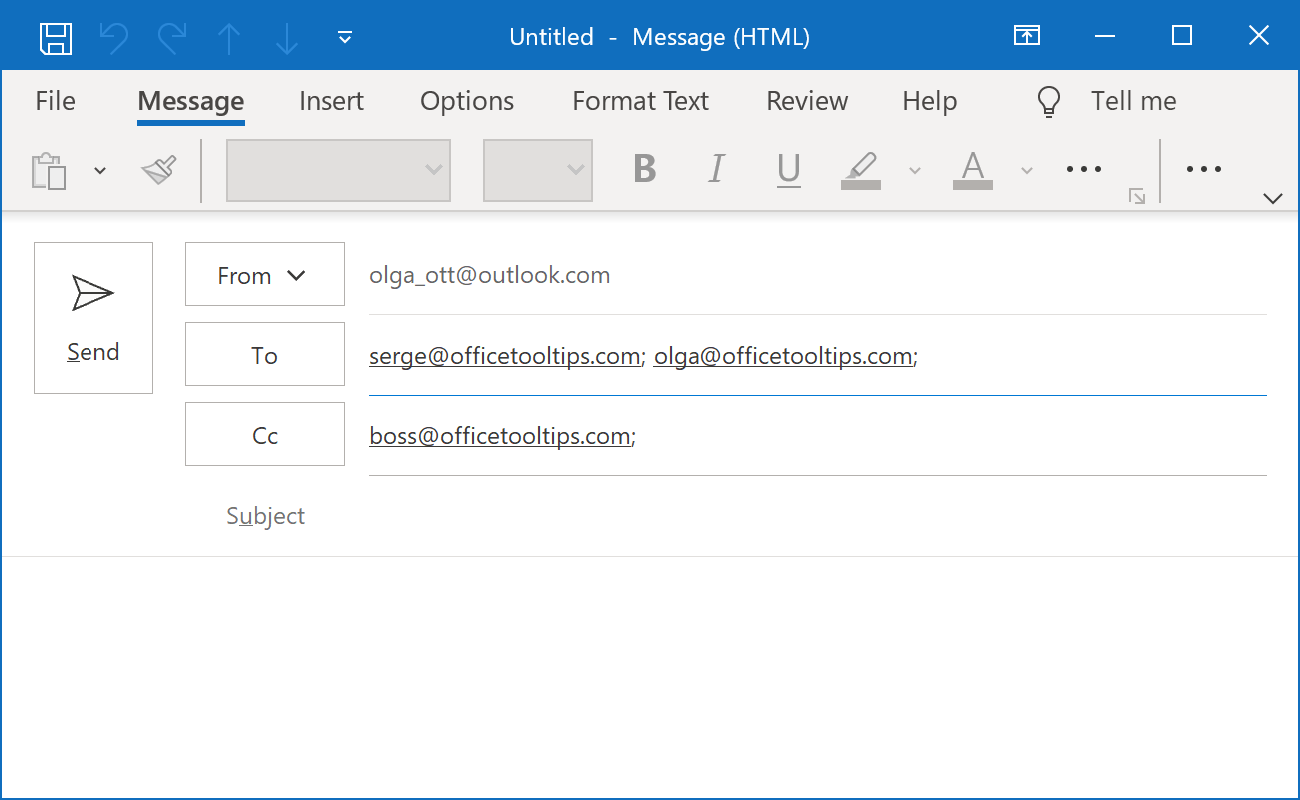
- The addresses in the Cc (carbon copy) field are usually not expected to respond; they need to receive messages for informational purposes only.
- The addresses in the Bcc (blind carbon copy) field are not visible to the recipients in the To and Cc fields, and each other.
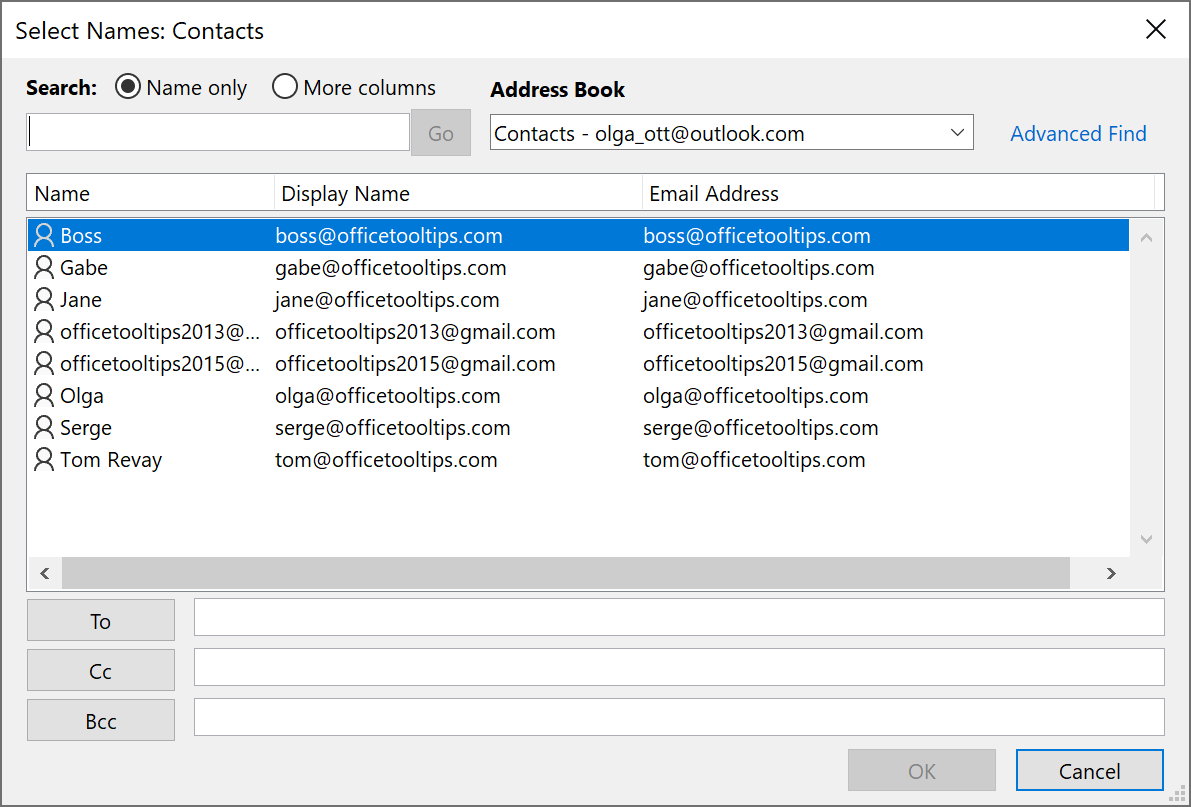
Click on the To or Cc button to open the Select Names: Contacts dialog box to have an ability to add addresses from your contacts:
Add an attachment
In some cases, you need to send a file such as a Word document, Excel table, image, etc. with the message. To add a file as an attachment into the email, do the following:
-
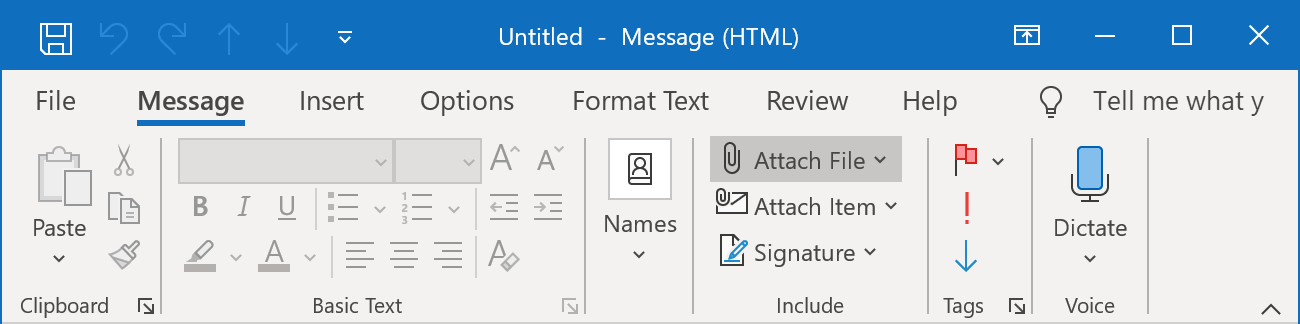
In the Message window, on the Message tab or the Insert tab, click the Attach File
button:
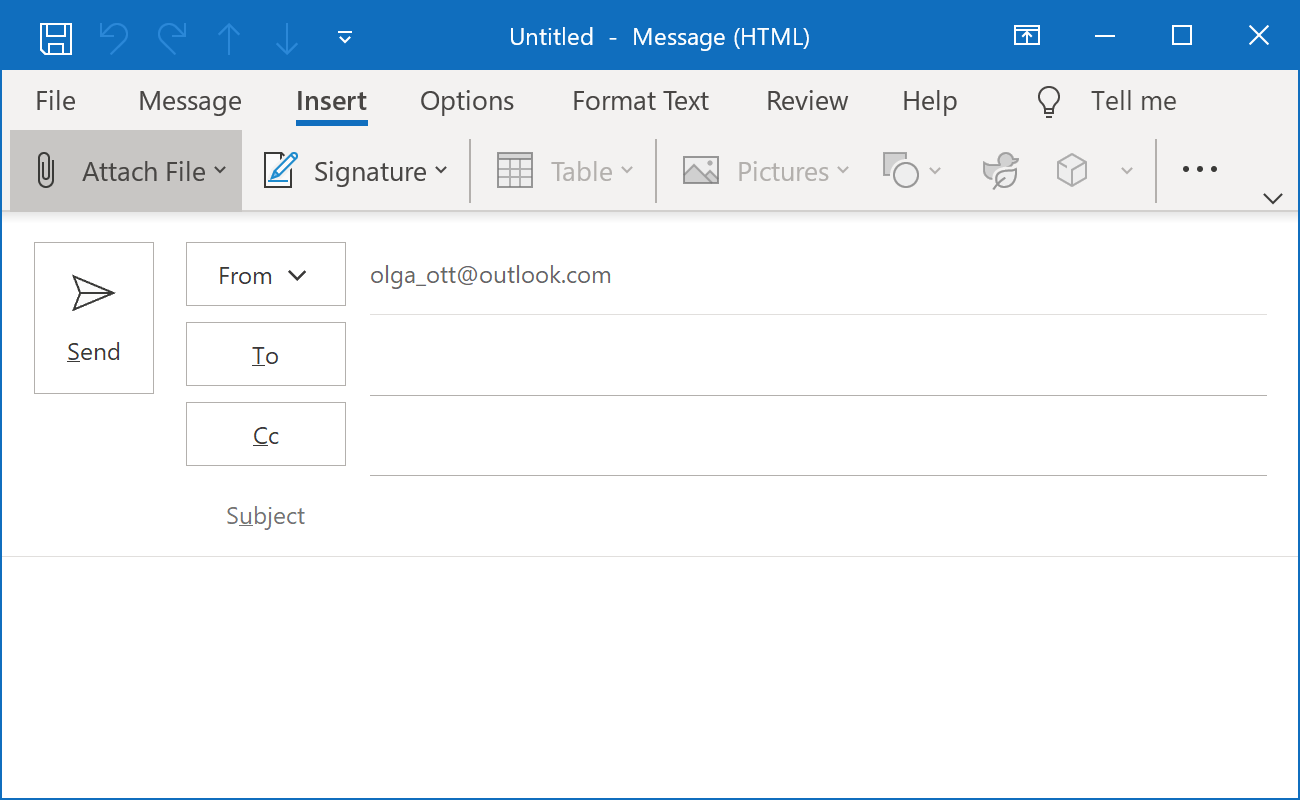
This button can also look like:
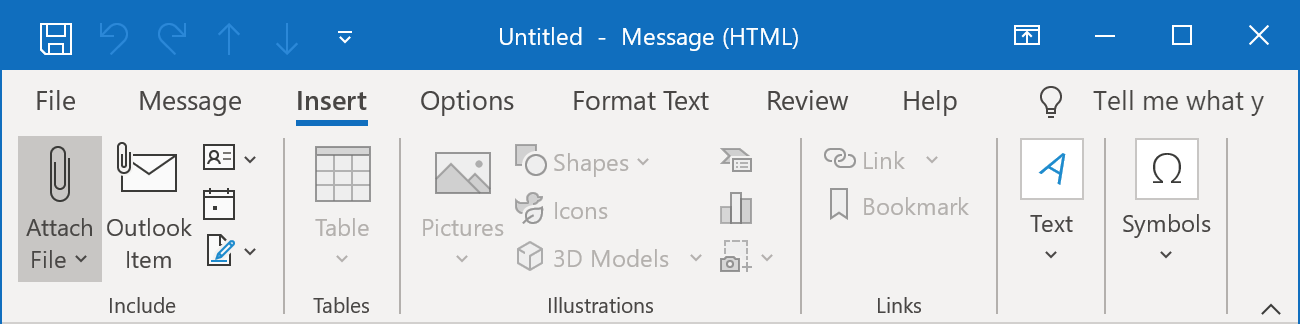
Also, you can find this button on the Message tab, in the Include group:
-
Select the file from one of the locations:
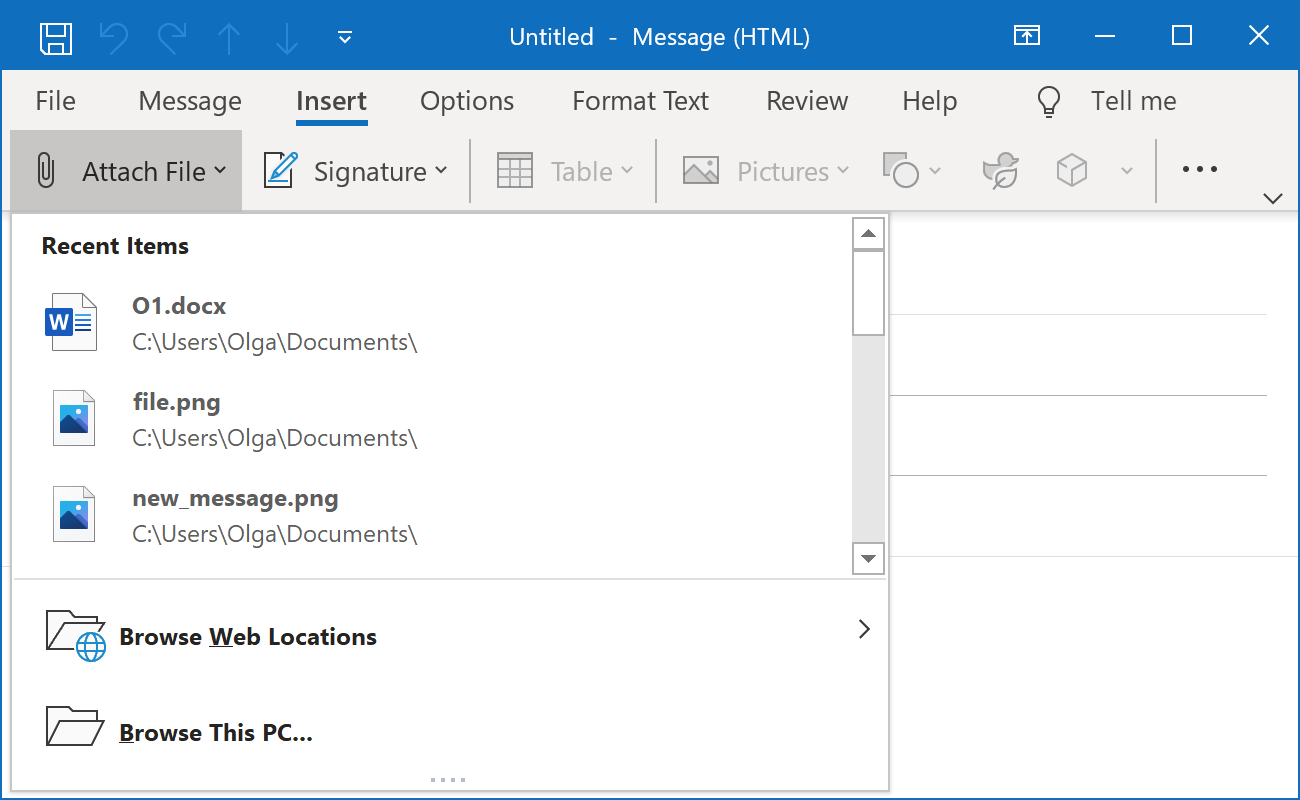
- Recent Items displays the 12 most recent files you worked with. These files may be located on your computer, on OneDrive, SharePoint, or another online document library. Select a file to attach it to your email.
- Use the Browse Web Locations item to open OneDrive, SharePoint, or other places you used or connected. Select one of the locations to open a new window, and then select the attachment.
- Use the Browse This PC... item to open the File Explorer window (the Insert File dialog box) where you can select a file on your computer.
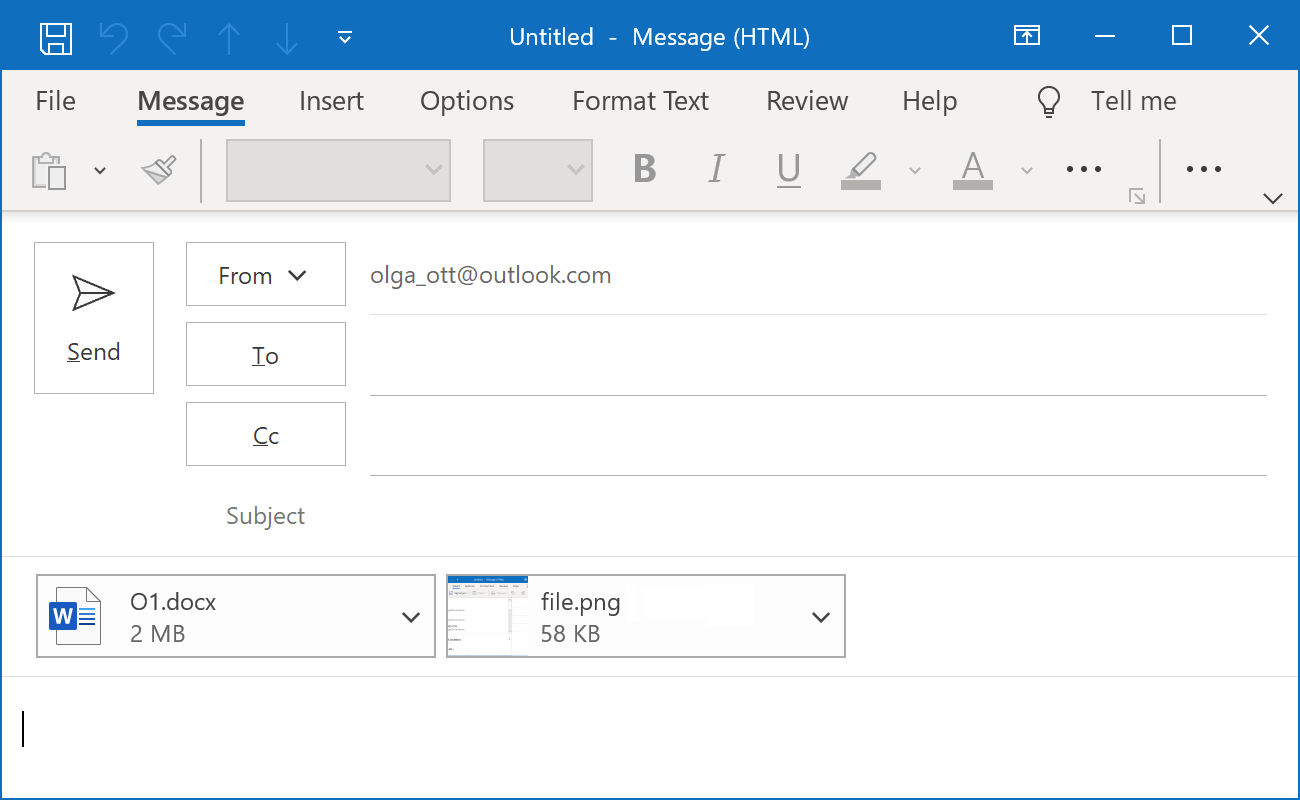
You can attach several files to your message:
We recommend attaching only small files because many email servers have strict size limits for incoming and outgoing messages, and your message will not be delivered without any notification.
The best way to share any file is to send a link to a file located on OneDrive, SharePoint, or any other shared location if your recipients have access to that location.
Set the default format for messages
Some companies use a specific format for all email communications (HTML or Plain Text, and rarely Rich Text). To specify the default format of outgoing messages, do the following:
-
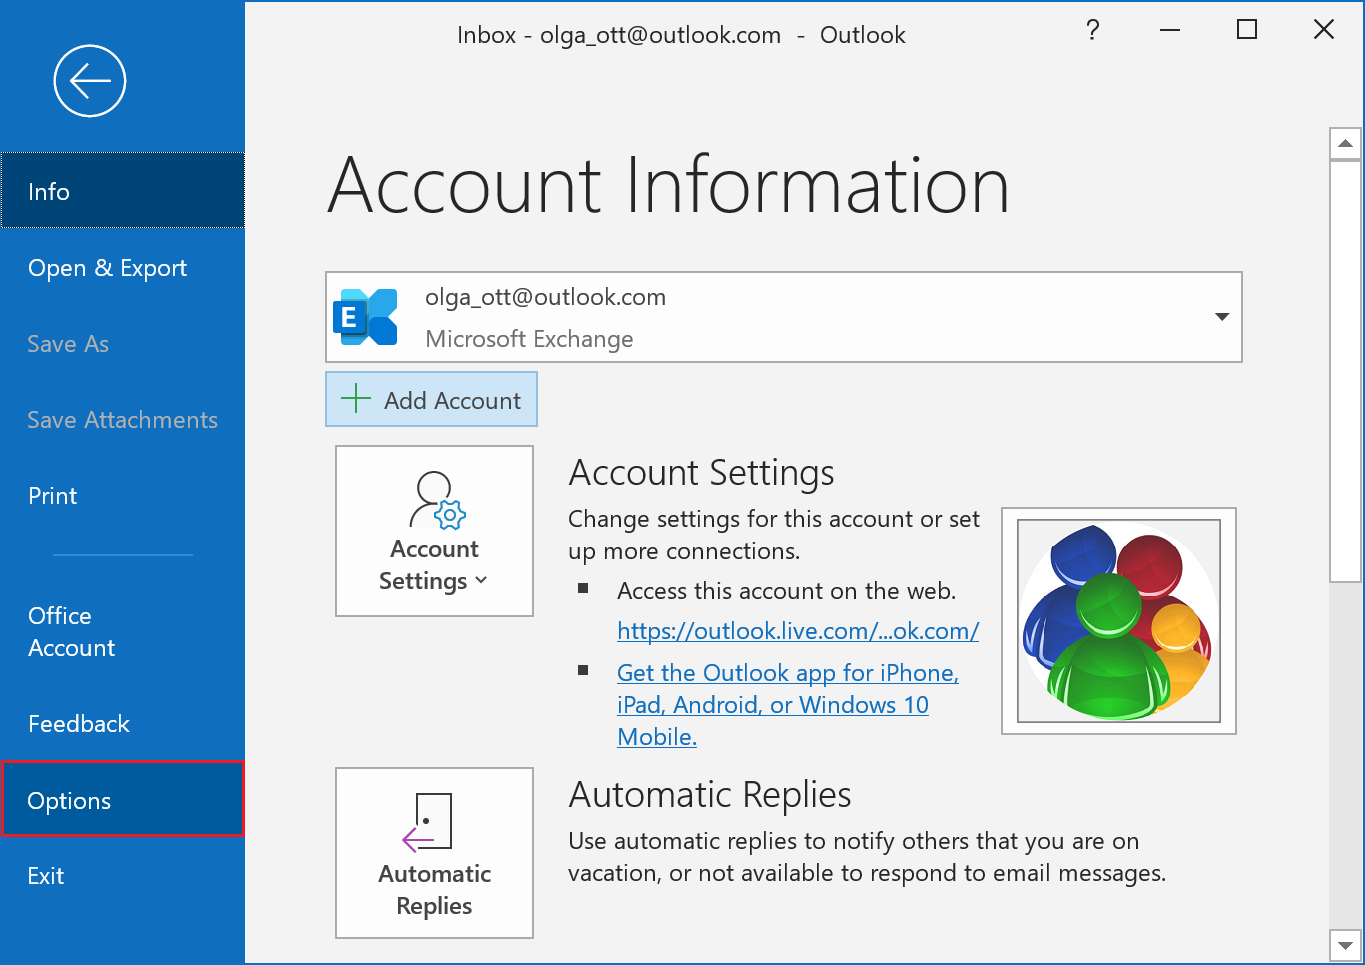
On the File tab, click the Options link:
-
In the Outlook Options dialog box, in the Mail tab, in the Compose messages section, in
the Compose messages in this format list, select one of the proposed formats:

- In the Outlook Options dialog box, click OK to save the changes.
Send message
When you click the Send button, you expect your message to be sent:
However, this is not entirely true. When you click Send, Outlook moves the message to the Outbox folder:
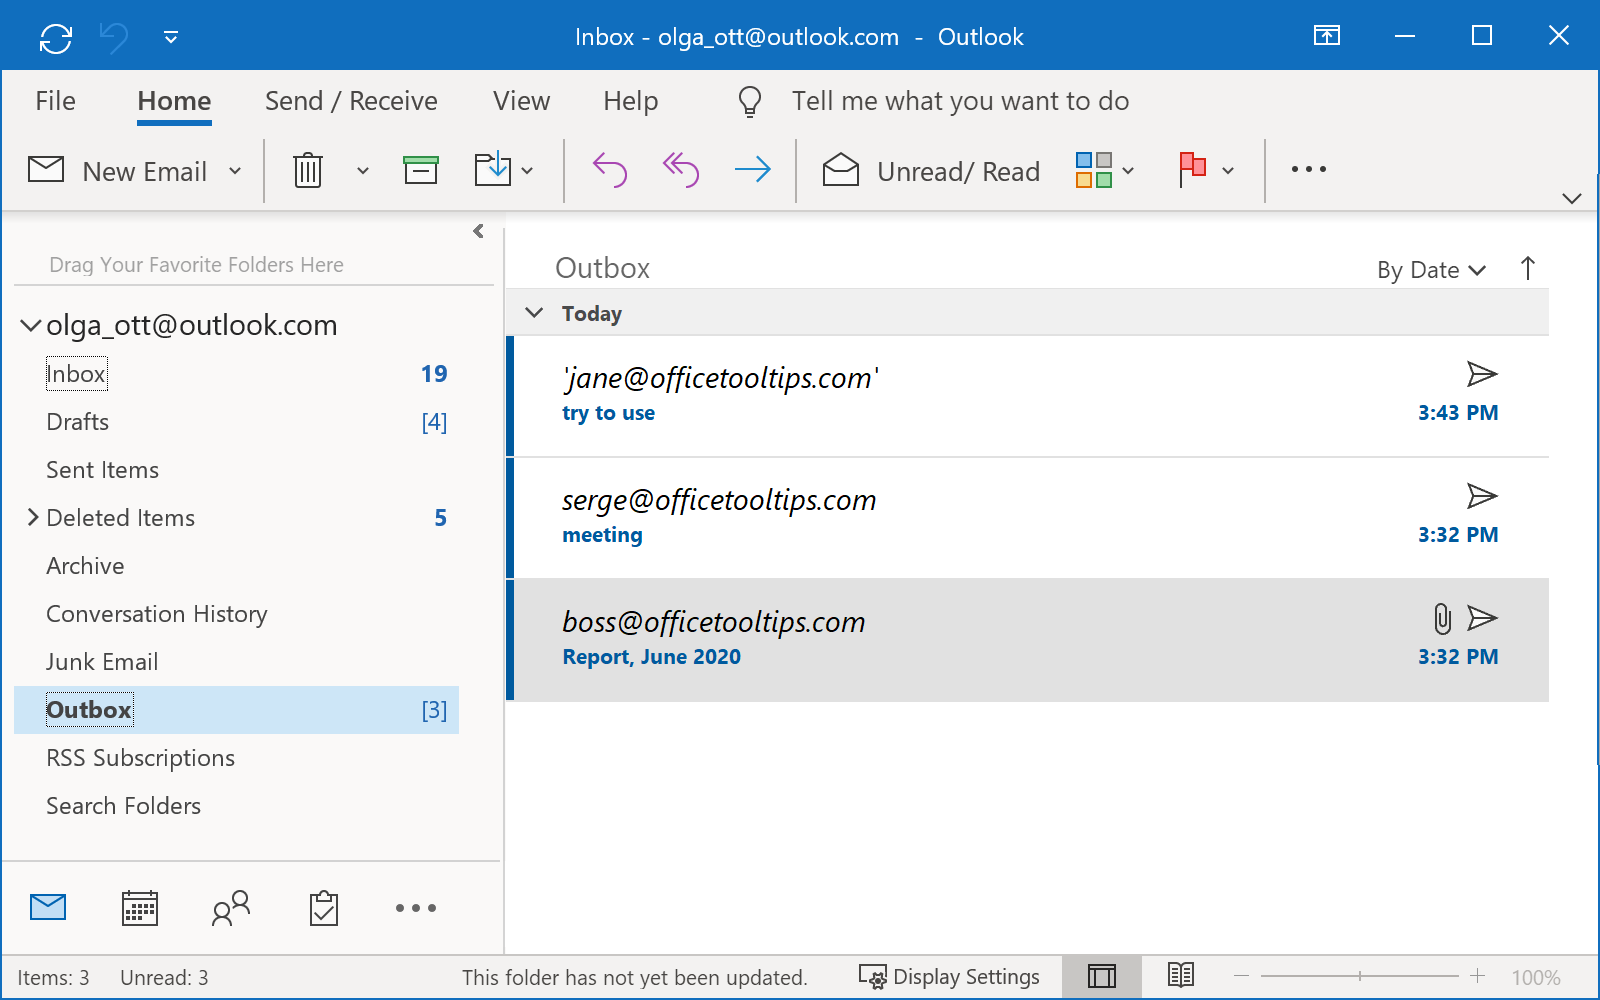
We do not recommend turning Outlook off immediately after clicking the Send button. Before shutting down the Outlook application, check that there are no unsent messages in the Outbox folder.
Only after the completion of the next Send/Receive session, the message will be sent if there were no unexpected errors. Automatically, Outlook moves sent messages from the Outbox folder to the Sent folder (used by default if there are no other settings for outgoing messages).
To start a Send/Receive session, do one of the following:
-
On the Quick Access Toolbar, click the Send/Receive All Folders button (or press F9):

-
On the Send/Receive tab, click the Send/Receive All Folders or Send All button:
