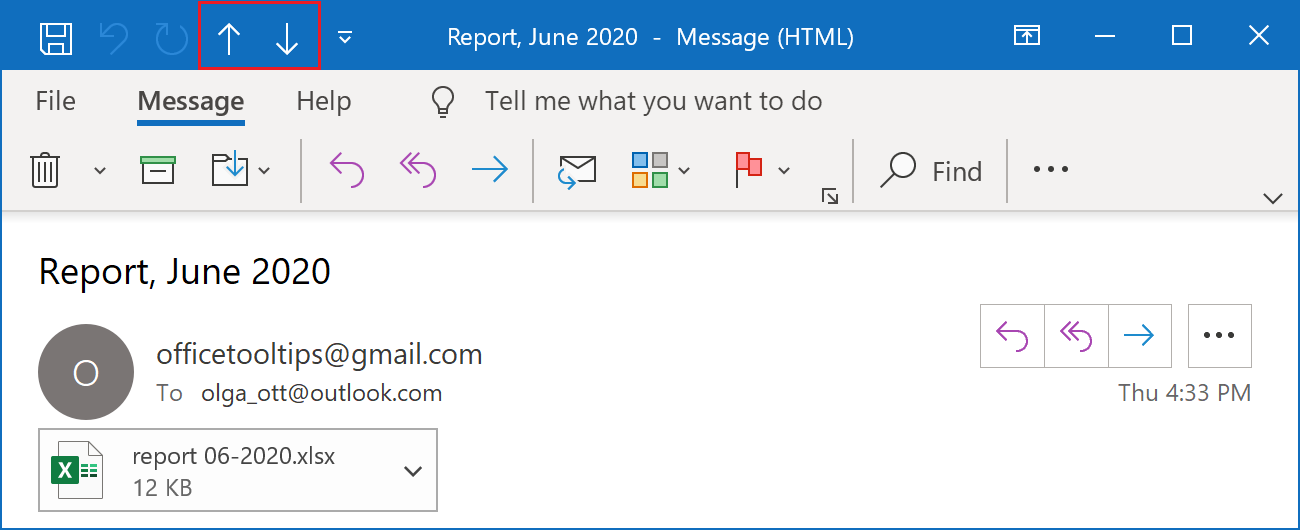
View attachment in Reading pane
You can preview certain types of attachments like Word documents, Excel workbooks, PowerPoint presentations, PDF files, and many types of image files directly in the Reading pane:
-
To display the attachment content, click once on the attachment name in the message header:
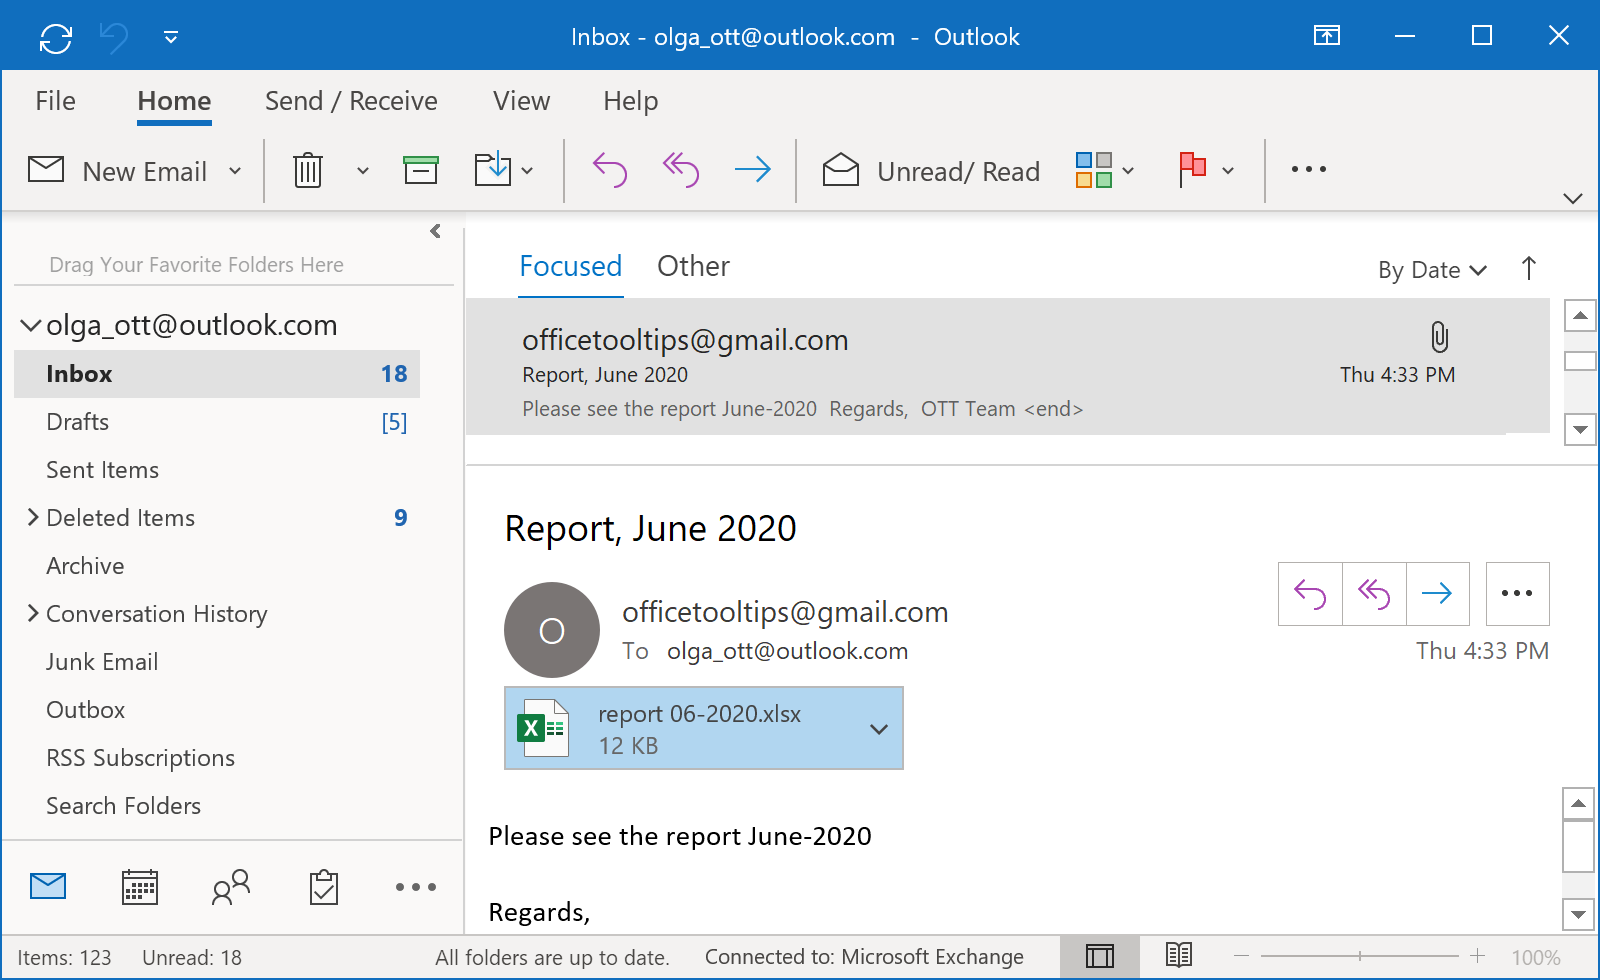
-
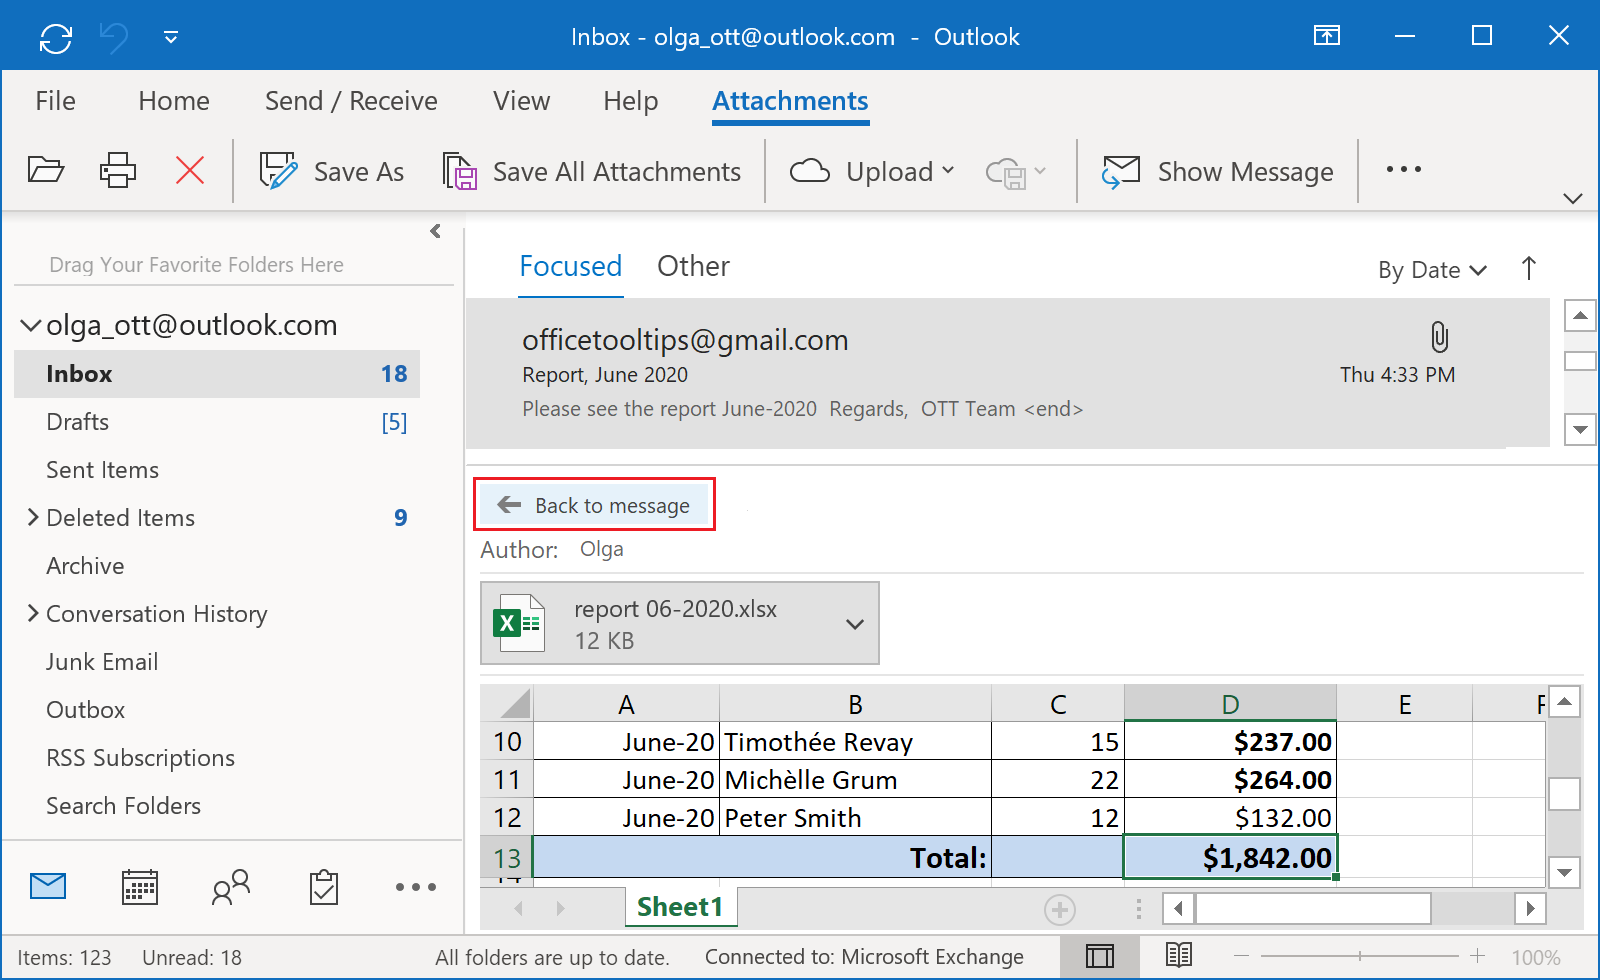
To return to the message content, click the Back to message button in the upper-left corner of the
Reading pane:
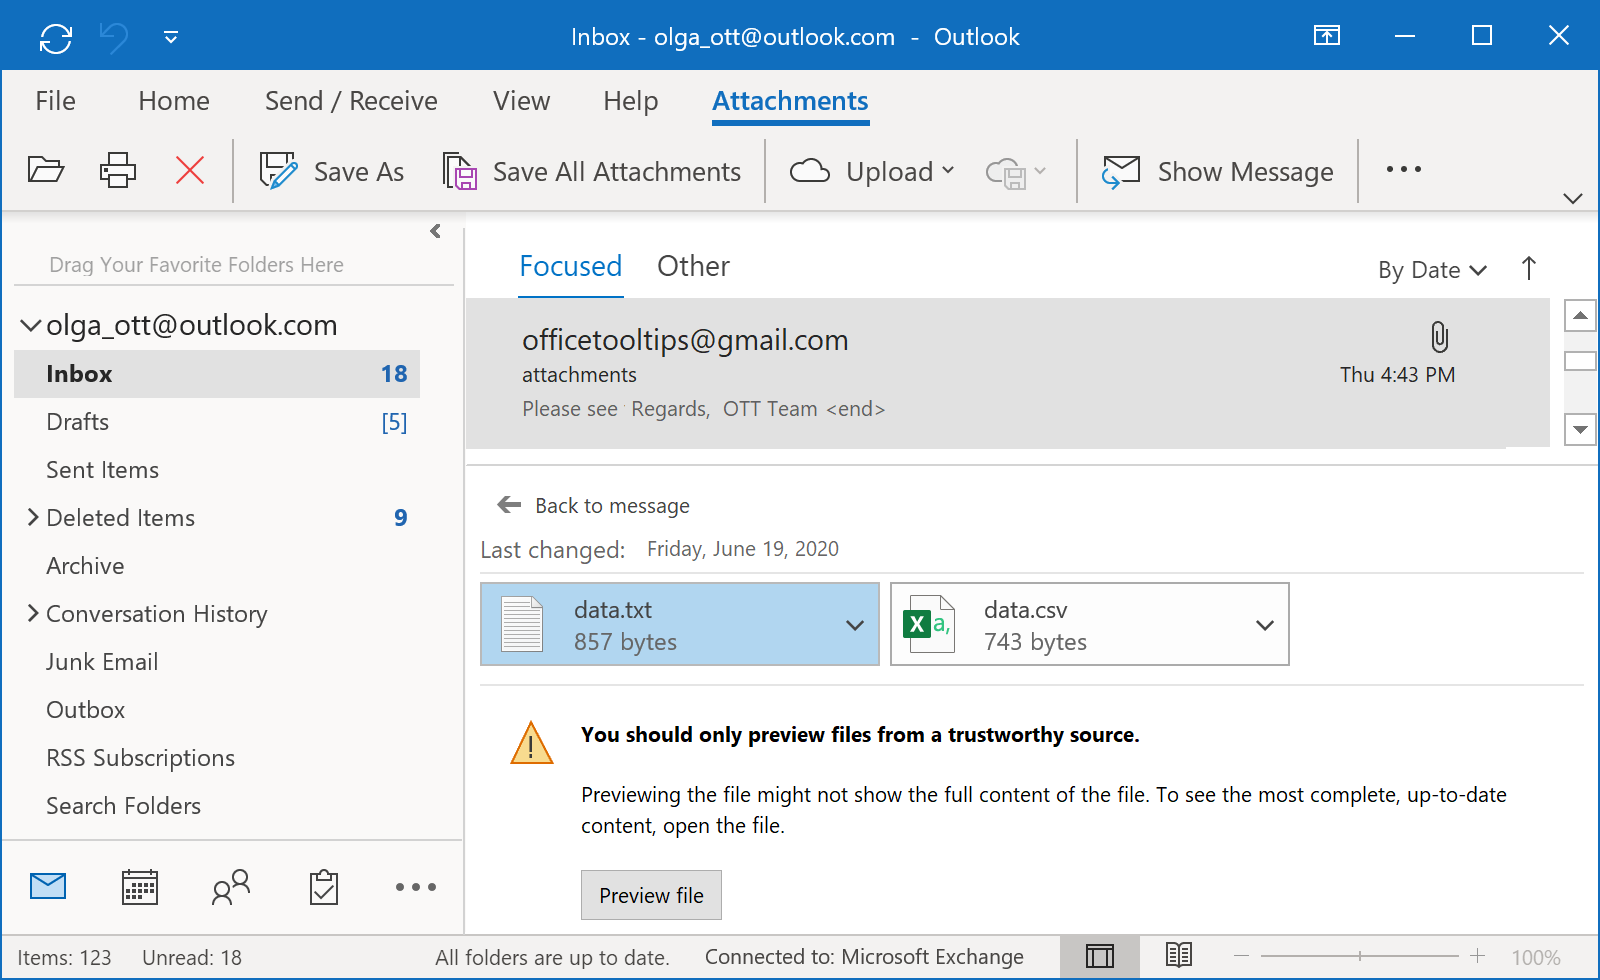
For other types of attachments Outlook displays an information pane with the Preview file button:
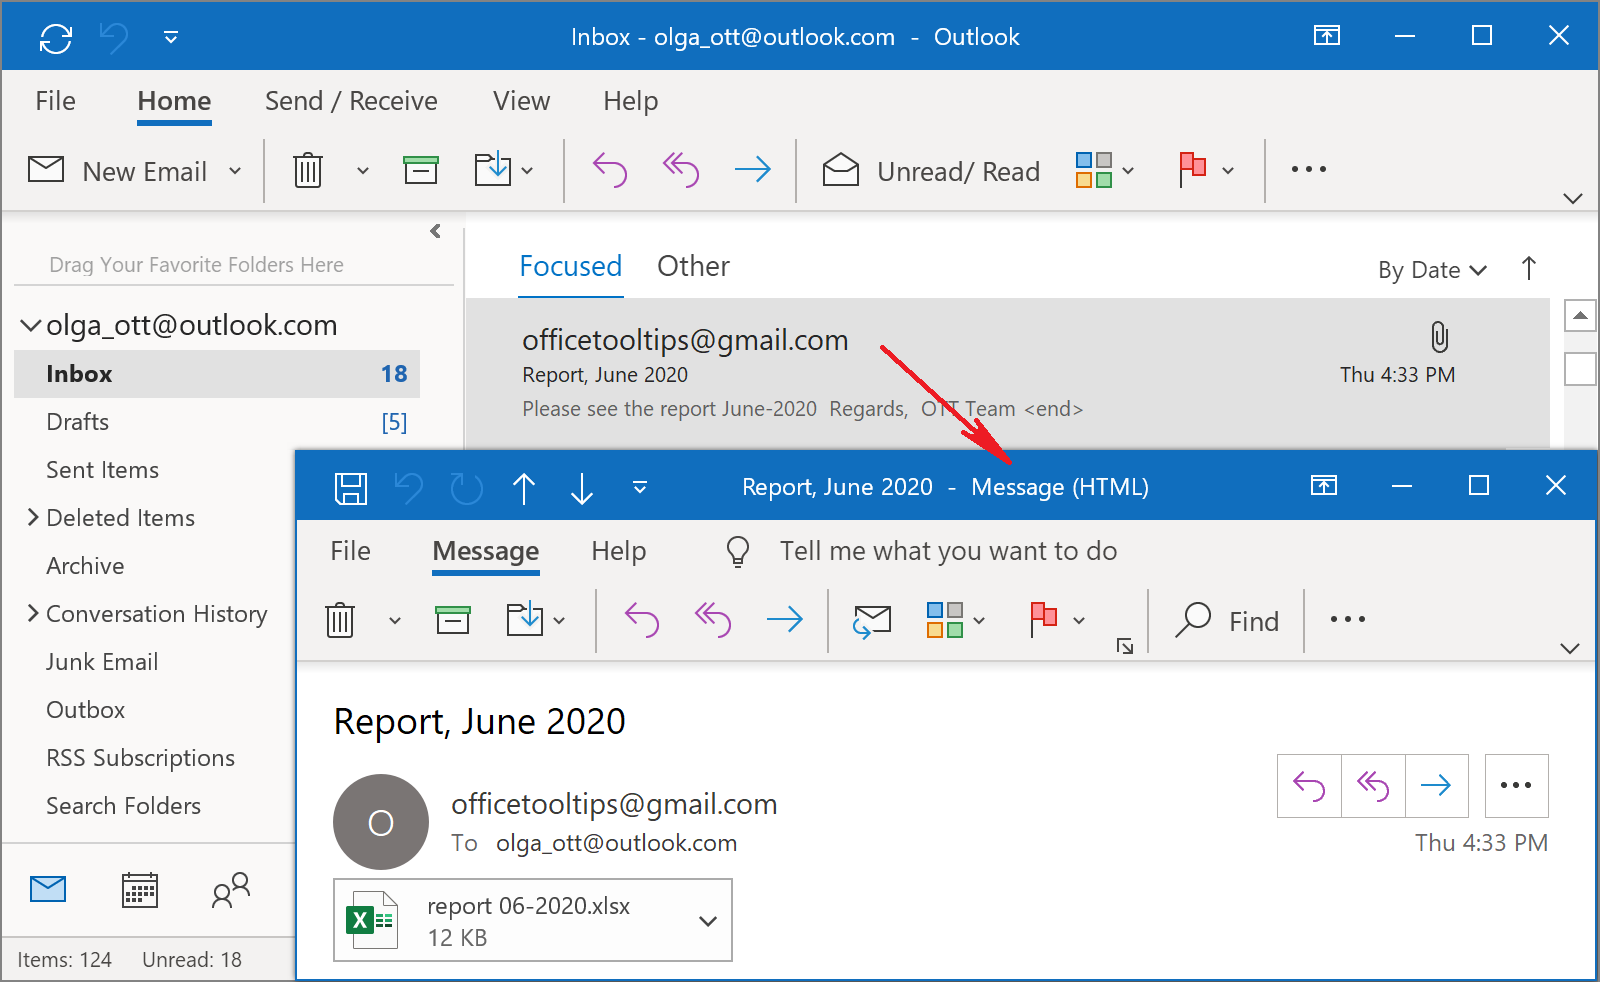
View message in a new window
To open the message in a new window double click on the message header in the Reading pane or the messages list:
When you open the message in the new window, you can navigate from the current message to the previous one or the next one by clicking the Previous Item and Next Item buttons (or pressing Ctrl + < and Ctrl + > accordingly):
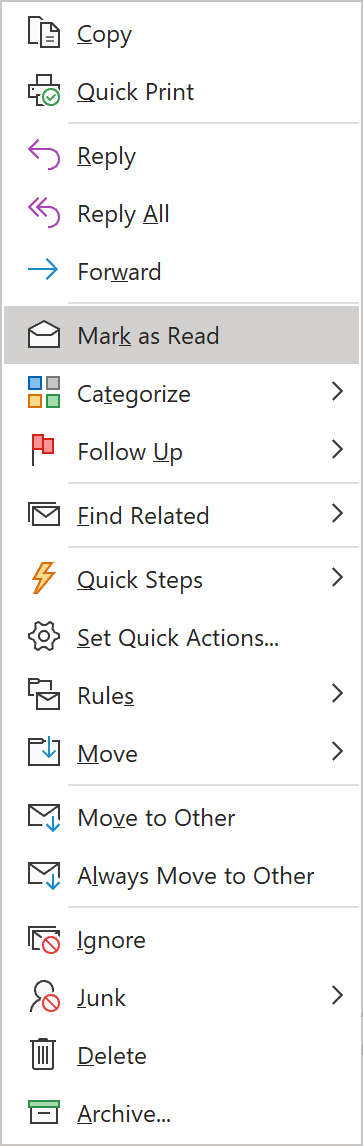
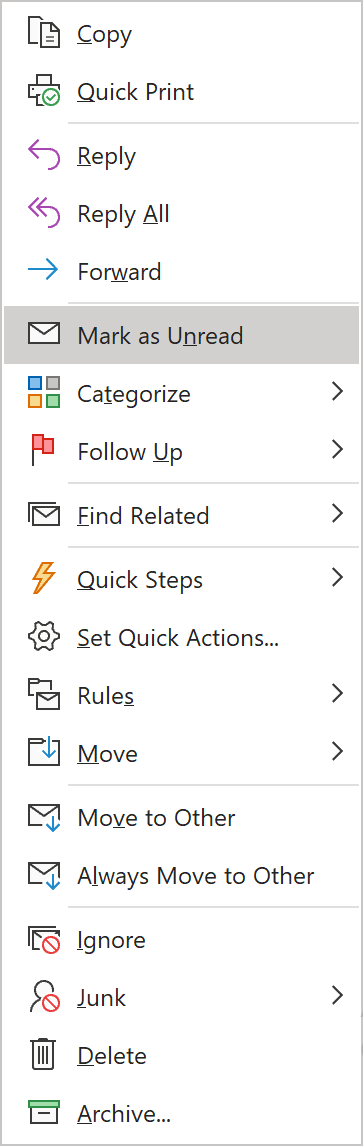
Mark messages as read/unread
To mark a message as read or unread, do the following:
- Select the message or messages for which you want to change the status.
-
Do one of the following:
-
On the Home tab, in the Tags group, click the Unread/Read button:

-
Right-click the selection and choose the Mark as Read or Mark as Unread command in the popup
menu:
-
On the Home tab, in the Tags group, click the Unread/Read button:
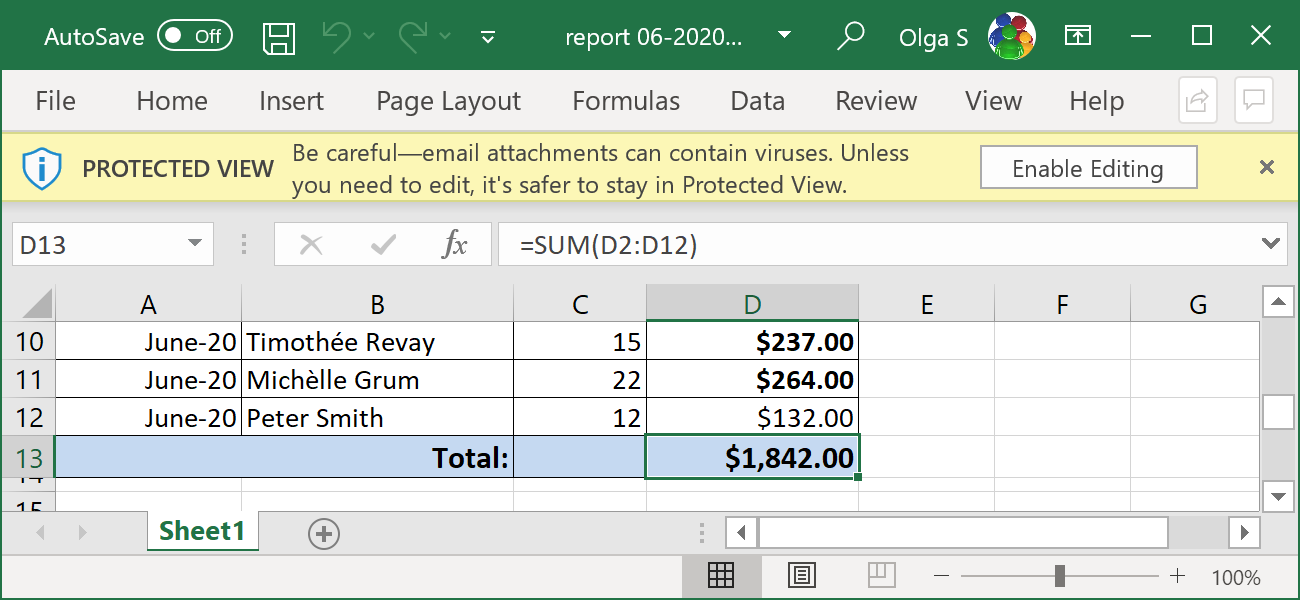
Open attachments
To open the message attachment, in the Reading pane or separate message window, double-click on the attachment name in the message header:
Outlook opens an attachment directly in the associated application:
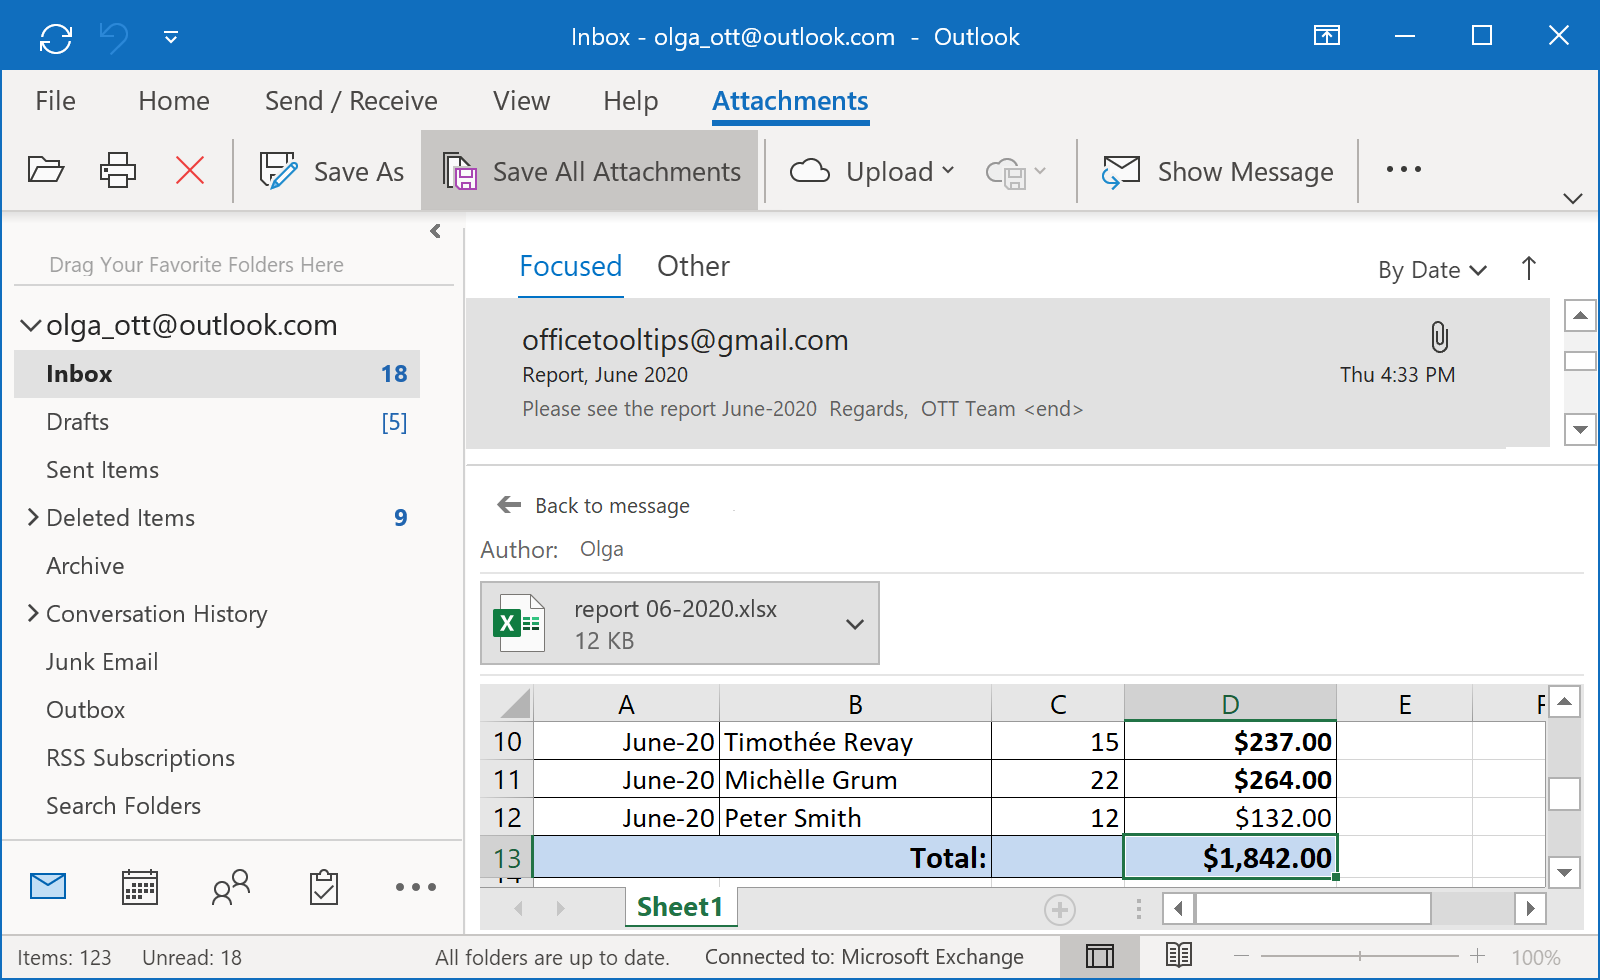
Save attachments
To save message attachments to a file storage location, do the following:
-
Open the Save All Attachments dialog box by doing any of the following:
-
Click on the attachment name in the message header. Then on the Attachments tab, in the Save to
Computer group, click the Save All Attachments button:
-
Click on the attachment name in the message header. Then on the Attachments tab, in the Save to
Computer group, click the Save All Attachments button:
-
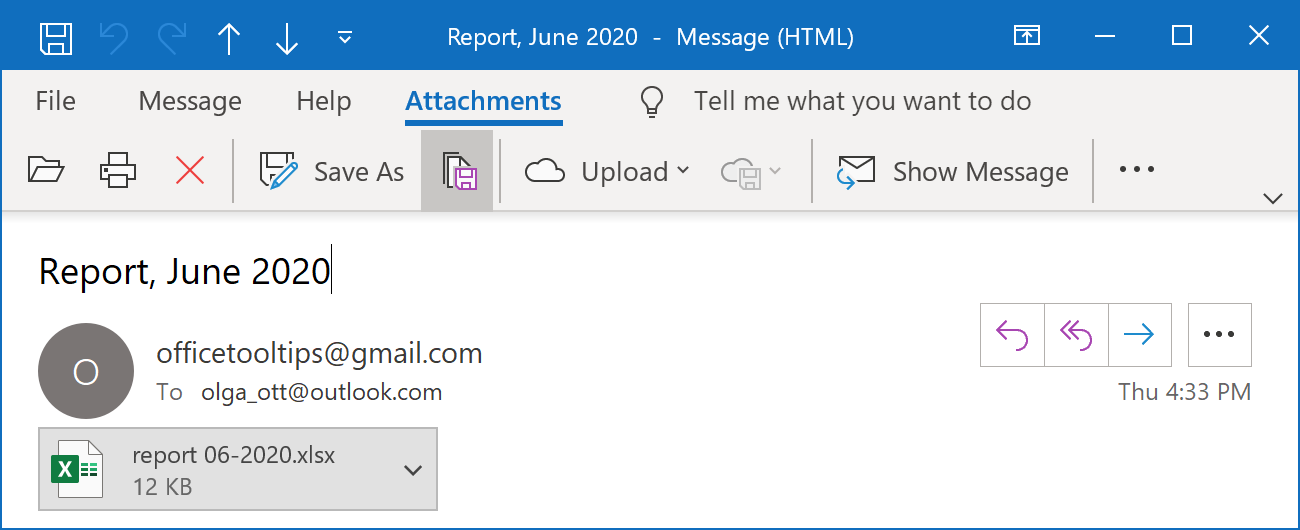
Click on the attachment name in the message window. Then on the Attachments tab, in the Save to
Computer group, click the Save All Attachments button:
-
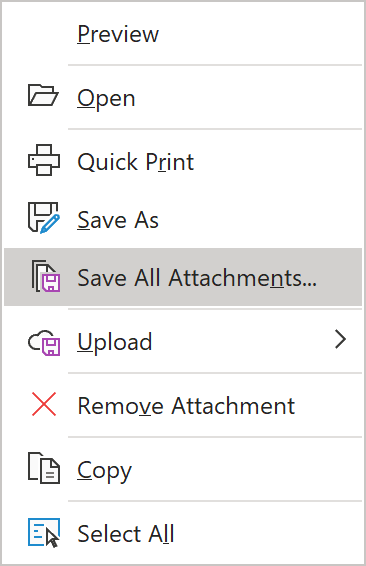
Right-click on the attachment and choose the Save All Attachments... command in the popup menu:
-
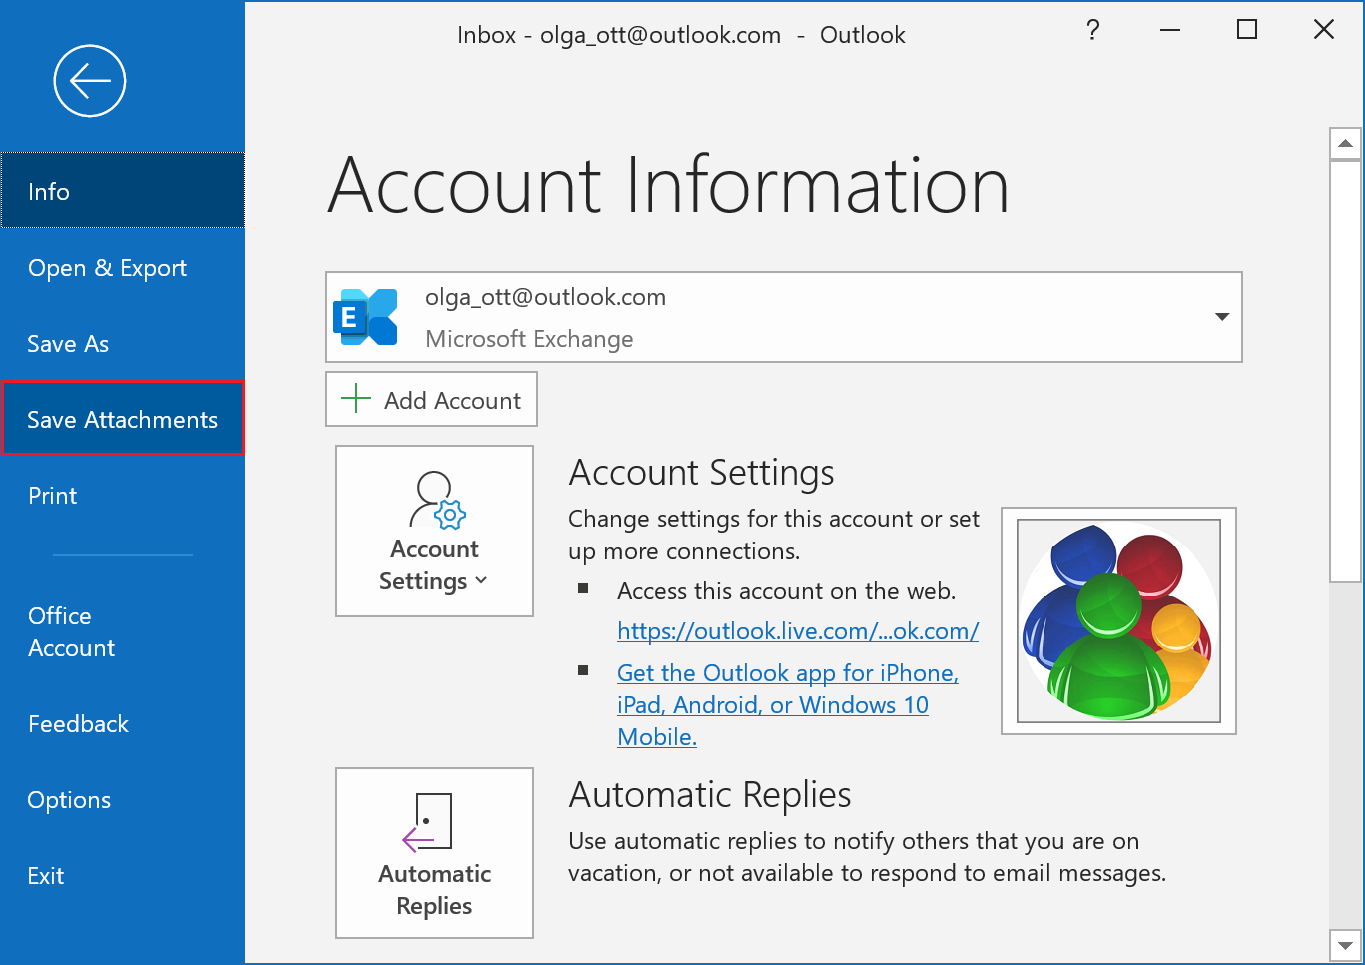
On the File tab, click Save Attachments:
-
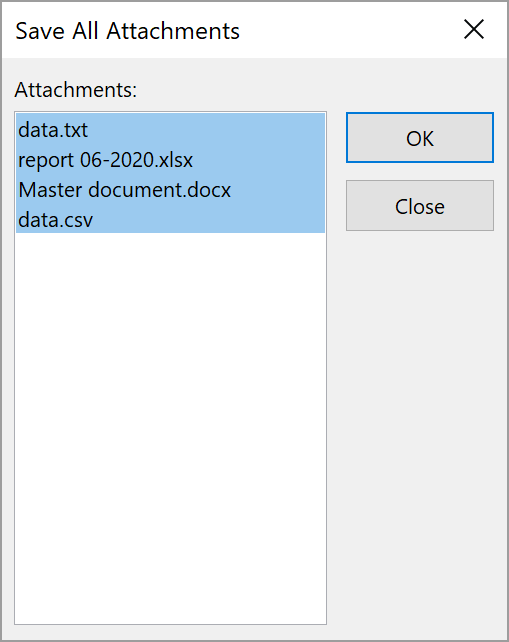
In the Save All Attachments dialog box, select the attachments you want to save, and click OK:
- In the Save Attachment dialog box, browse to the folder in which you want to save the files, and click OK.
Print messages
To print the selected messages, do the following:
- Select the messages that you want to print.
-
On the File tab, click Print (or click Ctrl + P):
 In the Printer drop-down list, select the printer or Microsoft Print to PDF to print the
selected messages to one PDF file.
In the Printer drop-down list, select the printer or Microsoft Print to PDF to print the
selected messages to one PDF file.
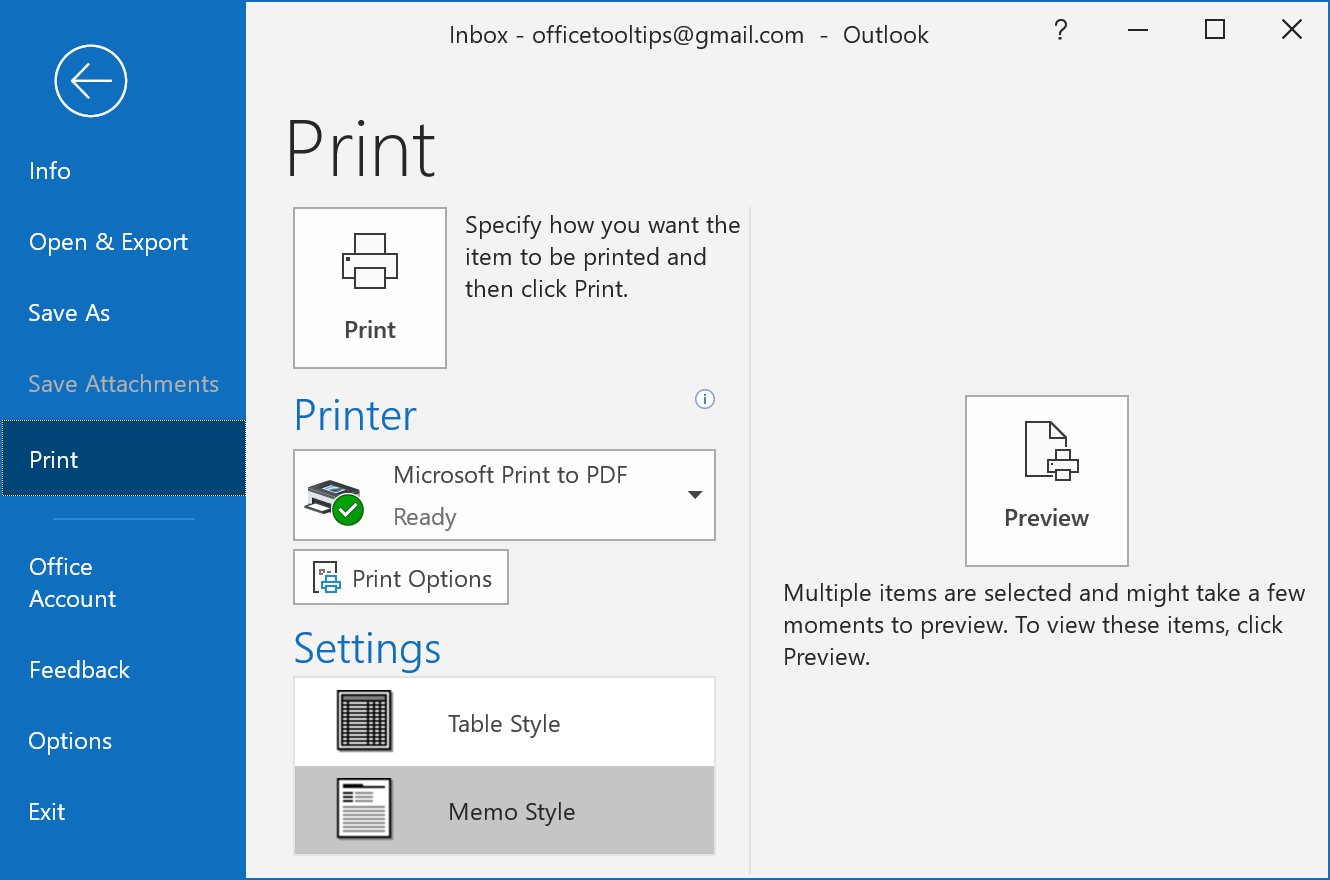
Click the Print Options button if you want to change any of them. For example, if you need to print all attachments:

Click the Preview button to see which and how pages will be printed.
- Click Print.
Open the Junk Email folder
By default, Outlook moves junk or phishing messages to the Junk Email folder associated with your account:
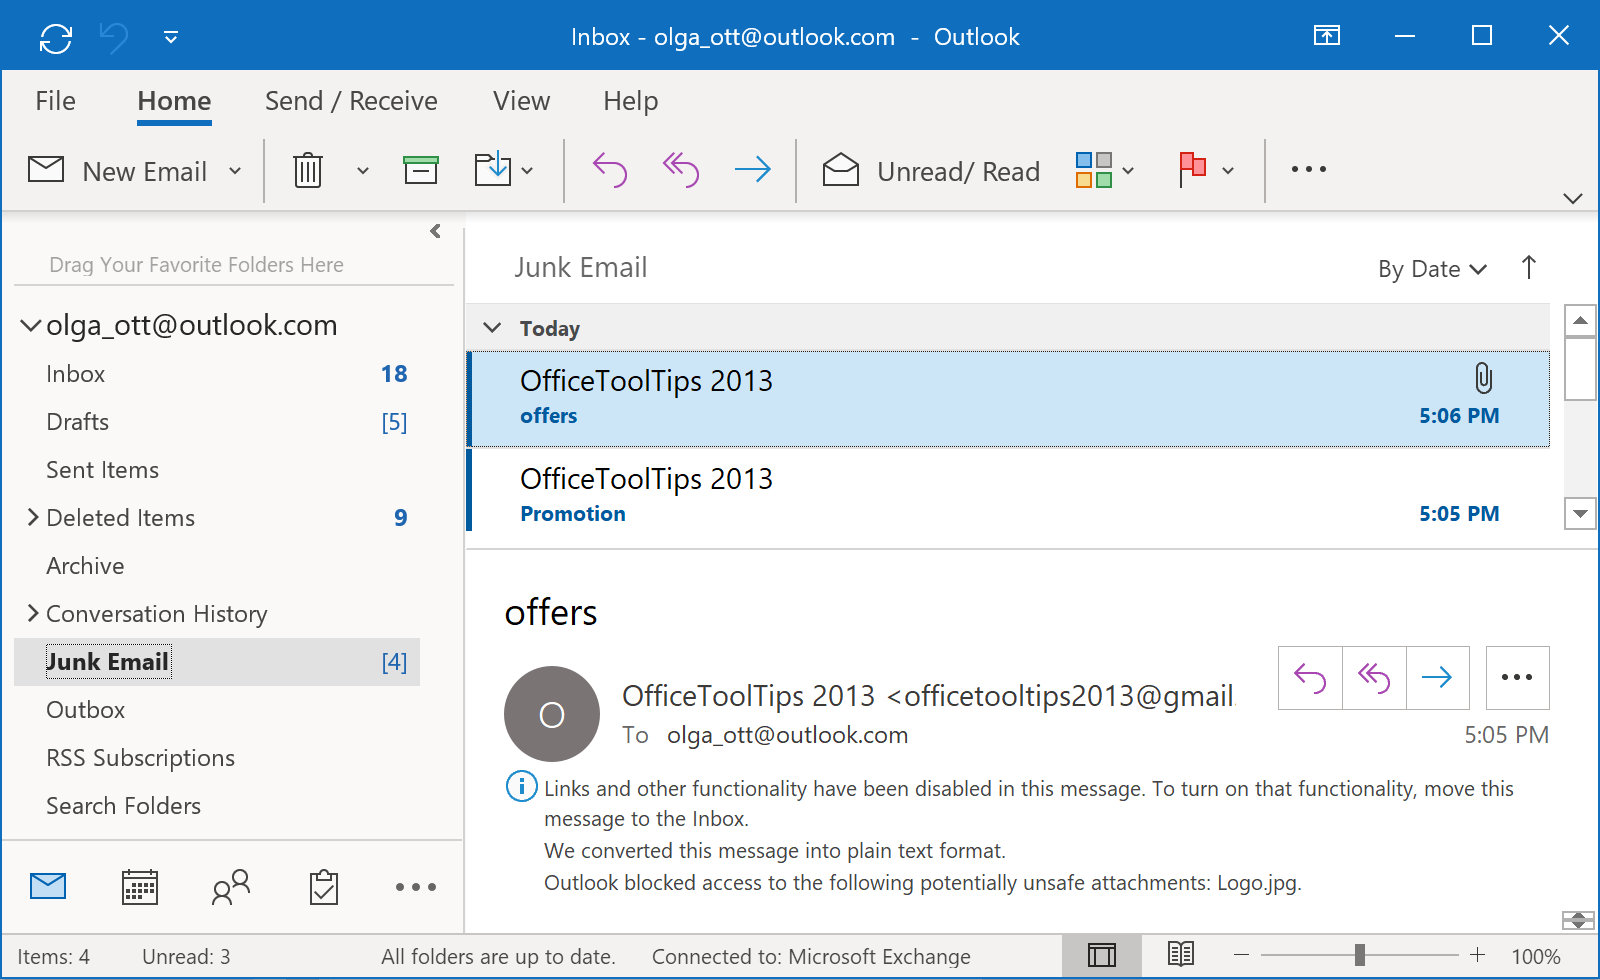
Outlook shows message content in the Junk Email folder in plain text and disables links or content within the message. The InfoBar in the message header provides detailed information about the message status.
Block sender
If you received an email from the sender that you want to block, select this message and block the sender, or add the sender to the Block Senders list:
To block the sender, do the follwing:
-
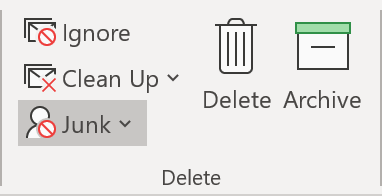
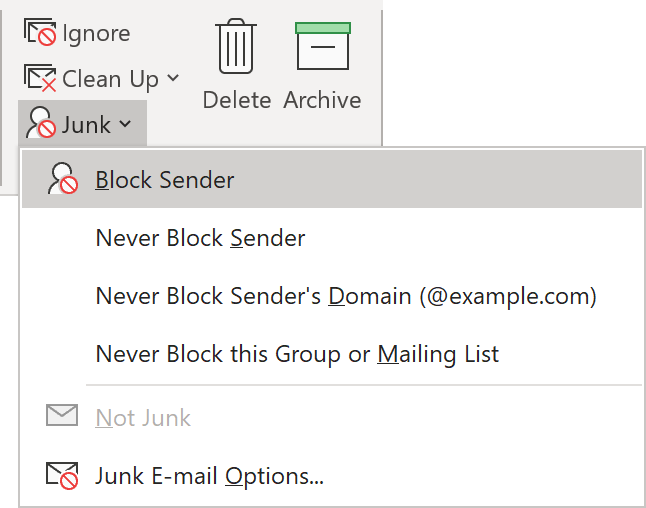
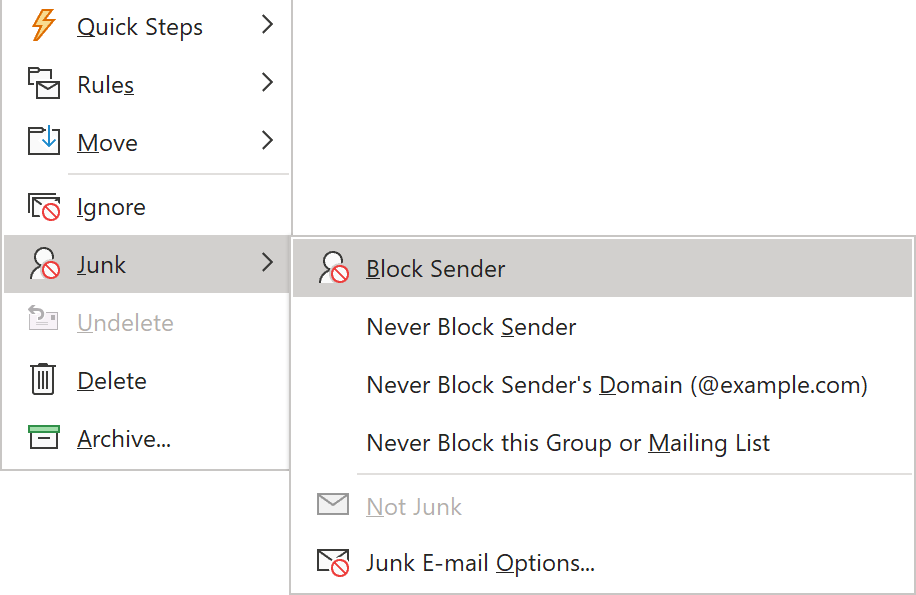
On the Home tab, in the Delete group, click Junk:
-
In the Junk drop-down list, choose the Block Sender action, or
right-click on the selected email and choose the Junk > Block Sender action:
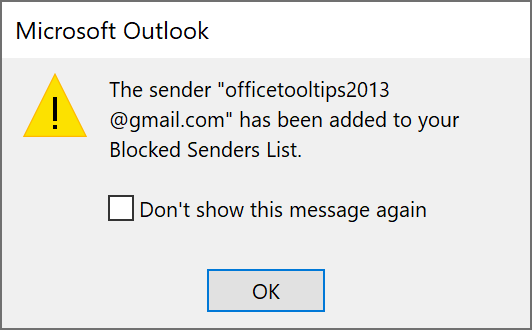
Outlook will show the message that the chosen sender is blocked, for example:
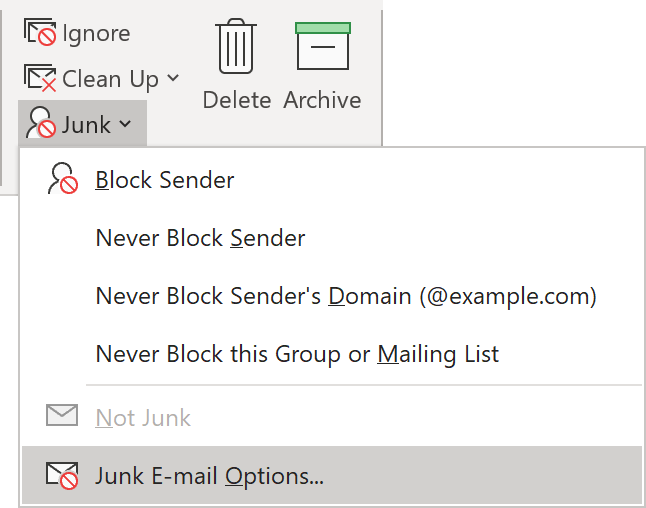
To add a sender to the Block Senders list, do the following:
-
On the Home tab, in the Delete group, click on the Junk drop-down list and then click
Junk E-mail Options...:
-
In the Junk Email Options dialog box, select the Blocked Senders tab:
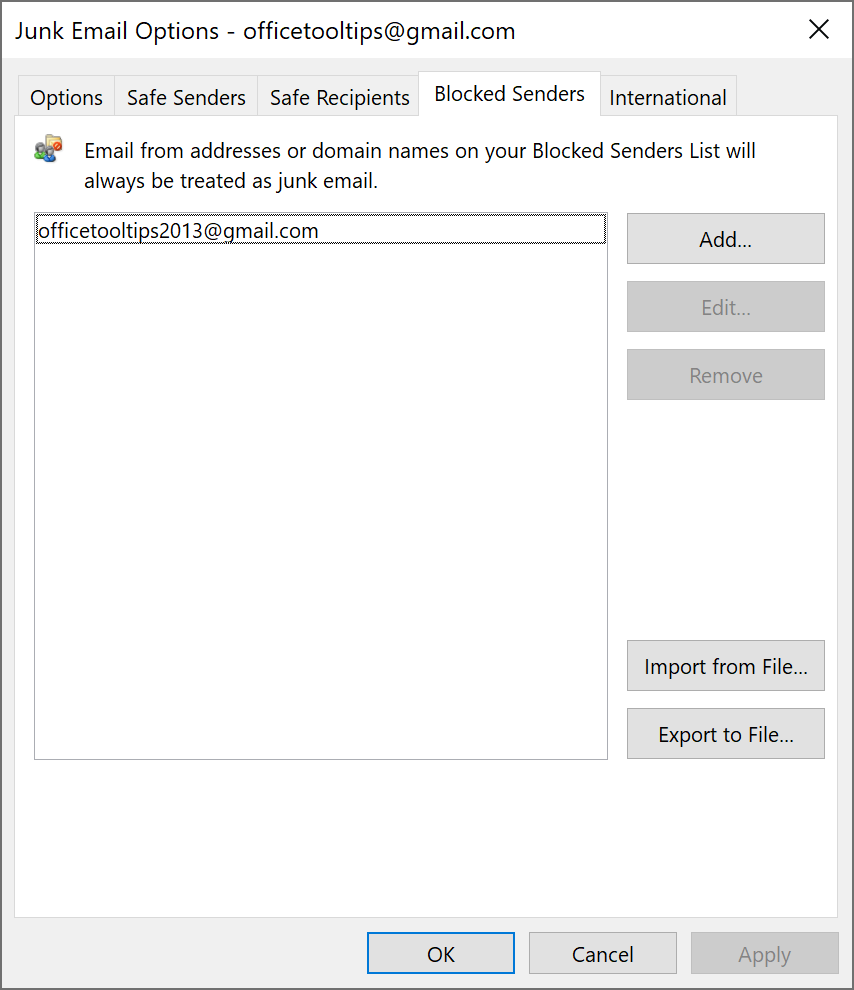
-
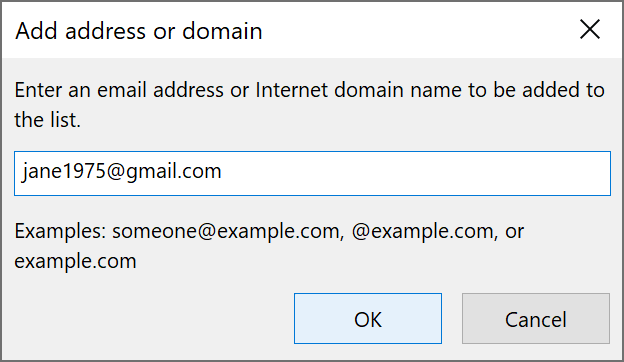
To add a new sender to the Blocked Senders list, click Add... and then in the Add address or
domain dialog box, enter the sender's address. For example:
Unblock sender
If you have an email from the sender in the Junk E-mail (Spam) folder that you want to unblock, select this message and unblock the sender, or add the sender to the Safe Senders list.
To unblock the sender, do the following:
-
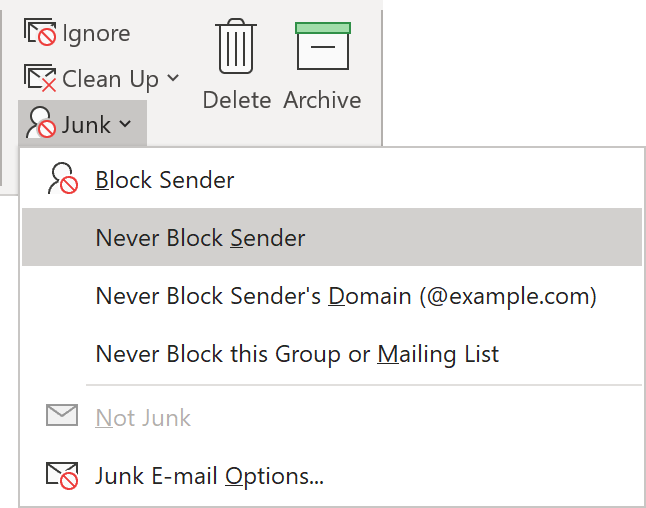
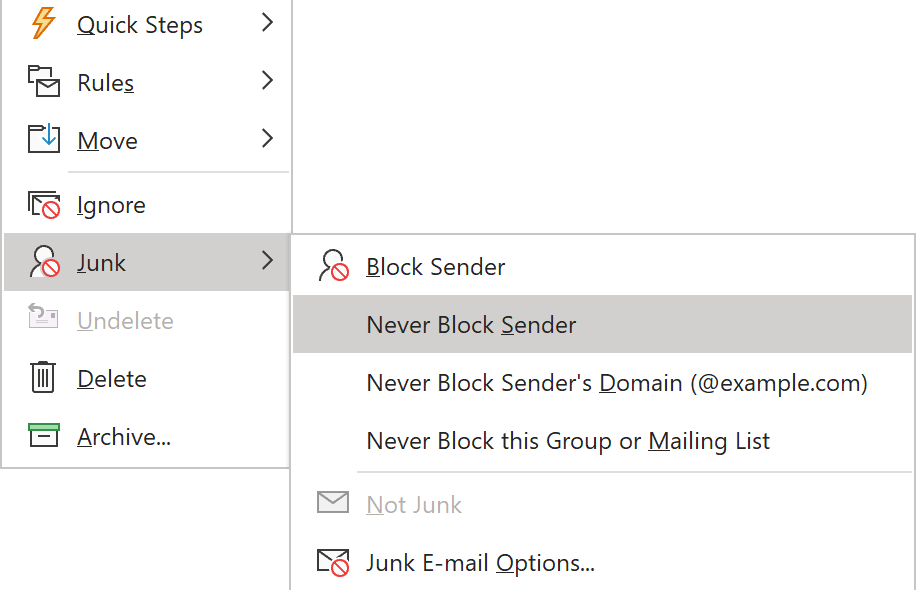
On the Home tab, in the Delete group, click on the Junk drop-down list:
-
In the Junk drop-down list, select the Never Block Sender action, or
right-click on the selected email and choose Junk > Never Block Sender:
-
Outlook will show the message that the chosen sender is unblocked, for example:
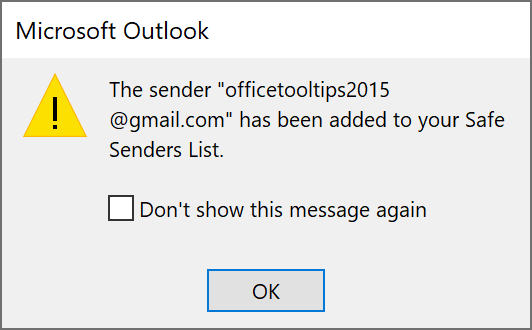
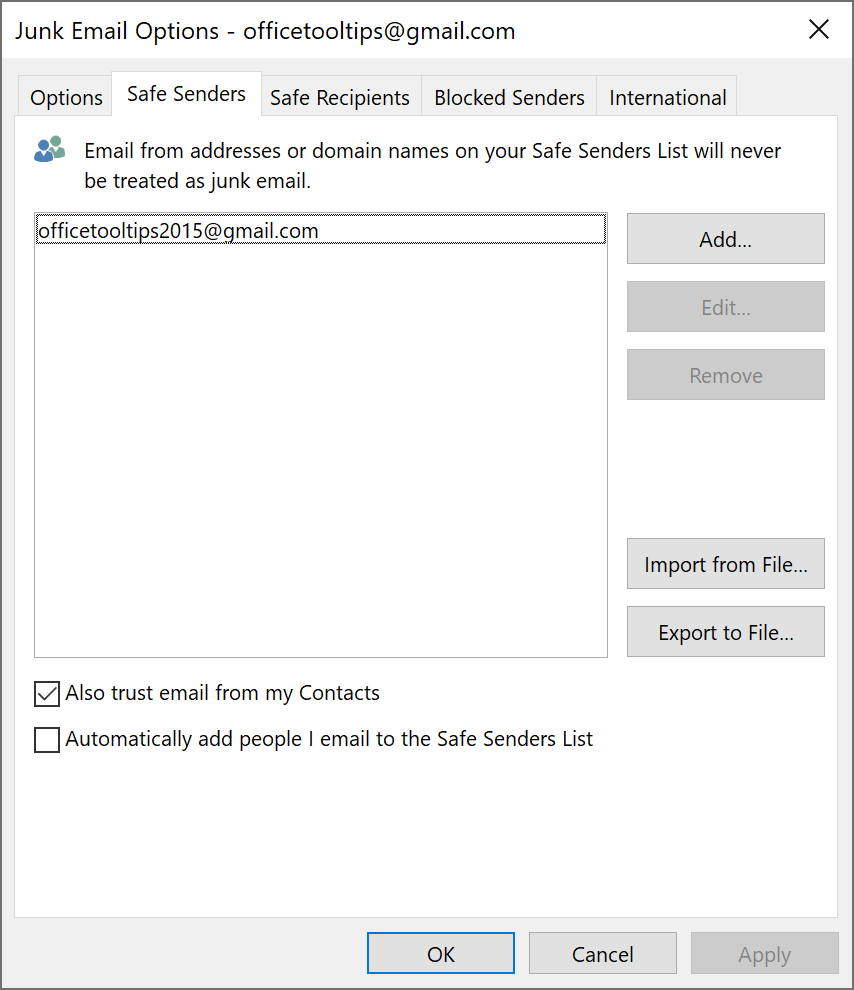
To add any sender to the Safe Senders list, do the following:
-
On the Home tab, in the Delete group, click on the Junk drop-down list and then click the
Junk E-mail Options...:
-
In the Junk Email Options dialog box, select the Safe Senders tab:
-
To add a new sender to the Safe Senders list, click Add... and then in the Add address or
domain dialog box, enter the sender's address. For example:
Move out of the Junk Email folder
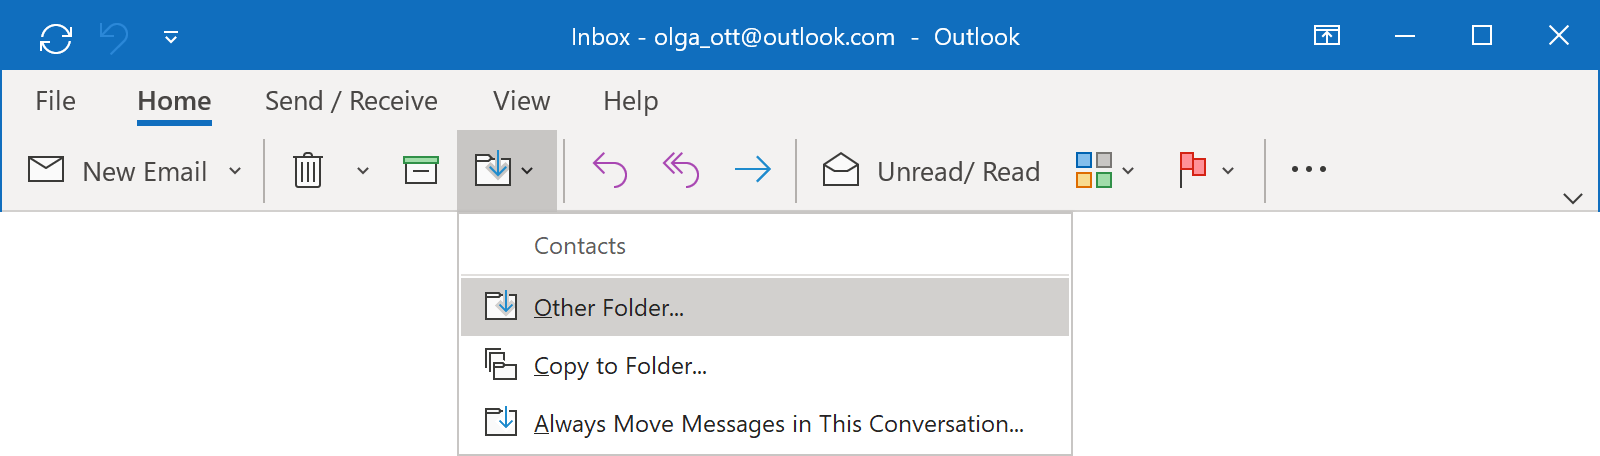
If you have a legitimate letter in your Junk Email folder, you can move it to your Inbox or any other folder by doing the following:
- Select the message(s) you want to move.
-
On the Home tab, in the Move group, click the Move drop-down list and then choose the
Other Folder... action:
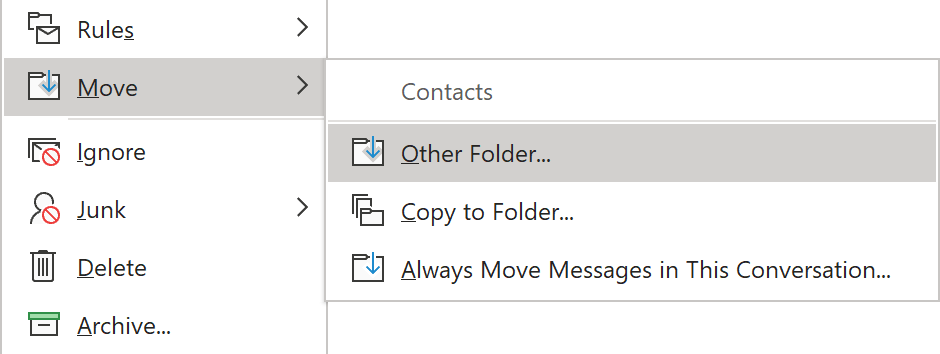
 Or, right-click on the selection and choose the Move > Other Folder...
action in the popup menu:
Or, right-click on the selection and choose the Move > Other Folder...
action in the popup menu:
-
In the Move Items dialog box, select the folder in which you want to move the selected message(s):
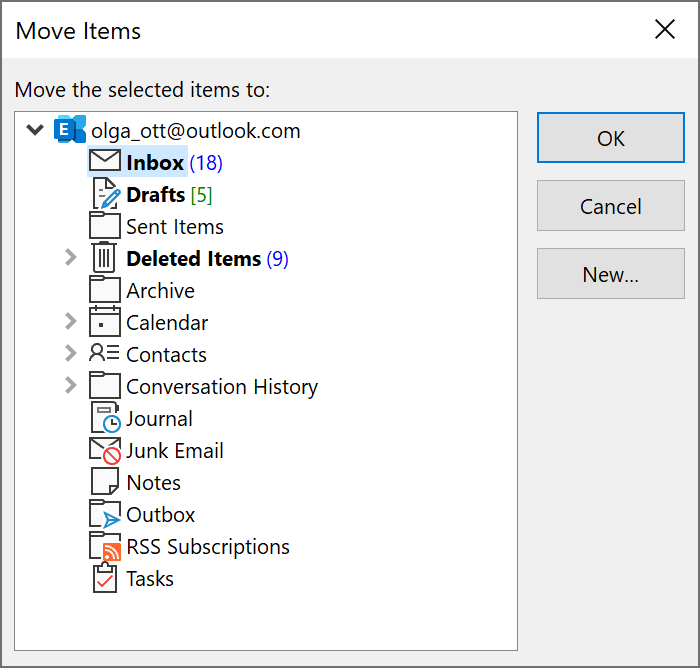
- Click OK.
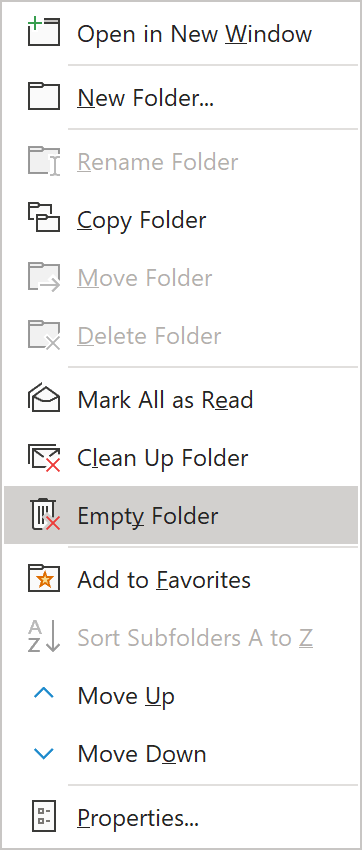
Empty the Junk Email folder
To empty the Junk Email folder of any mailbox, do the following:
-
Open the Junk Email folder.
Remember that the Junk Email folder associated with your account. So, there are several Junk Email folders in your local Outlook, if you configured multiple accounts. -
Right-click on the Junk Email folder, and then choose the Empty Folder action in the popup menu:
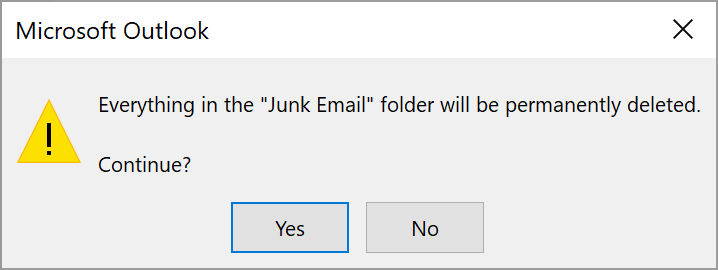
-
In the Outlook message box, click Yes to confirm that you want to delete the messages permanently:
Set the search scope
The Search tab appears when you activate the Search box in Outlook by clicking the Search icon, or by pressing Ctrl + A or Alt + Q:

To change the scope of the search operation, do one of the following:
-
By default, the search operation works for the Current Folder (you can choose Current Folder
also
by pressing Ctrl + Alt + A):
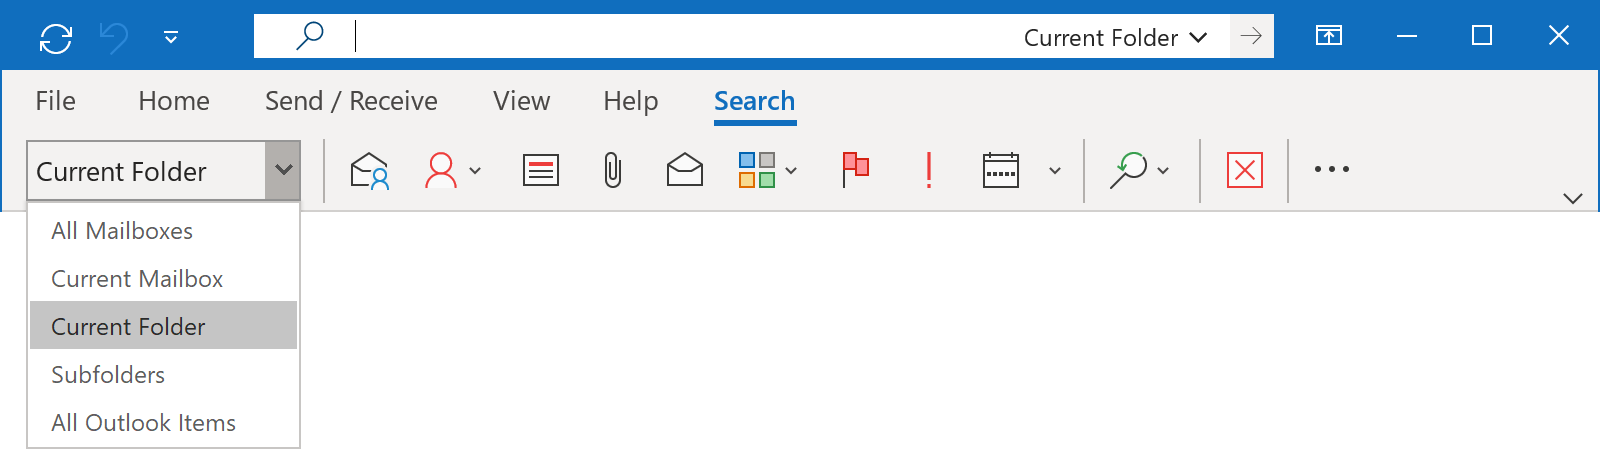
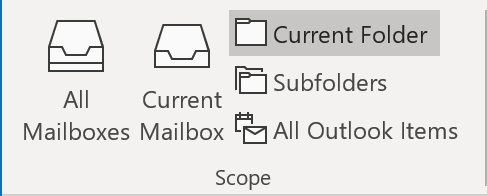
- To search across all connected accounts, on the Search tab, in the Scope group, select All Mailboxes or press Ctrl + Alt + A.
- To include subfolders of the current folder into the search scope, on the Search tab, in the Scope group, select Subfolders or press Ctrl + Alt + Z.
- To include messages, appointments, contact records, tasks, and notes from all connected accounts into the search scope, on the Search tab, in the Scope group, select All Outlook Items.
Search specific messages
Folders and mailboxes do not limit Microsoft Outlook search filters. For example, for searching last week Outlook messages with attachments from the specific sender in a current folder, do one of the following:
-
Use the Advanced Search dialog to define multiple filters:
-
Click the Advanced Search on the right side of the Search toolbar:

-
In the Advanced Search drop-down list, choose the appropriate filters:
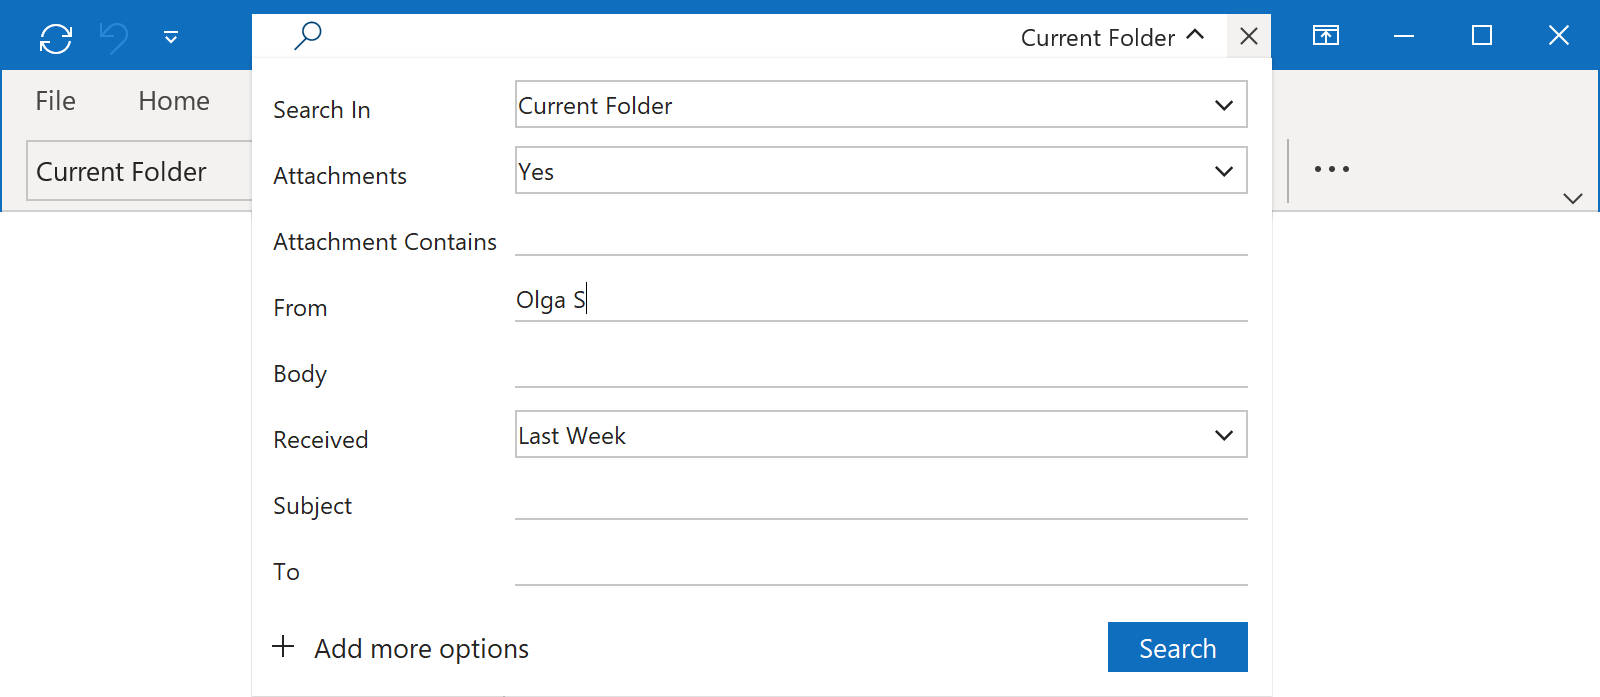
- After adding all the necessary filters, click the Search button.
-
Click the Advanced Search on the right side of the Search toolbar:
-
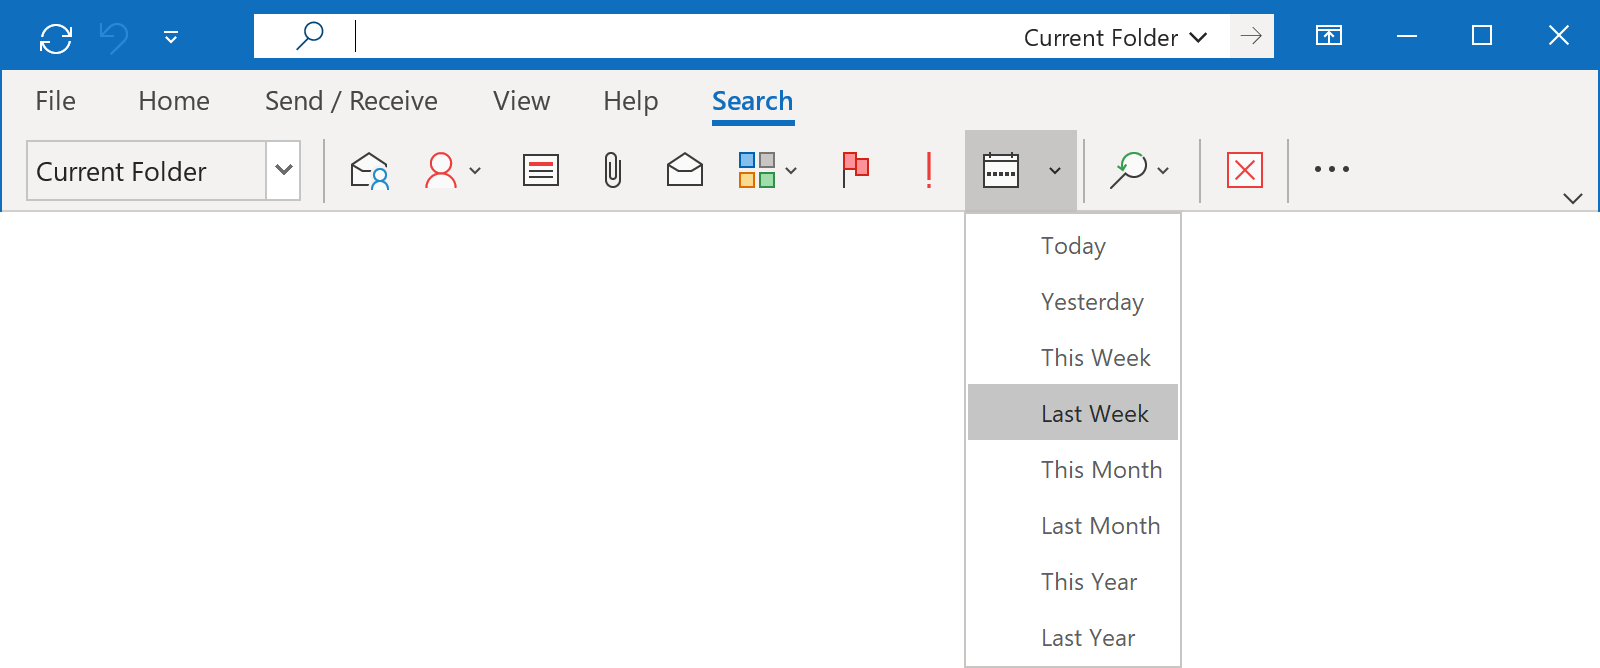
Use the Search tab to add filters one by one:
-
On the Search tab, in the Refine group, click the Search for Mail by Received Date
drop-down list, and then select Last Week:
-
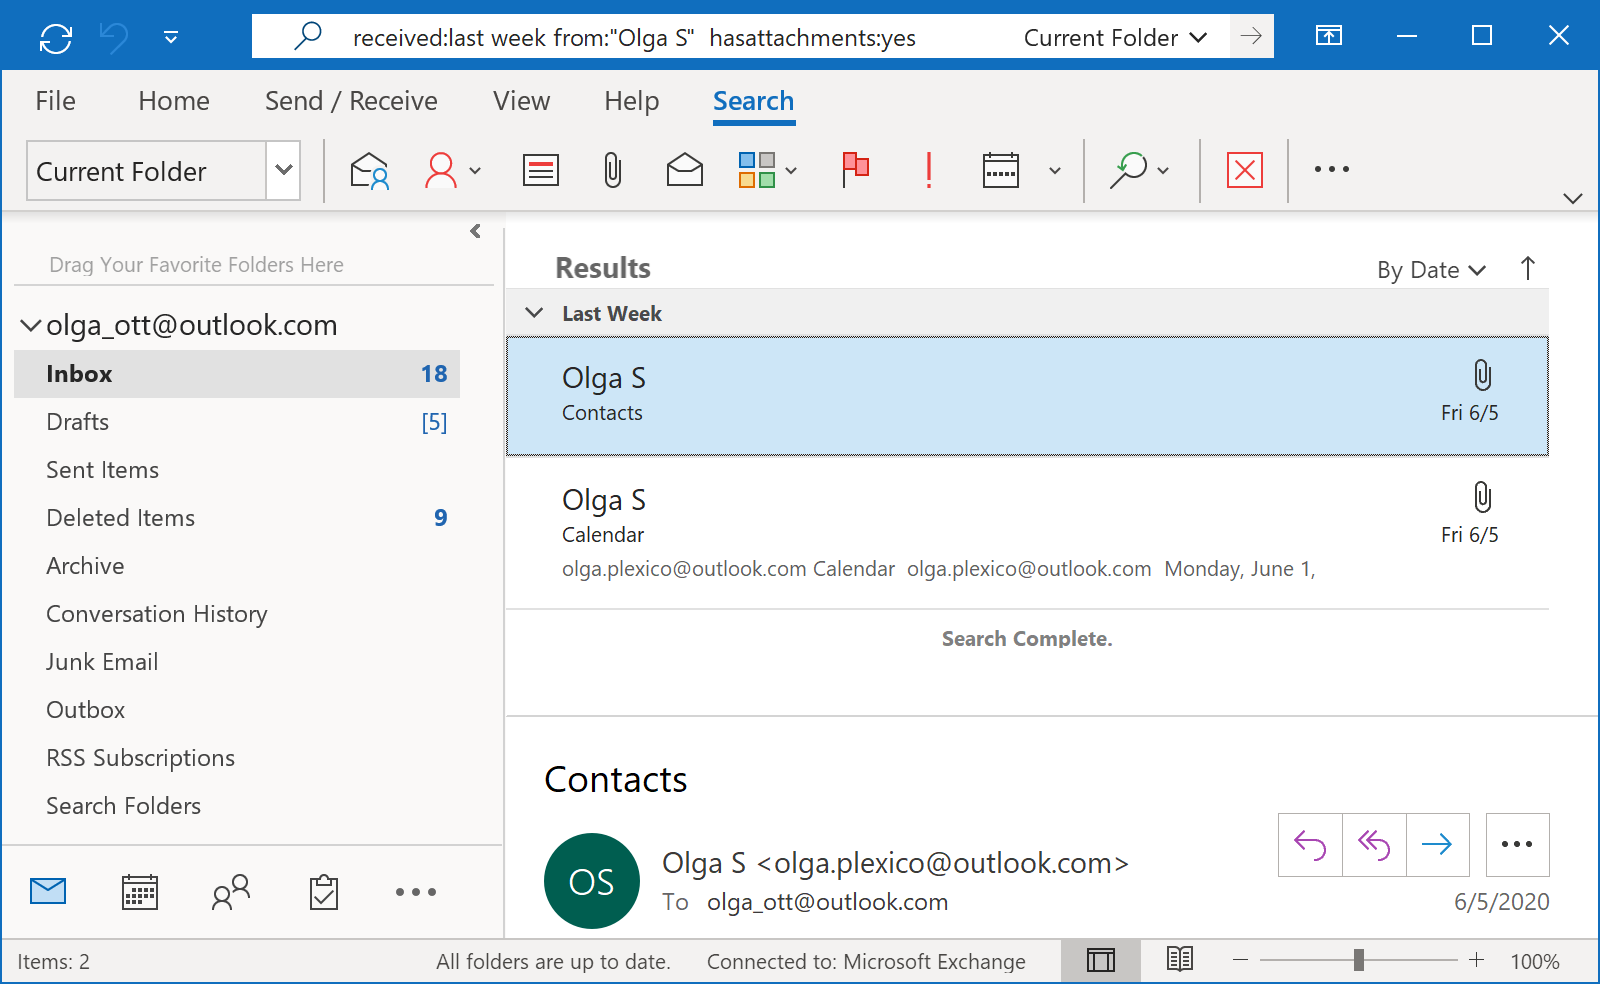
Add the filter to search messages Form the specific sender. On the Search tab, in the
Refine group, click the Search by Sender button, and then enter the email address in the
Search toolbar:

You can use the Sender Name and the email address as well.
-
On the Search tab, in the Refine group, click the Search for Mail by Received Date
drop-down list, and then select Last Week:
-
Add the filter to search messages with attachments. On the Search tool tab, in the Refine group,
click the Search for Items with Attachments button:

Every time after adding a new condition, you will see the search results in the Results pane:
Close the search results view
To return to the original content view, do one of the following:
-
On the Search tab, in the Close group, click the Cancel Current Search button:

- Click any folder in the Folder pane