Conversation view
The Conversation view is an alternative arrangement of messages grouped by subject. All the letters with the same subject appear together in your Inbox or another message folder under one conversation header.
When you receive a message that is part of a conversation (has the same subject), the entire discussion moves to the top of your Inbox, and the new message shows when you click the conversation header.
To turn on the Conversation view for the folder, do one of the following:
-
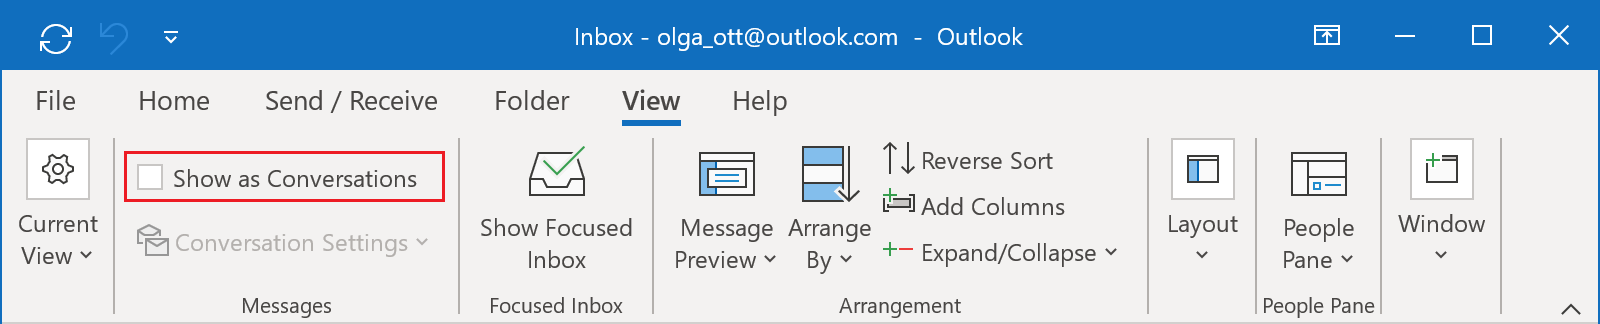
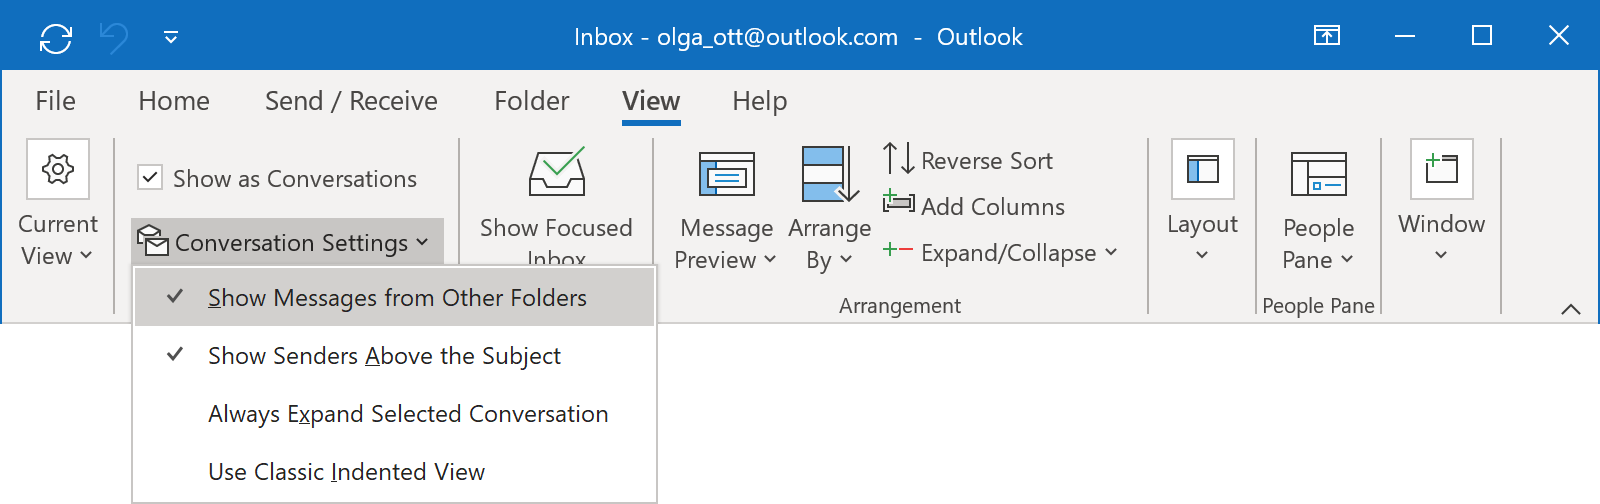
On the View tab, in the Messages group, select the Show as Conversations checkbox:
-
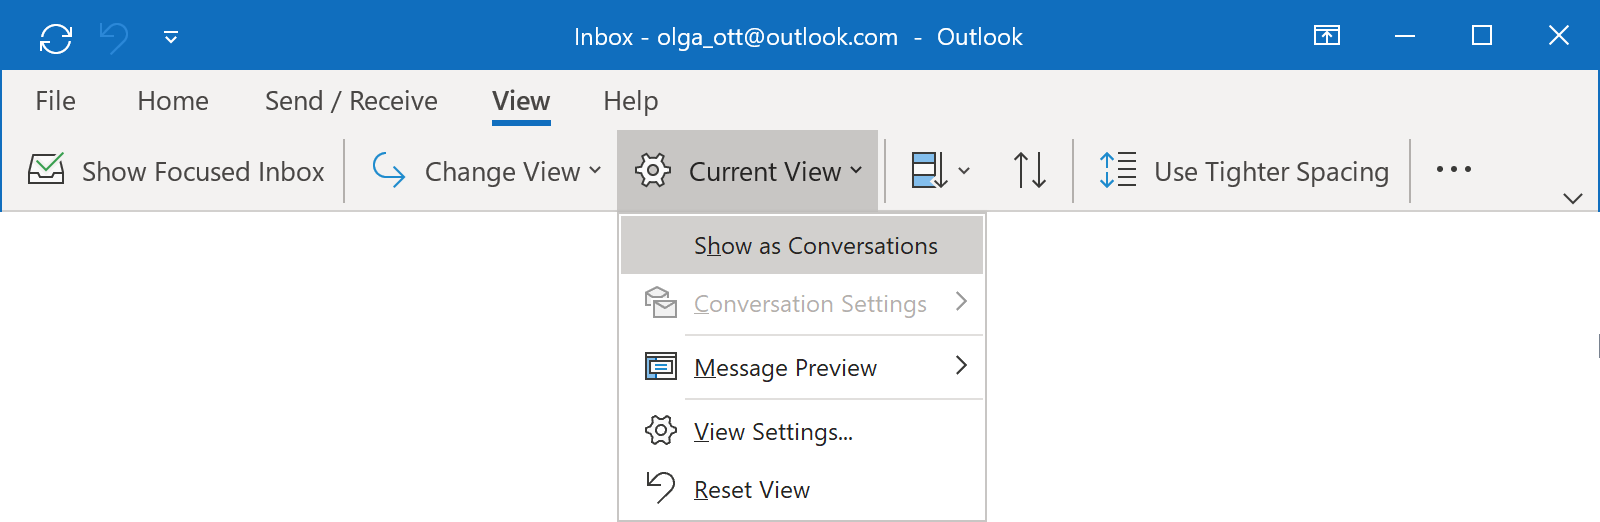
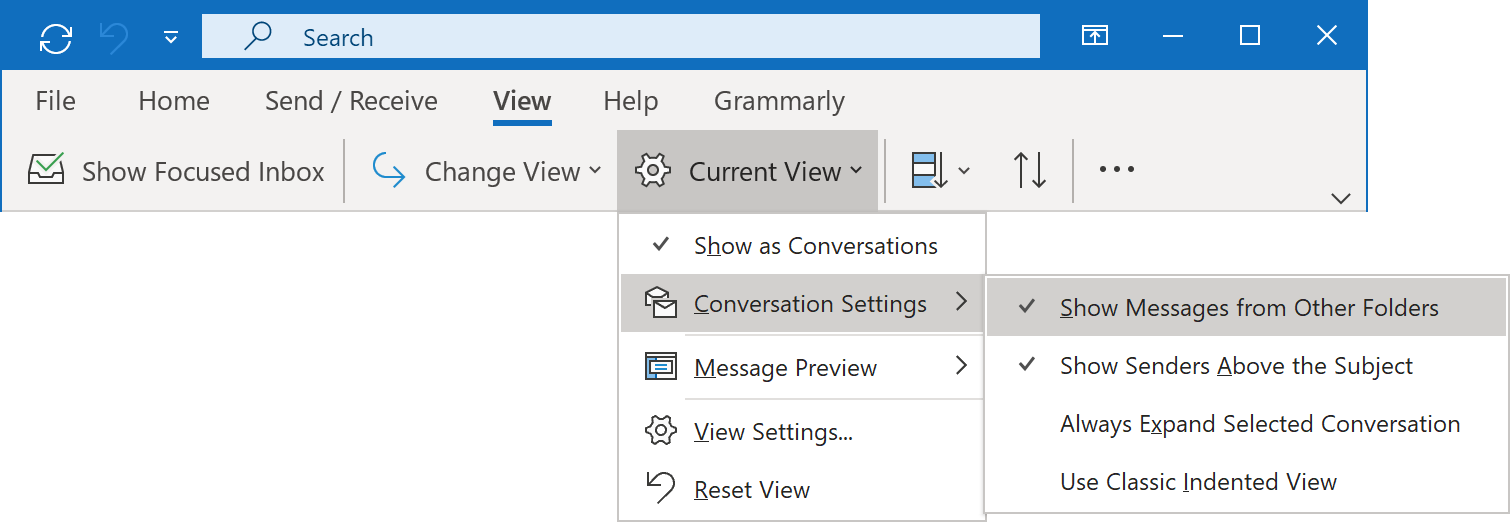
On the View tab, in the Current View drop-down list, select the Show as Conversation
item:
 In the Outlook message dialog box, choose messages to group into conversations:
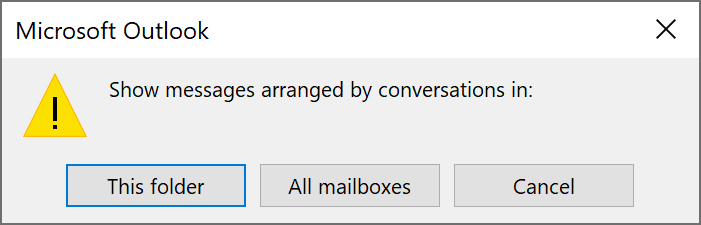
- This folder to show the Conversation view only for the current folder.
- All Mailboxes to show the Conversation view for all folders of all added accounts.
There are several useful settings that you can configure to work more effectively with conversations.
Show/hide other folders
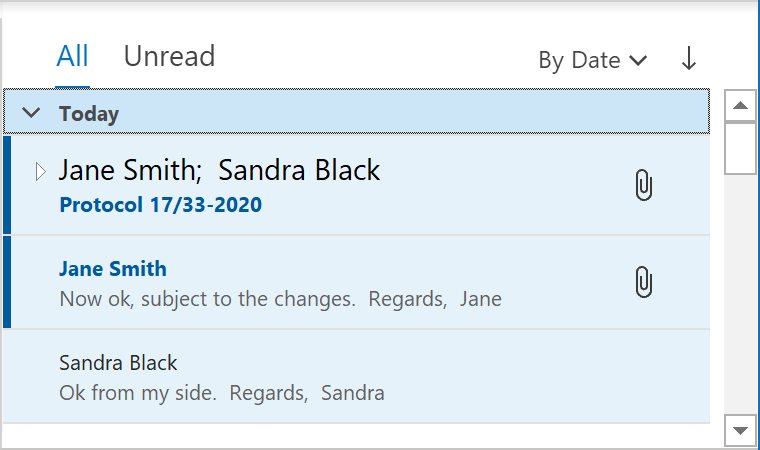
By default, Conversation view displays messages stored in any folder, including emails, moved to another folder, or even sent messages from the Sent Items folder:

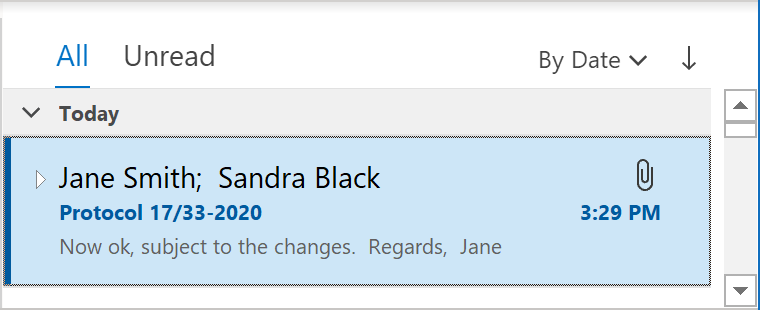
You can turn off this setting to display only discussions from the current folder:
To show or hide messages from other folders, do one of the following:
-
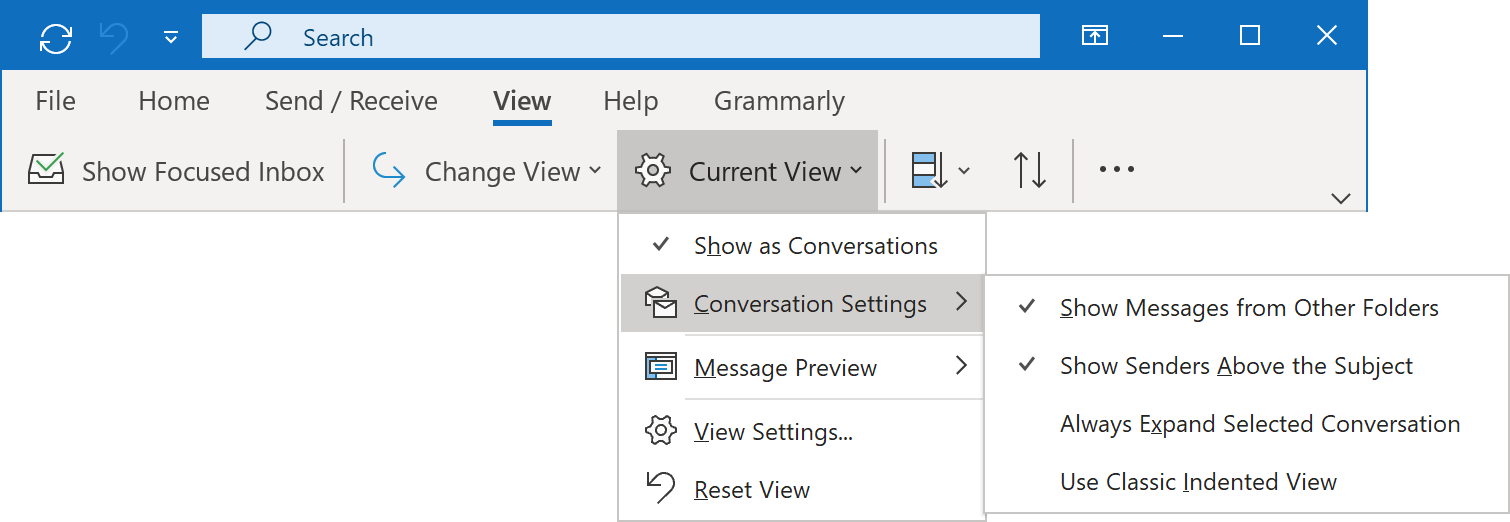
On the View tab, in the Messages group, click the Conversation Settings drop-down list,
and then select or unselect the Show Messages from Other Folders option:
-
On the View tab, in the Current View drop-down list, select or unselect the Show Messages
from Other Folders item:
Show senders above the subject
The conversation header provides information about the messages within the conversation, including the number of unread messages and whether one or more emails include an attachment, is categorized, or is flagged for follow-up.
By default, when a conversation is
-
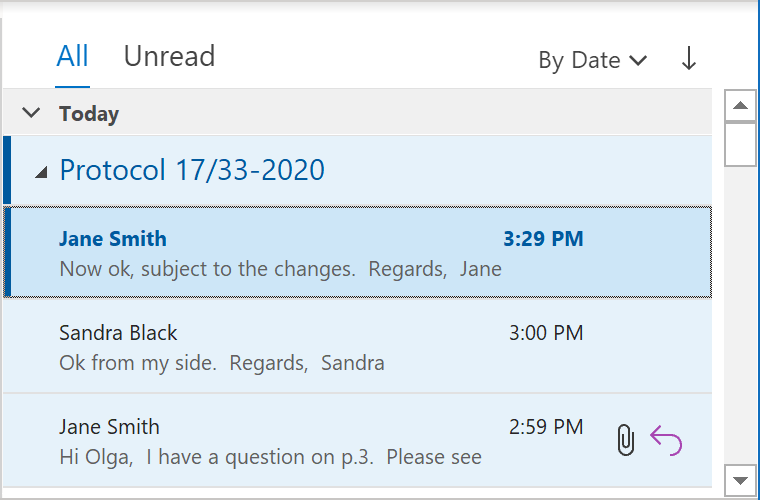
collapsed, the conversation header displays the names of all the conversation participants above the
conversation subject:
-
fully expanded, the conversation header shows only the subject line:
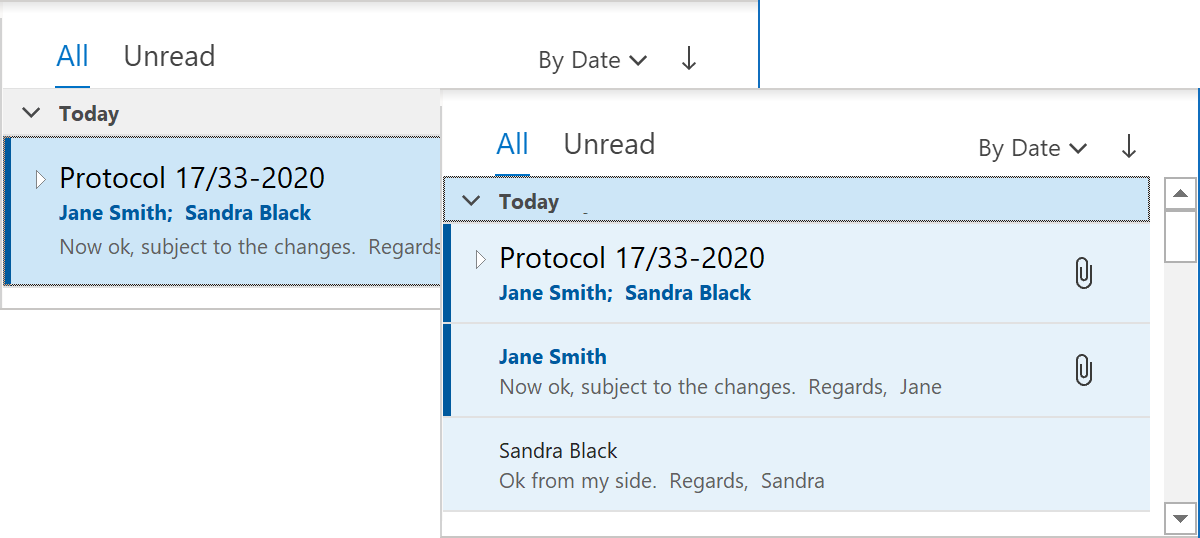
In some cases, the subject line might not be visible at all. You can change the conversation header to display the subject first:
To change the view for the conversation header, do one of the following:
-
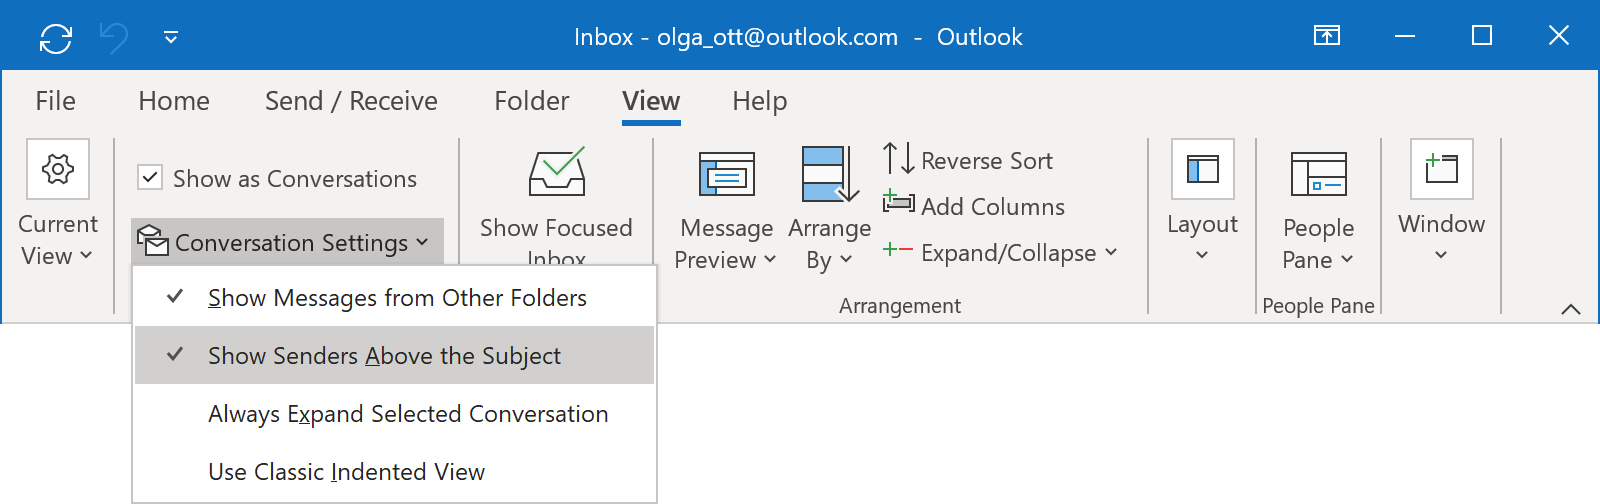
On the View tab, in the Messages group, click the Conversation Settings drop-down list,
and then select or unselect the Show Senders Above the Subject option:
-
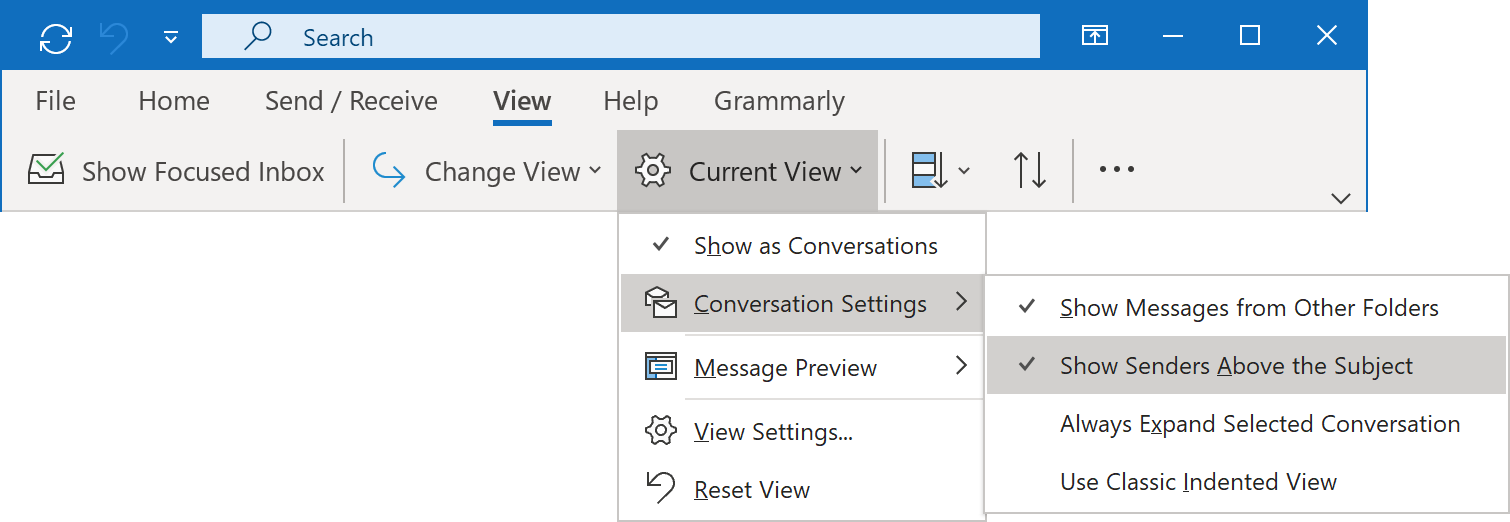
On the View tab, in the Current View drop-down list, select or unselect the
Show Senders Above the Subject item:
Expand the conversation
By default:
-
Until you expand the conversation, all the messages grouped within it take up only as much space in your
Inbox as a single message would:
-
When you click ones on the conversation, Outlook shows the starting text of each message in the thread:
-
When you click the conversation again, Outlook displays all messages of the conversation (including or
excluding letters of the other folders, depending on your customization):
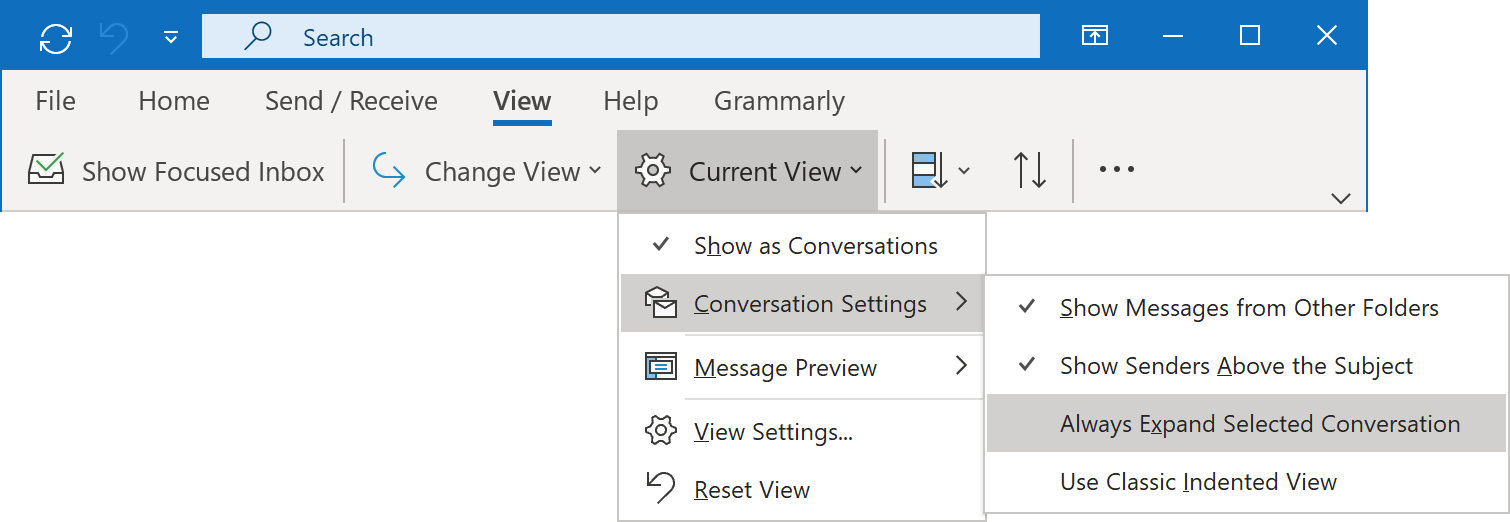
You can customize Outlook to open a conversation by one click. So, by one click, you can fully expand or collapse the conversation. Do one of the following:
-
On the View tab, in the Messages group, click the Conversation Settings drop-down list,
and then select or unselect the Always Expand Selected Conversation option:
-
On the View tab, in the Current View drop-down list, select or unselect the
Always Expand Selected Conversation item:
Indent messages in the conversation
By default, Outlook displays all messages of the conversation by the customized sort order as for regular messages:

Outlook can turn on the Classic Indented View to indent older messages within individual message threads to show the progression of the thread:
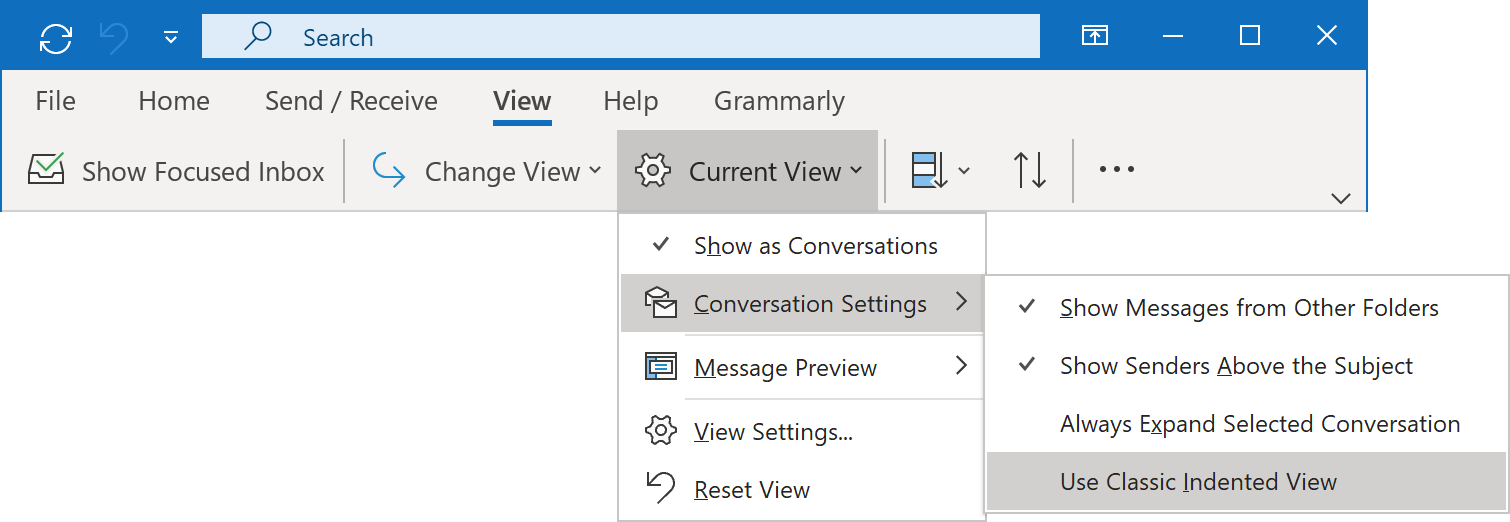
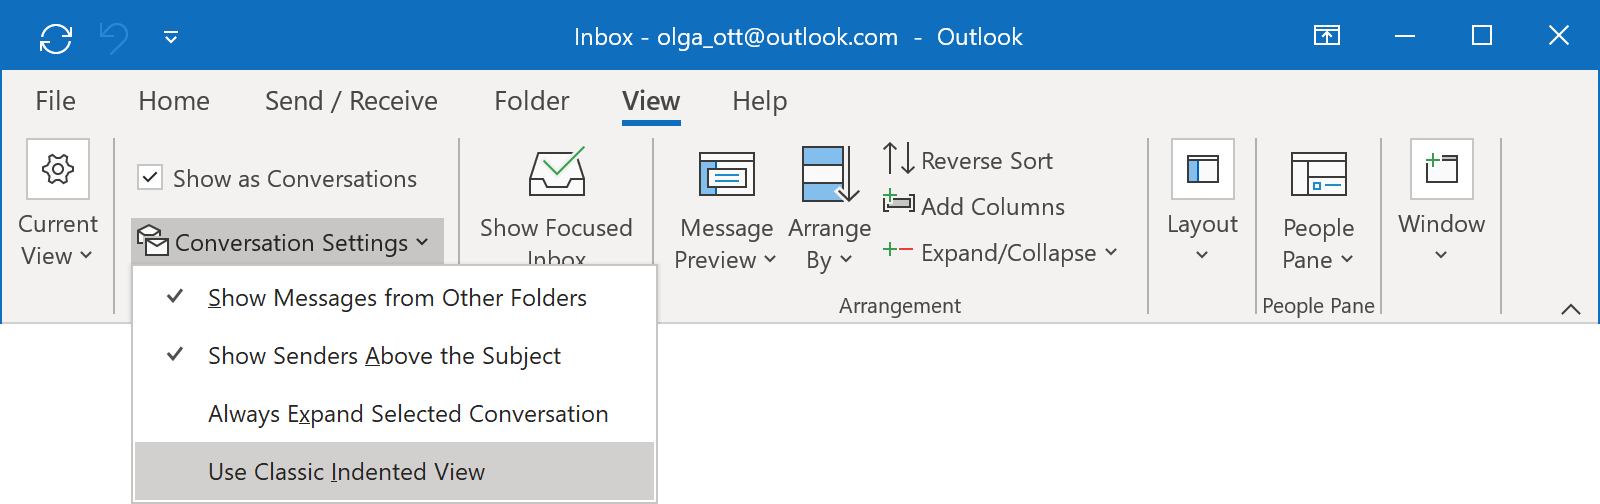
To turn on or turn off the Classic Indented View for the conversations, do one of the following:
-
On the View tab, in the Messages group, click the Conversation Settings drop-down list,
and then select or unselect the Use Classic Indented View option:
-
On the View tab, in the Current View drop-down list, select or unselect the
Use Classic Indented View item:
Clean up the conversation
Any conversation can contain redundant messages, whose text is wholly contained within later messages. You can Clean Up a discussion (several conversations) to reduce the number of messages in mail folders and move redundant messages to the Deleted folder:
- Select one or more messages or conversations.
-
Do one of the following:
-
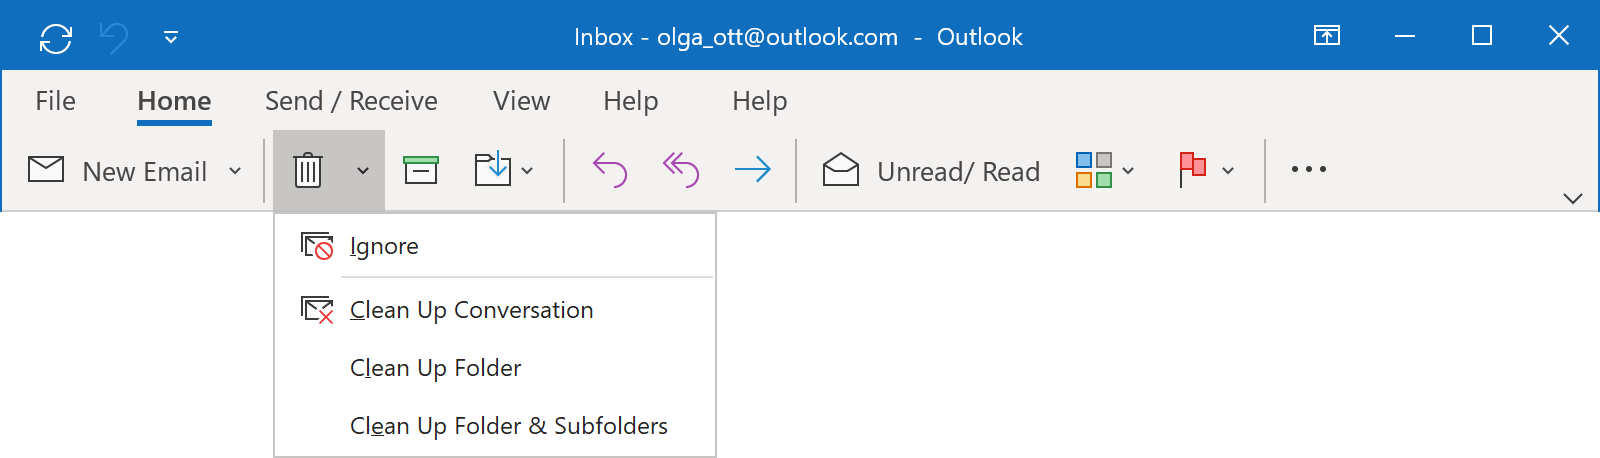
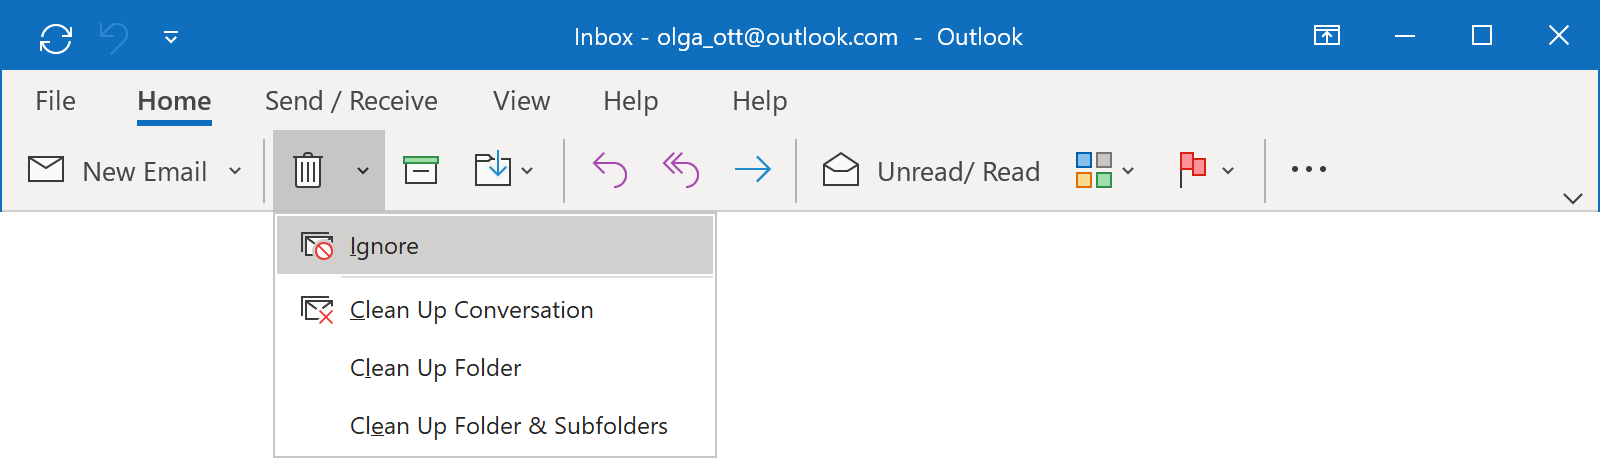
On the Home tab, in the Delete group, click the Clean Up drop-down list:

-
On the Home tab, in the Delete group, click the Delete drop-down list:
-
On the Home tab, in the Delete group, click the Clean Up drop-down list:
-
In the Clean Up list, do one of the following:
-
To delete all redundant messages from the selected conversations, click Clean Up Conversation and
then, in the Clean Up Conversation dialog box, click Clean Up:

-
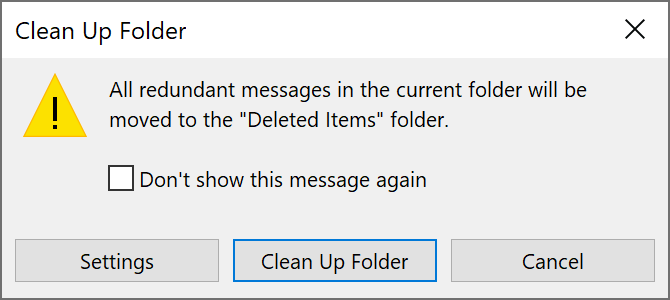
To delete all redundant messages from the current folder but not its subfolders, click Clean Up
Folder and then, in the Clean Up Folder dialog box, click Clean Up Folder:
-
To delete all redundant messages from the selected conversations, click Clean Up Conversation and
then, in the Clean Up Conversation dialog box, click Clean Up:
-
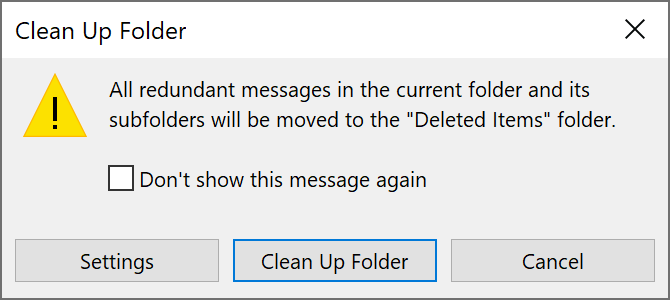
To delete all redundant messages from the current folder and its subfolders, click
Clean Up Folder & Subfolders and then, in the Clean Up Folder dialog box, click the
Clean Up Folder button:
- By default, Outlook does not clean up categorized, flagged, or digitally signed messages. You can modify conversation clean-up settings on the Mail page of the Outlook Options dialog box.
- By default, the emails Outlook identifies as redundant go to the Deleted Items folder, but you can configure Outlook to move them to an archive or another folder.
Delete the conversation
Outlook proposes two different ways to delete a conversation:
-
As a regular message:
Select the conversation and click the Delete key, the Delete button on the ribbon, or right-click and choose Delete in the popup menu. In the Microsoft Outlook message dialog box, click the Delete selected messages button to move all the emails from the conversation to the Deleted Items folder: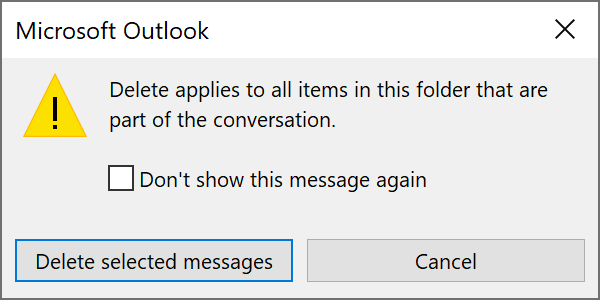 If you receive the new message that is a part of the deleted conversation, you will see the deleted discussion
in your Inbox again without deleted messages.
If you receive the new message that is a part of the deleted conversation, you will see the deleted discussion
in your Inbox again without deleted messages.
-
Ignore conversation:
This command moves the selected conversation and all related messages you receive in the future directly to the Deleted Items folder.
To ignore a conversation or several conversations, select them, and then do one of the following:
- Press Ctrl + Del.
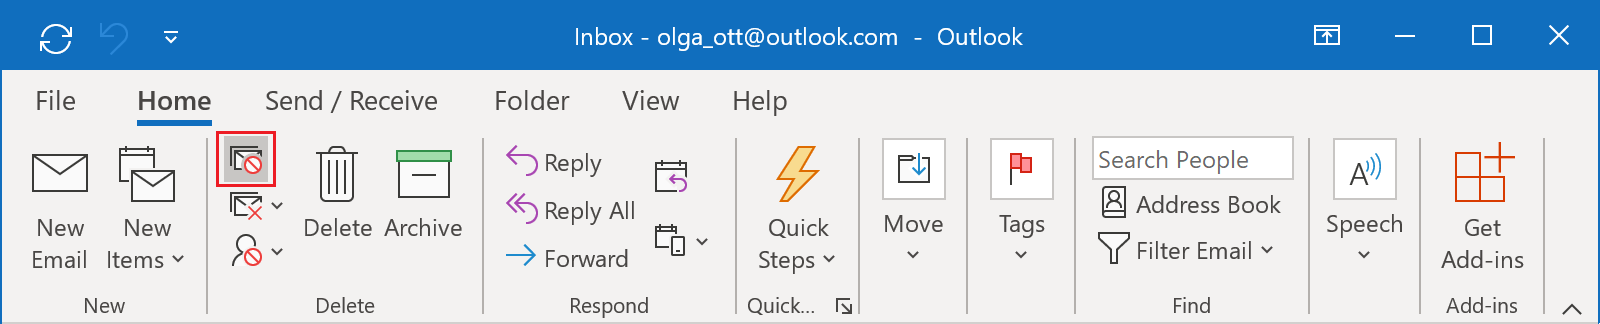
-
On the Home tab, in the Delete group, click the Ignore button:
-
On the Home tab, in the Delete group, click the Ignore Conversation button:
- Right-click and choose the Ignore action in the popup menu.
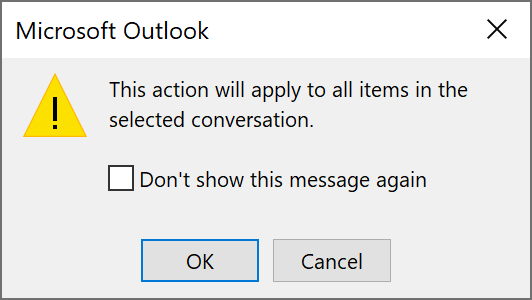
In the Ignore Conversation dialog box, click the Ignore Conversation button:
If you select all the collapsed conversation or the top item, you can see the Microsoft Outlook messages before the Ignore Conversation dialog box. Click OK in this message dialog box:
Create a message folder
To create a message folder, do one of the following:
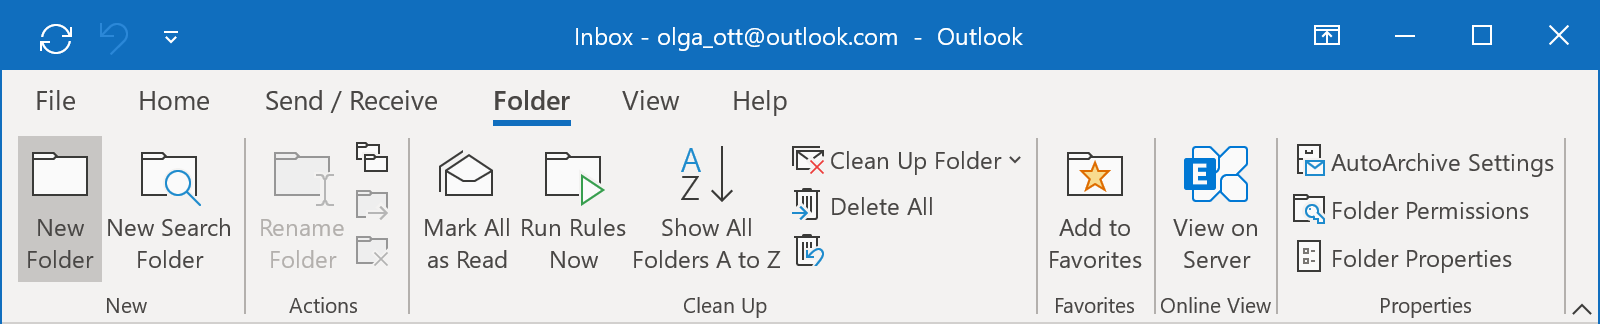
-
On the Folder tab, in the New group, click the New Folder button:
 In the Create New Folder dialog box:
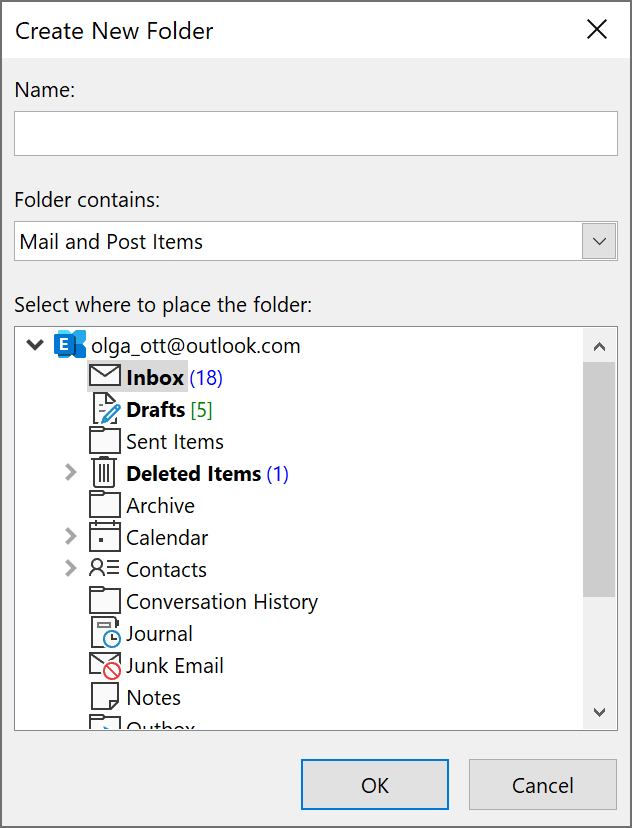
- In the Name box, enter a name for the folder.
- In the Folder contains list, select the Mail and Post Items option.
- In the Select where to place the folder list, select the location in which you want to create the folder (usually inside the Inbox).
- Click OK to create a new folder
-
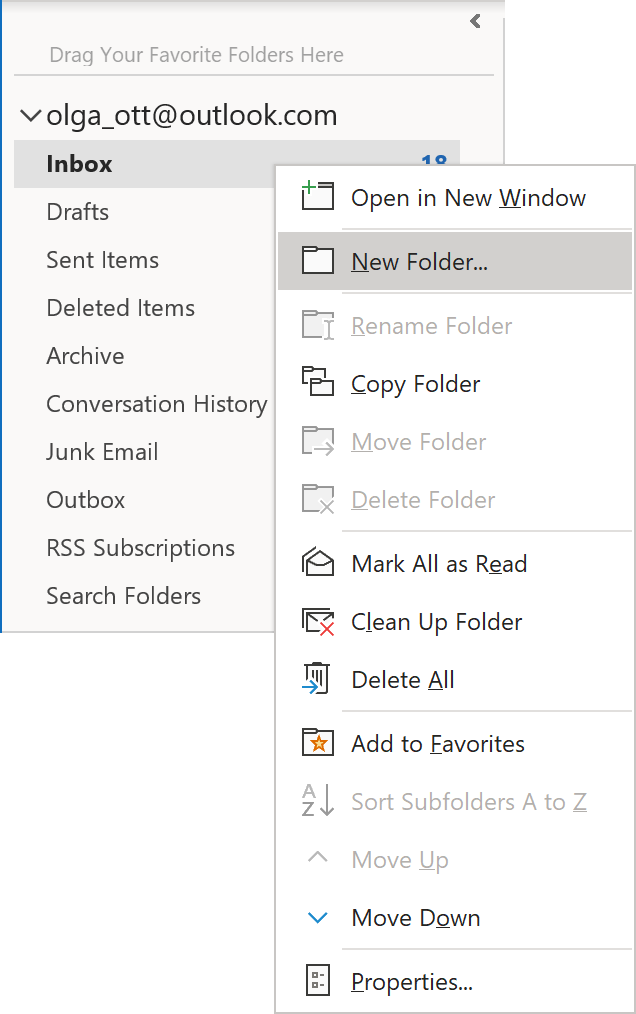
In the Folder pane, right-click the parent folder (usually the Inbox), and then choose the
New Folder... action:
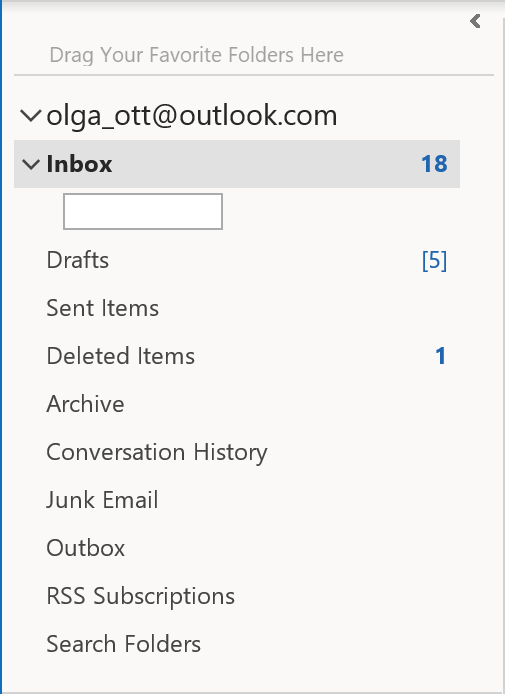
Enter the folder name in the subfolder name area that opens, and then press Enter.
Move messages to a new folder
To move selected messages and create a message folder, do the following:
- Select the message(s) you want to move.
-
Do one of the following:
-
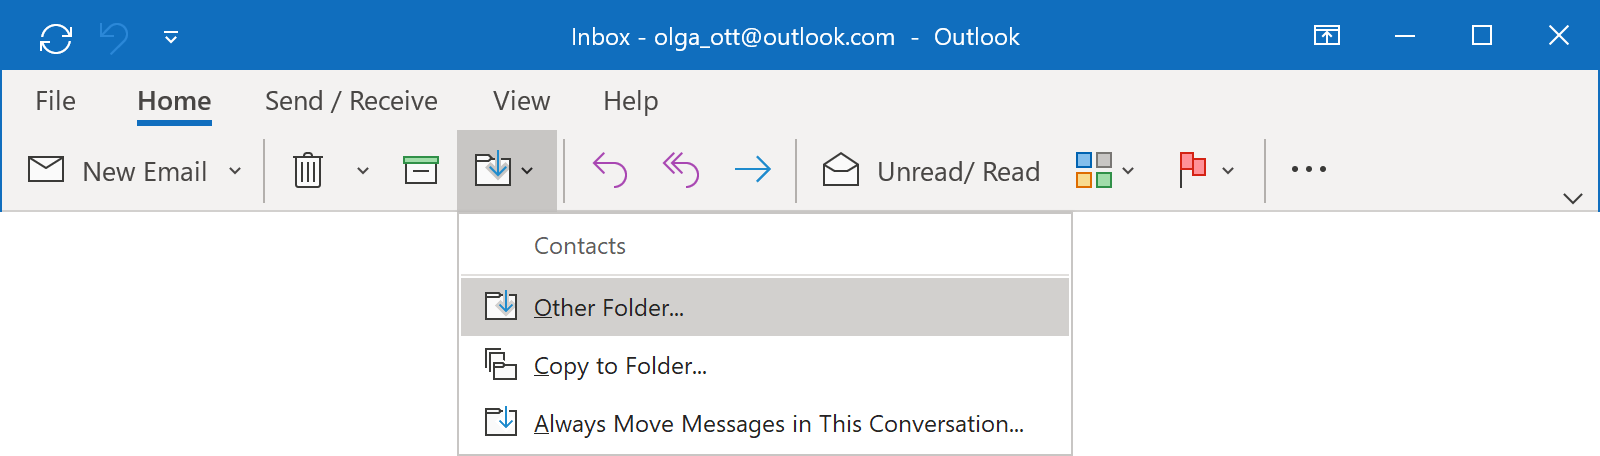
On the Home tab, in the Move group, click the Move drop-down list and then choose
Other Folder...:
-
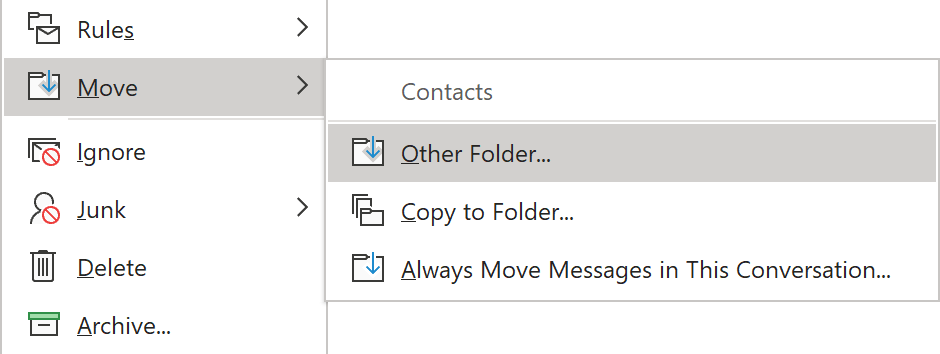
Right-click on the selection and click Move -> Other Folder... in the popup menu
-
On the Home tab, in the Move group, click the Move drop-down list and then choose
Other Folder...:
-
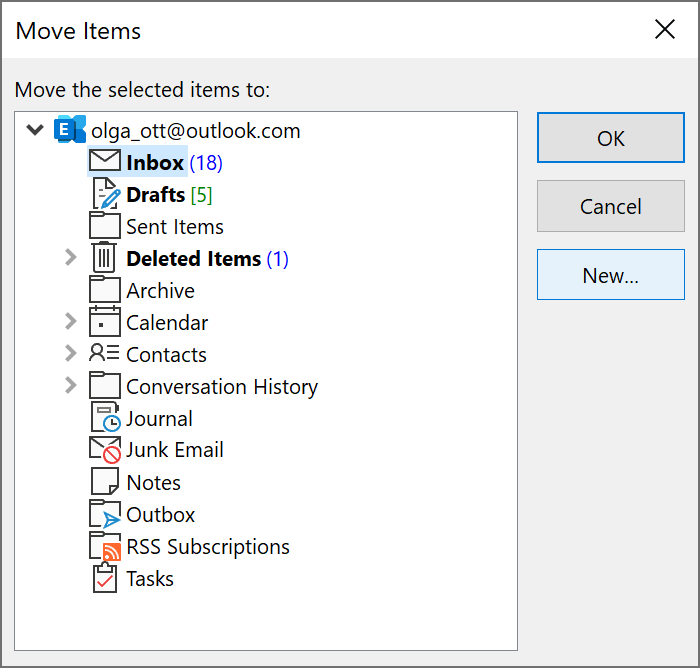
In the Move Items dialog box, click the New... button:
-
In the Create New Folder dialog box:
- In the Name box, enter a name for the folder.
- In the Folder contains list, select the Mail and Post Items option.
- In the Select where to place the folder list, select the location in which you want to create the folder (usually inside the Inbox).
- Click OK in each of the open dialog boxes.
Move messages to the existing folder
To move selected messages to an existing folder, do one of the following:
- Drag the messages from the message list to the destination folder in the Folder pane.
-
On the Home tab, in the Move group, click the Move drop-down list and then choose
Other Folder...:
-
Right-click on the selection and click Move -> Other Folder... in the popup menu
In the Move Items dialog box, select the folder in which you want to move the selected message(s) and then click OK: